Thursday, 22 January 2015

WHAT'S IN MY TOOLBOX??


Having the right tools for the job is essential for any DIY project!
Now, I'm lucky, as after years working in the British film industry as a mould maker, I have an extensive collection of tools:


This is my tool box, and yes: My tools are well used and look horrible, but this is also just the top of the iceberg, as I have a whole shed full!!

Now that I've shared that slightly off putting image with you all, I must stress that I probably have an excessive amount of tools ....
....and today I want to share with you all which tools I'm always using....the ones that I pretty much always have out for impromptu DIY sessions and various makes:

MY MOST ESSENTIAL TOOLS!!

The reason I thought I'd share this with you all today, is that I want to not only inspire you to get more creative with your interiors, but also set you up for a doing a good job.
And it would really help you out if you already had a basic set of tools in your home... that way You can crack on whenever inspiration takes you!!

SAFETY FIRST!
Invest in some dust masks, latex/rubber gloves and protective eye wear ....and maybe even some ear defenders! Keeping all these to hand will make it easier for you to NOT skip on health and safety!
Dress appropriately for the job in hand!

First, let's talk DIY....home improvement DIY!
From hanging a picture to resurfacing your work tops:


You will definitely benefit from owning both a drill (Yes, mine's really seen better days :()) and a palm sander!
 Of course you'll also need a selection of drill bits and sandpaper to hand with these!
But these two will be a great investment, if you don't already own them, as they are useful for almost all sorts of projects, little and large!

I would've included a jig saw in the top 3, but as this is a very basic list of MUST HAVE tools, I've left it out .... but if you're keen to get making and DIYing for your home, this may be very useful as well!!


Here are my list of must have hand held tools:
A wood saw (unless you've got a jig saw...lucky you!!)
Screwdrivers, both phillips (that's the + ones) and slots...One big and one small of each should fit most jobs!
Pliers, one Big flat nosed one and a smaller pointed one for those fiddly little jobs!
Measuring tape. ESSENTIAL!!
Cutters/snippers....for those jobs when scissors just won't do!
A chisel. This is very useful when you need to remove anything old and cakey (You'll know what I mean when you get there!!)
A hammer...this one is NOT just for nails, but sometimes you just need to give something a good old whack!! (Just not you husband, no matter how annoying he can be!!)
Stanley knife...just soooo useful!!

Other things that may come in handy on a regular basis is a spirit level and a selection of paint brushes.
Buy the best that you can afford and look after them! See how in this post! But sometimes the cheap disposable ones can be handy as well!
There's a type of brush for every project....I have a whole box full


Here's a few of my favorites:
 "Normal" 2" paint brush, 1/2 inch brush, both for decorating and furniture painting!
big soft bristle brush (for gilding etc.)
  sponge brush for applying glue evenly,
 Various flat and pointed art brushes, for the little, awkward to get to spaces (IE: around an electrical socket on a wall) or just for art!!
Wide flat surface brush for stippling and stenciling! 

Like I said: I have a whole box full, and in my opinion you can never have too many: Pick them up whenever you see them on offer....those children's art sets are also great value for money!!

For your  interior decorating,; Painting the walls etc I would recommend that you also stock up on  paint rollers and trays in various sizes! And you'll save your back if you invest in an extension rod for the rollers as well!!

And let's not forget to protect your surroundings when painting or sanding: Always keep some dust sheets and masking tape handy!

Now, moving on to those smaller projects you may find yourself inspired to do around the house, from repairing that broken list on the stairs to making that lovely candlestick you saw on pinterest...
These two are top on any DIY'ers tool list:


A glue gun and a heavy duty staple gun!!

Other things that come to mind after mentioning these two, is to 
keep a good selection of tapes: Gaffer tape, double sided tape and parcel tape are some of the ones I use most frequently (aside from masking tape and clear tape of course)
And a selection of glues: Super glue, craft glue, PVA and Glue sticks are always good to have in the house....but I also love using re-positionable spray glue when I do paper crafting:


Other things I consider a MUST HAVE , apart from pencils and pens, for paper crafting (but that is also useful for other projects) are:
A cutting mat (to protect the work surface)
A metal ruler
A scalpel or precision knife
and a good selection of scissors (I love using hair scissors for cutting details into paper) are always useful for any types of DIY, including sewing and textiles:
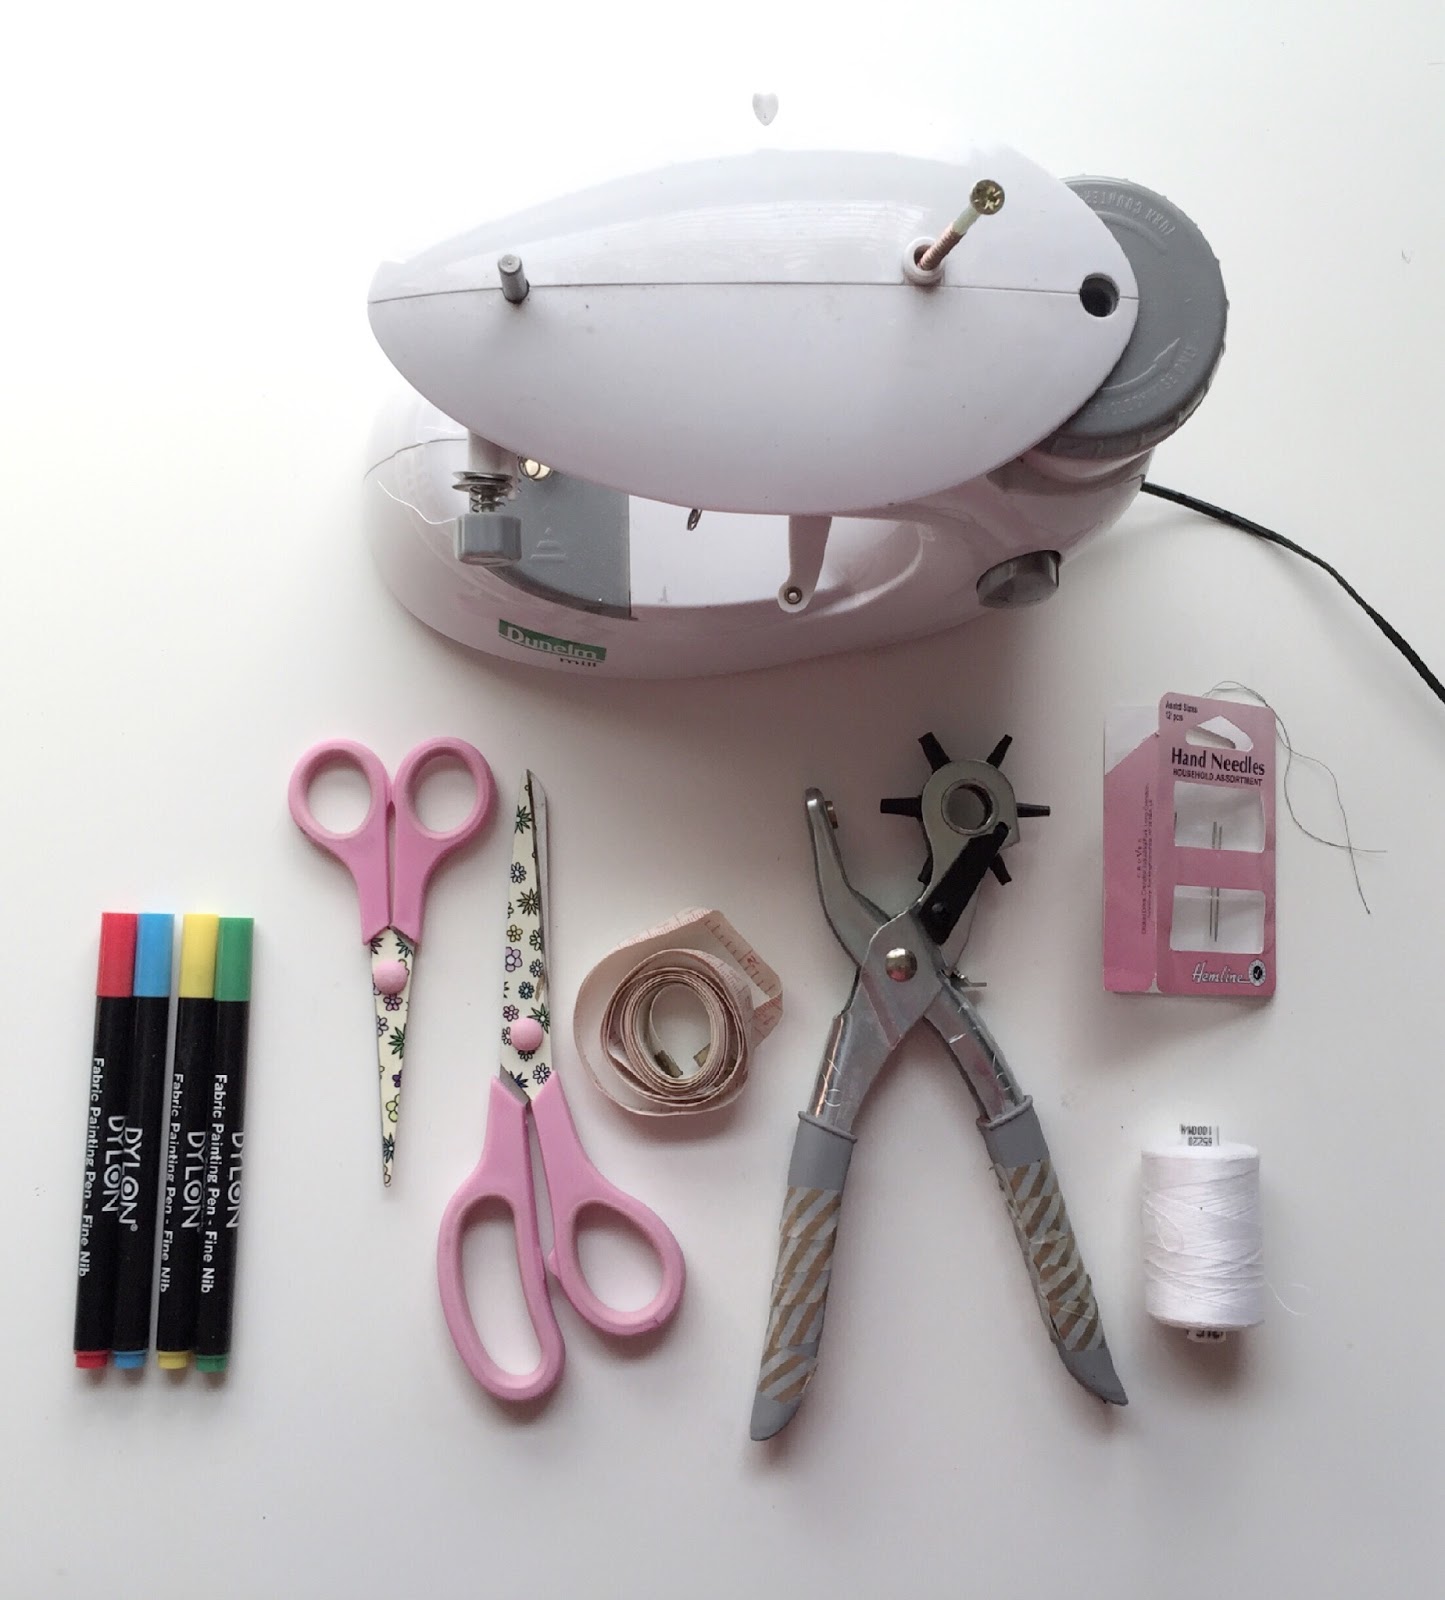

I would love to have a great big sewing machine with all the bells and whistles, but until I can afford one my little Mini one will do just fine for my basic sewing needs, like making cushions and hemming curtains.... Of course a set of needles and a variety of threads are a must for any hand sewing . I also keep a set of scissors especially for cutting fabrics with, and I am always using my Dylon fabric pens when doing any jobs using materials...And a measuring tape is useful not just for sewing, but for all sorts of things!!

Lastly, I want to mention craft paints and pens!
I keep lots of pens and pencils in a drawer in the kitchen, but the most useful are the marker pens!
I pick them up in all sorts of colors whenever I see them on offer!
I also have a big box of acrylic paints that are very useful when I am feeling a bit arty!!

Now chances are that yo'll at least have some of these things already, but don't be tempted to rush out (??) and buy every tool and kit I've just mentioned....As you get into DIY-ing and making things for your home, you'll naturally start accumulating the kit that YOU need!
And chances are that there will be things that I've not thought to mention here that you will need one day....just try to take my advice from This Post  and plan ahead before you embark on a DIY project, so that you can get everything you need in advance. Because there is nothing worse than getting halfway through the job, then realizing you'll need to stop to go out to buy something you've forgotten you'd need!!

This week I will not be posting any DIY tutorials, as I am busy working on an art commission and making some more concrete bowls , but I will instead be telling you about one of those people that have inspired me the most to get making and DIY' ing for my home!
So pop back at the weekend for that: You don't want to miss this one!!


Tuesday, 20 January 2015

HEAL'S MODERN CRAFT MARKET 2015

It's official! HEAL'S is one of my favorite shops for all things interiors...not only do they capture my Scandinavian tastes perfectly,they are also on the forefront of design and are keen supporters of up-and-coming design talent.

In the spirit of getting into DIY and making things for the home this year, I was thrilled when I received an e-mail from Heals telling me that they are repeating their successful CRAFT MARKET again this year, as I missed it last year!

Now, I totally missed out this point in my How to get motivated and find the time to DIY post from last week....but of course, one of the best way's to get into getting creative is to take a CRAFTY WORKSHOP! Learning a new skill can be all the inspiration you need to get more creative with your interior!

So I felt obliged to tell you all about it, so that you have a chance to book one of the amazing workshops they are holding:

Heal’s Modern Craft Market promises to inspire any creative soul!
Not only will they be Showcasing the work of the best contemporary craft makers in the UK today, letting you discover and collect unique pieces by the craft names of the future,
 but also host live workshops using new materials and processes by a stellar line up of crafts men and women across all fields of design!

 It is taking place at their Tottenham Court Road store running from 2 to 15 February 2015, so if you live or work in or around London, love design and crafts, why don't you try to catch one of these amazing workshops and discover what it takes to be a modern craftsman in their exclusive hands-on workshops hosted by the exhibitors at the Heal’s Modern Craft Market this year:.

3rd feb

Leather Moulding with Tortie Hoare

Setting the market off with a bang, bespoke furniture designer Tortie Hoare provides an insight into the medieval art of leather moulding. This workshop is a unique opportunity to explore a centuries old technique by making a one-off piece for you to take home and treasure.
3rd feb

Fair Isle and Pattern Knitting with Gabrielle Vary


Providing a crash course in the intricate craft of knitting, Gabrielle Vary will take you through a range skills and techniques; from teaching you the basics of how to use a knitting machine right through to creating Fair Isle and pattern in knit.
This small workshop is the perfect opportunity to take a love of knitting to the next level, giving you the chance to translate your designs into custom knitting patterns.


4th feb
Porcelian Tea Light Making with Jo Davies


Exploring the translucent qualities of porcelain, Jo Davies’ workshop gives you the chance to design your own porcelain tea light lantern. Using natural and man-made materials to imprint the porcelain clay, you will create beautiful patterns around the surface of the tea light, building them up to make a truly personal gift or memento.

6th Feb

Screen Printing with Gabrielle Vary


Hosted by textile designer Gemma Waggett, this workshop teaches you how to create and screen print pattern on to your very own tote bag. Working alongside Gemma, you will learn all of the skills involved in using a digital embroiderer as well as translating to a silkscreen. With all materials provided, there’s nothing stopping you from making.


7th feb

Paper Cutting with Miss Paper Cut


Join ‘Miss Papercut’, aka Stephanie Hosmer, for an introductory workshop in crafting with paper. By first teaching you the techniques of how to use tools to cut from templates, the workshop leads on to you trying your hand at more complex patterns, creating a collection of beautiful cards in the process.

9th feb

Leather and Concrete Moulding with Katharina Eisenkoeck


This workshop lets you test out the techniques used by Katharina Eisenkoeck to mould leather and emboss concrete, creating 2 beautiful handmade napkin rings to take with you. By cutting the leather into strips then wet-forming it in water you will learn how to emboss the material with your own unique pattern, before cast small cubes of concrete to attach to your napkins.

9th feb

Out of the Dark Introduction to Chair Caning


Join Out of the Dark ( a charitable social enterprise that recycles, restores and revamps salvaged furniture as a means to train, educate and employ young people from disadvantaged backgrounds.) at the Heal's Modern Craft Market for their brand new, introduction to caning workshop. You will cover the different styles, examples of caning and its history.
Learn the basics of 6 way chair caning on a small frame that you can then take home with you.

10th feb

Lino Printing with Justine Wall


Talking you through the different stages and techniques, Justine Wall of Hector and Haddock’s workshop will show you how to design and make your very own lino-cut. Sketching your own designs onto tracing paper, you will transfer your creations onto lino block before carving in your design. This highly-skilled workshop includes all the materials you will need to create a master piece in your lunch break.

11th feb

Love Token Making with Rosemary rose


Led by Zara Day of Rosemary Rose, this workshop gives you the chance to create your very own Love Token. Popular in the 19th Century, the Love Token is a gift traditionally given by gentleman to show their affection. The hearts are filled with fragrant local Cotswold lavender, which in Tudor times was associated with passion, and are hand-made using the traditional technique of embroidered stitches. The perfect workshop to craft handmade your Valentine’s Day gift.

11th feb

Panel discussion

Keeping it Real: Craft and Authenticity 


If you are particularly interested in the future of crafts in design Why not pop down to participate in this panel discussion, Talking traditional techniques to cutting-edge digital processes,  – chaired by Crafts editor Grant Gibson and featuring bodger-in-chief Chris Eckersley, Studio Manifold’s Zachary Eastwood-Bloom and up-and-coming designer Xenia Moseley – The panel sets out to discover where the limits of craft reside and begs the question: what precisely is ‘real’ craft.

13th feb

Letter Carving in Stone with Thomas Appleton


Using stone donated by London Stone Conservation, this workshop gives you the chance to try your hand at traditional techniques of letter carving. Under the watchful eye of heritage craftsman Thomas Appleton, you will carve letters in stone to take with you and enjoy at home. All equipment and materials needed for the workshop will be provided.

13th feb

Clock Making with Umut Yamac


With years of experience making delicate paper sculptures, this workshop will show you how to create your own handmade wall clock using the origami style of folding paper. Inspired by Umut Yamac’s own Perch Light artwork, each participant will be supplied with all the materials necessary to create their own clock to display at home.


14th feb

Stitch Knits with Nancy Nicholson


Learn the art and craft of stitch-work with Nancy Nicholson. During this workshop you will be shown many of the specialist stitches that Nancy uses in her designs, which will also be on display throughout the duration of craft market. You will also be provided with a printed motif for you to stitch and take home to enjoy.


If you want to learn more about the various artists holding workshops for HEAL'S MODERN CRAFT MARKET, just click on their names to be taken to their individual websites!
Amazing , right??
And to think that YOU can go and meet and learn from these super talented people!!??
INSPIRING!!

I had a hard time choosing....would've liked to do them all, but in the end I decided on the Screen printing workshop as this is something I've always wanted to try ....
and  katharina Eisenkoeck's concrete and leather workshop, as I'd love to meet her and discuss the possibilities/limitations of concrete!!

Prices for the various workshops vary (but they are all totally affordable) and Places are limited, so please hurry over to Heal's to choose and book your Workshop!!
I will of course tell yo all about after!!
Maybe I'll see you there?

If you are NOT London based, but would like to find craft workshops near you, Craft Courses lets you search your local area for any available workshops!

Saturday, 17 January 2015

DIY wrapped storage boxes


Taking my own advice from my Last post to start small, here's an easy DIY for you all!
Easy, but useful, resourceful and Pretty!!

With Christmas a vague recollection now, you may have some Christmassy gift boxes, boxes from perfume gift-sets ,an old shoe-box or similar laying around?
If you do, these are perfect for this project!
 If not, this is the perfect time of year to score some Christmas gift boxes or storage boxes in the sales!


I used a combination of all of the above!


Then I used a variety of pretty papers and contact papers to wrap the boxes in.
I carefully chose these,:

Sheets of Daler Rowney Canford A1 art paper in Blush and aqua
Metallic geometric double sided wrapping paper by Lilac coast (Currently on sale at Not on the high street for £2.50 for two)
and 

(Click on the links to purchase*)

By mixing pastel pink and blue with marble and mixed metals as well as the lovely geometric patterns, I am ticking off not just one, but 4 trends in this make!!


I am not going to try to teach you guys how to suck eggs....or wrap up boxes!!
 I trust that you can work this out for yourself!
What I will say is: try to work neatly and use double sided tape to hold the wrapping papers in place:
The self adhesive contact papers are easy: Just make sure you smooth out any air bubbles:


I love how these turned out:

And how the combinations of finishes work together..
And not only are they pretty....
...but pretty useful too: I am planning on using mine to store papers and craft supplies!

This may not be a revolutionary DIY, but it goes to show: Those ugly boxes have got a second life as beautiful and useful storage boxes....
....and I've saved our landfills from a few more bits of cardboard!!
WIN WIN!!
IMAGE DESCRIPTION
Please vote for me for best DIY blog

*I may make a small profit should you decide to purchase!

Thursday, 15 January 2015

How to Get motivated and find the time to DIY this year....


We all see images  (on pinterest , facebook, blogs and instagram) of beautiful homes...and maybe think to ourselves: I wish my home could look like that!
Or maybe you're out shopping and see something you love, but think to yourself : I could make that!!
Well, this year: Why don't you do it??
Image via domaine home
Because you can!!
I did!
Now, I know that that is kind of my thing...I mean: I blog about it right?? Easy for me to say: You have a job, kids, a life ....how will you find the time to DIY and improve your home??
Well, that's what I used to think.
...until I started actually just doing it!!
So today I want to share with you all my top tips to get into DIY-ing this year!
The main thing is to get motivated, get planning and get started!!
MOTIVATION
Beautifying your surroundings and your home in particular is an investment into your personal well being!! Making your home a sanctuary where you truly feel happy, both visually and functionally is what interior design is all about....and you can achieve this all by yourself!
INSPIRATION
 If you have yet to find YOUR style....the look that works for YOU, I suggest that you start by buying a few interior design magazines...Spend a Sunday Afternoon , with a cup of tea in hand....maybe even listen to some music....relax and enjoy :looking through them, ripping or cutting out images that appeal to you! It can be colours, shapes, furniture or artwork....whatever catches your eye! Don't worry about reading the articles (unless you want to:)) but just skim through and compile visual images that you like...
Spread them all over the floor, and take note of what colours and styles are repeating....Maybe you're into opulence and dark jewel colours...or maybe you like bright and airy images with minimalistic decor? 
The style that appeals to you should become more apparent when you look at all your clippings!
Image via Elle decoration
Now that you've an idea of what you like, head on over to Pinterest
If you are not yet using pinterest, you should!
Its a great place to find inspiration for all your interior projects, big or small!
You can create moodboards of images you like for every room in your house: 
Just search for the styles you like using key words, say white walls, wooden floor, mid century modern furniture...etc...
This should make you hone your tastes down and give you a more solid picture of what you'd like your home to look like!
Just don't get too caught up with details: Yes, your home may not have big windows letting lots of light in, but stear clear of pinterest envy: you can still take inspiration from the interior design elements of that space! This article from Apartment therapy may help should the green eyed monster rear its head!!
Image by Mr Badger
If you already know you're style, and are quite confident in what you'd like your home to look like, get more specific in your pinterest search:
Searching the site using key words like DIY or tutorials on just about anything should give you results. Want to put up wall paper in your living room? Or maybe you've seen a knitted blanket you thought you could DIY? 
Set up a board with projects you'd like to do for your home: Big or Small!!
Get started by visiting my pinterest board Projects or just follow me to see what I'm pinning!!
Image from I spy DIY
PLANNING
Now you may already have thought about what you'd like to get done in your home already at this point....But putting it all down on paper should motivate you to start putting the plans into action!
Grab a notebook and a pen and do a walk through of your home and take notes of all the home improvements you would ideally like to get done this year! From completely redecorating a room, painting a wall to adding some art or maybe something more practical, like coming up with a new storage solution for the hallway? Write it all down as a list!
Image via Pinterest
Next up, get real....If you have a day job, you are probably not going to find the time to do it all!!
So you'll need to prioritize:
Re-order your list of DIY's from small, easy-to-do, to bigger and more time consuming projects!
Star those projects that are most important to you: The ones you feel would make the biggest ,most positive impact on your home (and your life) and the ones you feel would be most enjoyable!
A DIY project is as much about the journey of doing it as it is about the end product!
Tassel pillow DIY from Fall for DIY
Choose one, easy and fun project to get you started!!
Something you feel confident you can make and that you know you'll enjoy!
Like making some quick art or jazzing up a pillow with tassels, like in the image above!
Starting small will give you some momentum and build your confidence to continue tackling the projects on your list!
Image from from up north
PREPARATION
Think about the process each of your projects on your list entails!
Start at the top of your list!
Break each project down into steps before you start!
Weather you are following an online tutorial, or instructions on a tin, make sure you familiarize yourself with the entire process so you know what to expect and can plan how long each project will take! 
Be prepared to encounter "spin off" projects!
ie: You've painted the walls, but now the woodwork/ceiling or floor looks tatty = NEW PROJECT!
Try to pre-empt if this could happen in the planning and preparing phase, and break down these projects into steps as well
Image from Classy clutter
Make a road map in your head of the processes and steps of your project!
Make a list of what tools and materials you'll need and set off time to purchase them.
Make a plan to work organized and always prioritize health and safety!
Invest in safety glasses ,dust masks and rubber gloves, as well as dust sheets and masking tape for those BIG jobs!!
Then work out an estimation of the time you think the project will take you, taking into account things like moving furniture out of the way or drying time for paints etc.....especially if it's a big one , like redecorating a room, and schedule it in your diary at a convenient time! 
Schedule time for DIY when you can feasibly fit it in!
Image via campaign
DO IT!!
Set up your workspace, Protect your surroundings and your health and tidy up as you go!
Working in an organized fashion is key to enjoying the process!
Just don't be tempted to mix alcohol and DIY....NOT a good combo (Believe me, I've tried LOL)
If you've done your research, planning and preparing, you have set yourself up for success!
If you are doing a smaller project, Set yourself up a DIY station!
It doesn't have to be big (depending on the DIY , of course)
A desk or a space where you can leave your project out....or even just a tray or a basket where you can keep you project handy...
Setting up and cleaning up your workspace takes time and can be discouraging, so keeping a project handy in a designated area will make you more inclined to do it whenever you get some spare time!
Try to schedule time to DIY on a regular basis in order to work down your list of projects.


Getting into a regular groove will help you stay on track!
And as you start ticking things of the list, you'll see your motivation and sense of achievement rising, spurring you on to the next project!
PROBLEMS
Don't put pressure on yourself to do too much in a short space of time....DIY's tend to always take longer than estimated! Be prepared for problems, delays or timing issues.
DIY is a learning curve!
If you want to be a DIY'er you'll need to accept that sometimes you'll fail...but if you keep trying your skills and confidence will grow by leaps and bounds.
Image from Livin3
Be honest with yourself in your skills and abilities...
If you have bitten off more than you can chew, there is no shame in calling in the professionals!
This applies in particular to anything structural or to do with electrics or plumbing!!
And if you run out of patience or time, just STOP!
Take a break! 
Image from Retrogasm
Don't keep going just to get it done....if it's half past 2 in the morning, you're tired, frutrated and not thinking straight...You're bound to make mistakes you may regret!
Just schedule to finish the job at your earliest convenience....
....but do make sure you finish!!
And on a last note:
Sometimes mistakes can be happy accident's....Life's little way of showing you just how creative you can be! It doesn't always have to be perfect to be beautiful!
And do what YOU want....not what Bloggy McBloggerson told you to do on her blog (mine included)...it's your version of the project that makes your DIY unique!!
Image from fvquotes
Or, in the words of Sophie Conran:
"Things don't have to be perfect to be beautiful. If you go into a room and it's all perfect, you don't feel comfortable. A home interior is not an abstract thing, it is about people, it's about the way you feel, the way you interact. It's about family and friends, it's the backdrop to your life."

Image via Maisons blanches
See my DIY tutorials gallery for lots of little and large projects you can make and do for your home!
Next week I will be sharing my toolbox...
not literally of course...but I want to show you what basic tools, in my experience, any DIY'er should have!!
But before that I will be posting a pretty and pretty useful easy little project, so please pop back for that!!
"