In turning our loft space into a work space/ office , I am , as ever, on a tight budget!!
So making do with what I already have is essential!!
Having said that, this is not going to stop me from achieving the look I am after (See my previous post
here)
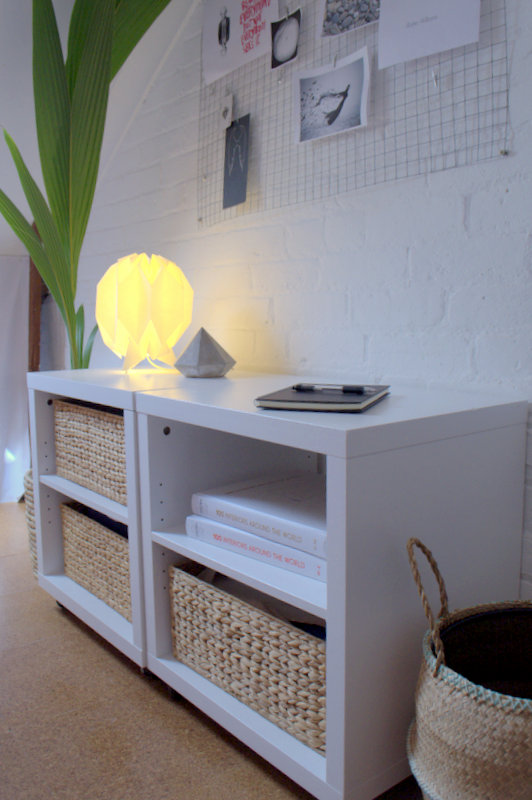
An essential part of a working office/work space is storage....but I could not afford to go out and buy new, so I've transformed these old laminate IKEA bedside tables that we already had to fit in with my work space design!! Other than being that fake birch wood look , they were perfect...especially as they already had castors, making them easy to move around. All they needed was a lick of paint!!
Painting laminate furniture can be a bit of a disaster, if not done properly....
....so in this post I am going to show you how to get a lasting and good-looking finish when painting laminate!!
The rules for painting Laminate is slightly different from when painting real wood:
You cannot key up the surface of laminate, as you would with wood, by sanding the surface.
But you still need to prep the surface in order for the paint to grip and not slide straight off.
The key to achieve this on Laminate furniture, is to thoroughly clean the surface:
Use a cleaner with de-greasing purposes : I've found that a regular cream cleaner does the job.
Rinse and dry the surface after cleaning!
The next step is THE MAGIC INGREDIENT!!
(*This is an affiliate link: I may make a small profit if you decide to purchase this product !)
Simply wipe it on with an old cloth, leave to dry for 10-20 minutes, then clean off !
You will notice that the previously smooth surface of the laminate now feels slightly rough to the touch!
Before you can paint your laminate furniture, you will need to further prep the surface by painting it with an oil-based primer! This will create a bond between the laminate and the paint, making the finish more durable!!
It CANNOT be a water based primer, as this will simply not work!!
Any oil-based primer will work, as will a product like
Stain stop*, which is what I used!
*affiliate link
For a smooth finish, roller it on with a sponge roller...
Don't worry about an even coverage at this point...you are merely creating a bond for the paint to grip on to!
When the primer has dried, you can paint your laminate furniture with ANY paint you'd like: emulsion or gloss...it doesn't really matter: If you have prepped the laminate properly, they should all grip nicely to the surface!!
I chose to use gloss paint!
I rollered it on with a gloss roller sleeve!
I did 2 coats to achieve an even coverage!!
(If you are painting something that will have to withstand a lot of wear and tear: Like a table top, I would recommend that you finish off with a coat or two of clear varnish)
And that's it: My old laminate IKEA bedside tables has gone from fake wood look to glossy white!
And now you know how to properly paint laminate furniture with a lasting finish!!
(of course you can be more adventurous with your color choice than I have)
Using what you've got, and updating furniture with paint, is one of the best ways to save money when updating a room! See more of my tips on decorating on a budget
here and
here
It fills me with a great sense of achievement when I can make do with what I've got and still create the look I am after... The new work space in the loft is nearly there now...Just a few little creative touches left to do, before I'm ready to show you all!!
And just in the nick of time, as we are off on a little break to Norway tomorrow!
Time flies! (is it just me or does time go faster as you get older??)
Enjoy the last of your summer folks!!
Oh! And if you have a spare minute or two, please vote for me in BEST INTERIOR BLOG CATEGORY in the COSMOPOLITAN BLOG AWARDS!
Voting closes on the 29th August, and I would really appreciate your support!
Click on the image below to be redirected to cast your vote (Page 11)
Thank you!!