Showing posts with label DIY tutorial. Show all posts

Wednesday, 9 December 2015

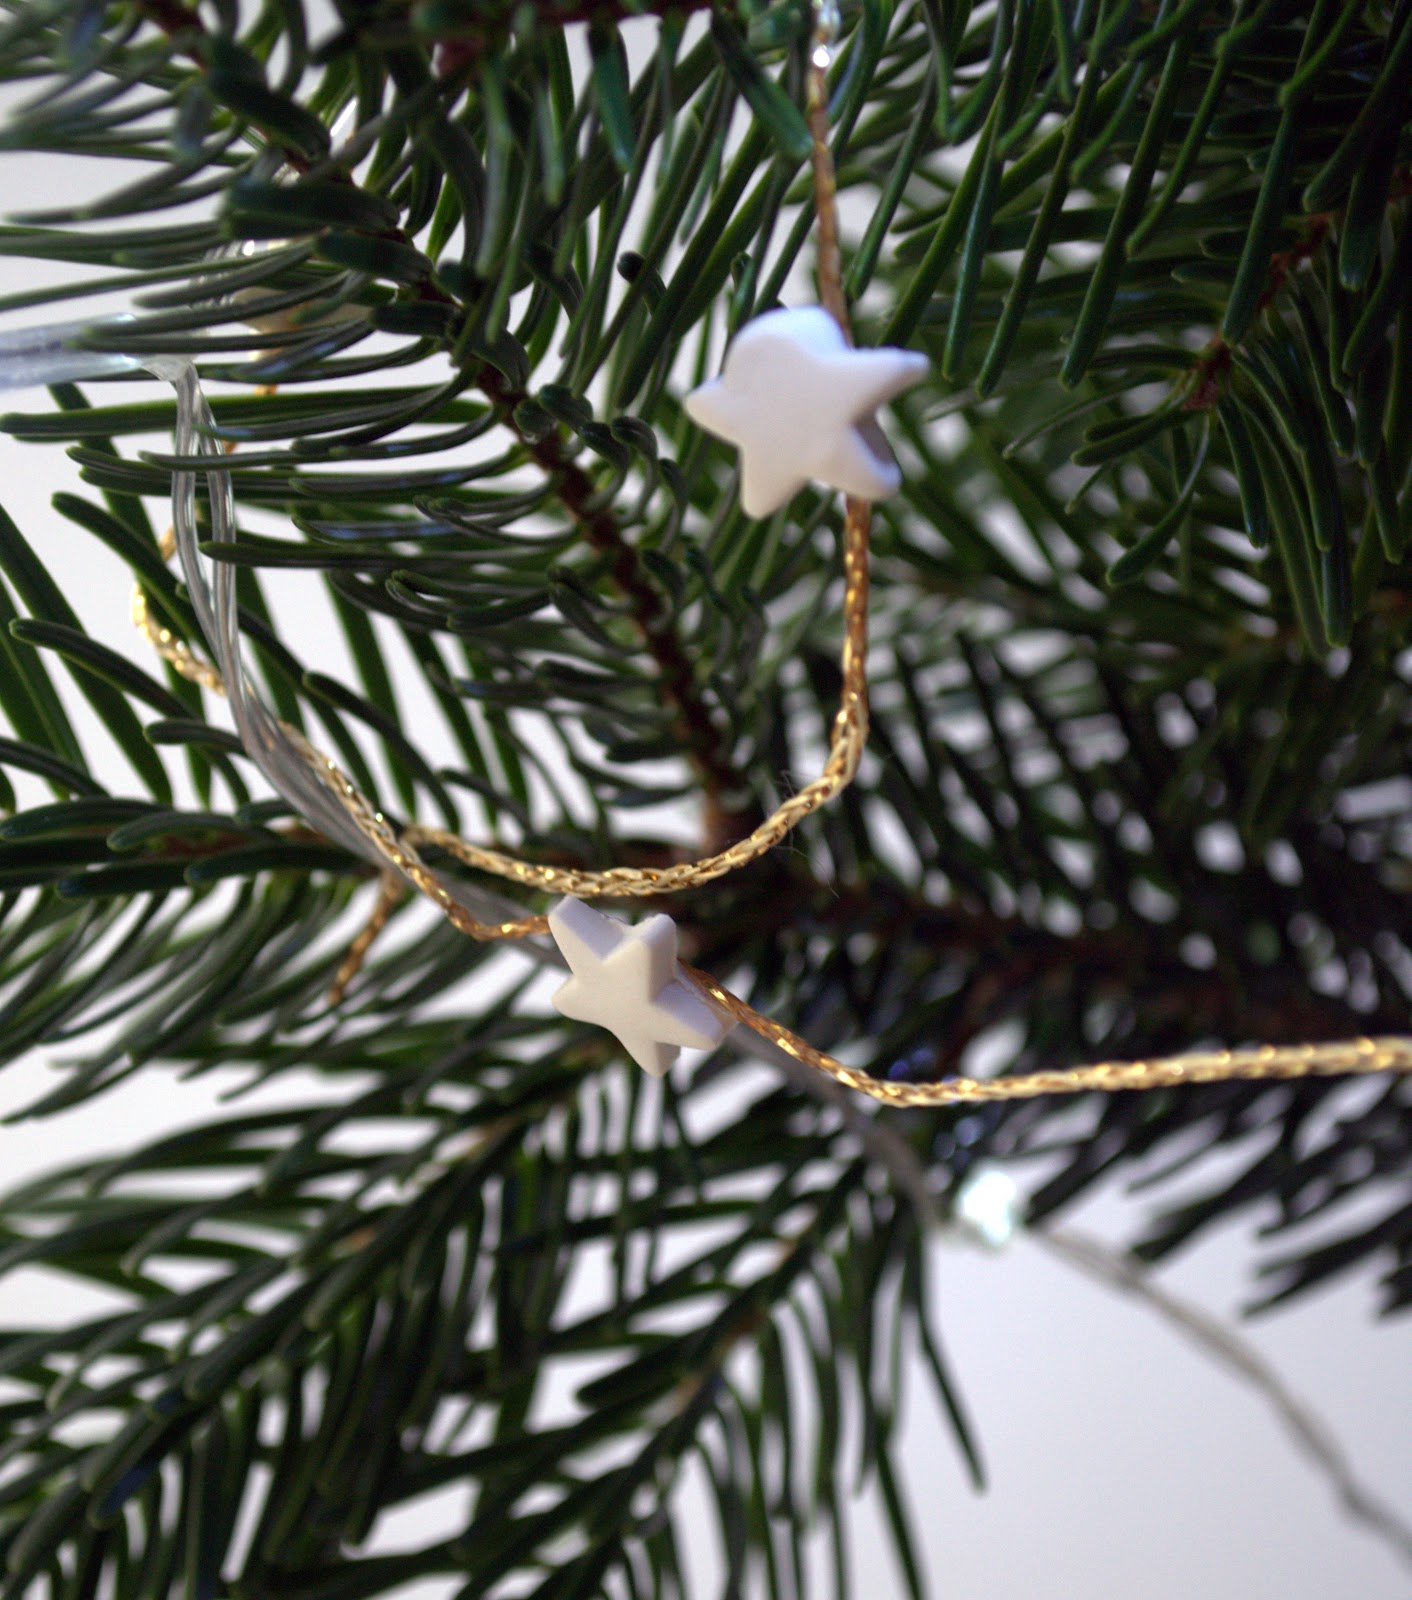
DIY Star garland for the Christmas tree


If you, like me , tend to shy away from tinsel and over the top decorations for your Christmas tree....This cute little garland is just the thing: Adding a subtle touch of sparkle with cute little stars, make this easy , minimal garland to drape all over your tree.

This is such an easy DIY , requiring very little in terms of both materials, effort and time:


I used:
rolling pin
superglue
Baking paper


Roll out the polymer clay to approx 2-3 ml thick...
Place the rolled out clay on some baking paper.


Use the star cutters (I used the largest size) to punch out loads of little stars in the clay...
Remove any excess clay
Transfer the stars on the baking paper to a baking sheet and cook in the oven at 150 degrees for approximately 8-10 minutes (Or according to the instructions on the packet of polymer clay)
Allow to cool....


Superglue the stars with regular intervals onto the gold string...
This may take some time: Do a section at the time, and allow the glue to dry whilst getting on with , so: do the washing up, take a bath or read a magazine.... Then move on to the next section of string....


Don't make your string garland TOO long, or you risk some serious tangling....
rather make a few 1,5 m long sections....


Pretty, simple and adding a subtle touch of sparkle with the gold string...a far cry from garish tinsel, but non the less decorative on you Christmas tree!

Tuesday, 10 November 2015

#PlantShelfie with a DIY plant pot...

Urban jungle bloggers
November Challenge


The November Urban Jungle Bloggers challenge is #PlantShelfie
So today I am sharing some pictures of my kitchen shelves....
....but in true Nostalgiecat style, I have a DIY plant pot tutorial thrown in....


I made this plant pot this summer, and I love how it looks with some autumnal heather in on my kitchen shelf...


Of course this is not the only DIY you can spot on my kitchen shelves...I shared these cute DIY hand drawn faces egg cups back at Easter (There is no tutorial, but you can find lots of great advice on drawing with marker pens on ceramics here)...and I love how some simple cactus' add to their personality...
And all though my "string of pearls" are looking a bit neglected, they are still one of my favorite greens...


Here's a little tutorial on how I made my Triangle plant pot:


I used:


You will also need:

Rolling pin
tool for cutting (a sharp knife will do)
Baking paper


Roll out the white polymer clay...just long and wide enough to fit around the cooking rings, approximately 5 mm thick + an extra bit to form the bottom of the plant pot
Use the Cooking rings to measure out the rolled out clay. Cut out a rectangle shape and a circle shape for your plant pot....

Next up, I rolled out the black oven bake clay, approximately 2mm thick this time.
Then I cut out some triangle shapes to place along the length of my white clay rectangle.
I used the rolling pin to press the triangles into the white clay....

 I placed one of the cooking rings on top of the bottom piece of clay, before wrapping the rectangular piece around the two cooking rings stacked on top of each other to form the pot.

NOTE!
I didn't get my cooking rings back out from the clay after cooking, but if YOU wrap some baking paper around yours, you should be able to....Learn from my mistake here peeps!!;)

Where the clay meets, use a knife to merge the clay together, and again to push the clay around the bottom of the pot together....then trim off any excess clay to neaten up around the base and along the top....

Cook in the oven for approximately 15 minutes at 150 degrees (or according to the instructions on you polymer clay)


If you are worried about using your kitchen oven for polymer clay, the clay manufacturers assures me that it's OK, as long as you cook out any left over fumes at high temperatures, then air out your oven for an hour or so...

So, there you have it. a DIY plant pot....


I've said it before, and I'll say it again: I love making my own decorative home wares....
Yes: I love being creative and making things....that's  kind of my thing....but more than that I love how  DIY-ing things means that you can make it how YOU want....and this technique is definitely custom-able to whatever shapes and patterns YOU would like to create....that way you end up with something unique and personal to you and your home decor...

And as for the plants....The perfect way to liven up a kitchen shelf....
Don't you think??

Thursday, 22 October 2015

Easy Halloween DIY: Cat eyes string light

Here's a quick and easy DIY for Halloween for you all...
Jazz up some string lights with some black card Cat faces to create some Spookily cute Cat Eyes to set the mood in your home this Halloween...
All you'll need is some A4 black card, some scissors and of course some String lights...

I've made up a FREE pattern for you, that you can simply download then print out on your black card.


Then you just cut out the cat faces....


Pierce where the eyes are indicated on the template (I used a sharp craft knife for this).


Then simply push the bulbs on your string light through the holes.
C'est ca!

I love how simple these are to make...and don't they look great??


This will probably be my last DIY post this year, as I have some big news to tell you all about very soon... but you can see more of my previous Halloween makes in my DIY Tutorials gallery or you can have a look at my Halloween Pinterest board for more inspiration...
...And of course, if you're planning a Halloween party, You should really check out my Classy Halloween Party ideas post , to see my picks of quick and easy creative ways to hold a sophisticated but spooky party...

Tuesday, 22 September 2015

{ A u t u m n }

Displaying the colors of Autumn leaves


I love little seasonal projects that takes me out into nature.
And Autumn has its beauty in the changing colors of the leaves on the trees, the cosyness of the shorter evenings and the feeling of the cooler, wetter weather..

.

I thought I'd bring some of the beauty of this season indoors, and into my decor...
So I pulled on my wellies and went in search for some pretty autumnal colored leaves: The yellows and reds, the speckled and imperfect....


I brought home a handful of these beauties...


Laid them out to dry and dabbed them with an old tea-towel to remove the remnants of Autumn rain on them...


Then I made up a quick microwave flowerpress to help flatten and dry my little autumn jewels out completely:
I did this by simply cutting up a cheap spiral notepad, and using some drawing paper to create a few folds to hold my leaves...

As a rule pressing flowers and leaves will distort their colors:
white will become yellow or caramel brown,
purple will become navy,
pinks will go brown and
orange or red will become maroon.
But this technique using microwave will reduce the color distortion dramatically  compared to traditional flower pressing....

I placed my leaves in the paper folds, then placed these within the sheets of the cut up notebook:

You can do several folds of leaves in one parcel....just make sure they are all of a similar size and thickness....(because some will take longer than others)
....take care that the leaves inside your parcel doesn't slide around, but stay put where you folded them in....
...you don't want them to lay on top of each other, as they will stick together when pressed... 


Then used some rubber bands to hold it all together:


Before placing the parcel in the microwave for 30-45 seconds ....
Take the parcel out and leave to cool, then check that the leaves are fully dry...if not pop them back in the microwave for another 20 seconds or so...Take care not to overcook , as the leaves will burn...
You might have to experiment with the timing and settings on your microwave oven, as some are more powerful than others...


When I was satisfied that my leaves were fully dried, I carefully removed them from the folds in the parcel, and laid them flat on a tray:

Then I simply arranged the pressed leaves in these lovely  brass frames from ROSE&GREY:


....playing around with creating different patterns with the leaves....


I replaced the batik straps that came with the frames with some natural twine... 


Then hung them up in our spare room, above the little mat where we put our wet wellies to dry out....


A perfect way to style up this season, using natures own color palette in a very subtle way


Starting to feel a bit autumny now, isn't it?
More autumn home-changes coming up on the blog next month!


Friday, 18 September 2015

DIY laced up hanging planters....


...With a Faux glaze


OK...so here's a little random DIY tutorial for you:
I've been dreaming up this project for a while now, as I wanted to add some funky hanging planters to this corner of my living room for ages...


And having been a very busy bunny this week with my VERY IMPORTANT PROJECT (that I will tell you all about next week...promise!) I needed a little creative fix and some time away from the computer. So I spent yesterday making these funky laced up conical hanging planters....complete with a faux ceramic glaze....
...and in today's post I will show you how:


You will need:

Paper template to ensure your plant pot will fit inside....I will show you how to make one in a minute...
Large block of Ovenbake Polymer clay (I like using this one)
Rolling pin
Baking paper
Kitchen foil
Straws
Sharp knife
Leather Cord (4 meters should be plenty)

For the Faux glaze (A bit further down the post) you will need:
Acrylic paint in the colors of your choice
Paint brushes
Water
Water based polyurethane varnish (Like this one)


HOE TO MAKE THE TEMPLATE:


Get an A3 sheet of paper and wrap int around the plastic plant container into a cone shape, as shown above.
Secure with tape.
Use some scissors to cut the paper cone just flush with the top of the plant container.
Take the container out and fold where the paper laps over. Use this fold as a guide and cut along to make the template.

MAKING THE POLYMER CLAY CONE PLANTER:


Knead a big block of polymer clay until soft and pliable.
On a sheet of baking paper roll out the clay until approximately 4-5 ml thick and large enough to fit the template onto.


Place your paper template on top of the rolled out clay and cut around using a sharp knife.

Using the straws, make holes all along the edges (Equal amounts of holes, equally spaced out)
and make 3, evenly spaced out, holes along the curved top of the clay shape...
Cut the baking paper ca 2cm all around the clay shape.

MAKE A SUPPORTING INSERT OUT OF FOIL:


Use some kitchen foil to make a conical shaped insert to fit inside the clay and support it when baking in the oven. 
TIP: Fold over several layers of the fold to make it thick enough to retain it's shape under the weight of the clay.
Place this on a oven tray covered in baking paper.

Gently lift the clay shape onto the foil cone, using the baking paper it is placed on...
Fold the clay around the foil cone, until the two sides almost meet, as shown below:

 Secure the shape of the clay cone by gently pressing some sausage-shaped clay leftovers along the gap. This will help the clay retain it's shape whilst cooking in the oven. We will remove these as soon as the clay is cooked.

Cook on the bottom shelf of the oven according to the instructions on your polymer clay. As a rule 5ml thick clay should be cooked for 10-15 minutes at 180 degrees c.

When cooked, remove the little clay sausages, and leave to cool.
(It may help the clay to retain its shape if you wrap some more foil tightly around the cone shape whilst it's cooling)

THE FAUX GLAZE:


Use some acrylic paints (I like these) in the colors of your choice.
Water them down a little for a more even application.
I stuck to one color for the base, a pale grey,  then used black to create the splatters...


I applied the paint from the (pointed) top of the clay come, stopping approximately 1/3 from the base...I wasn't too precious about it, and let the paint drip towards the table....and I think this makes for a nice faux ceramic glaze effect...


When the base color was dry (apply more coats if you want a more opaque finish, but I think a slightly translucent effect looks nice), I mixed some black paint with a few drops of water, and , using a stiff paint brush (a toothbrush would work well here) I flicked on little spatters of the black paint all over the cone:


This adds a nice faux ceramic glaze effect, I think.
When these spatters had dried, I Simply brushed on a thin, even  coat of the glossy polyurethane varnish, giving the conical clay planter a nice sheen all over...


LACE IT UP


There are loads of colors of leather cord to choose from, but I used a natural for this one....


Simply thread the leather cord though the holes and lace the clay cone up as you would a shoe....
And of course add three equal lengths in the holes along the top of the cone for hanging your cone shaped planter up from.... Secure with a simple knot.


Here's some useful info on how to securely hang a hook from a ceiling, so that you can hang these up...


Then simply place your plant into your new, funky, conical, faux glazed, laced up hanging planter...


Of course, as these planters are not water tight, they would be most suitable for plants that need hardly any watering, like succulents etc...
And if you do want to give your plants a watering, just remove them from the planter first, and wrap the plastic plant container in a plastic bag before replacing ...


Here's a close up of the other one I made....This time in a mustard-y yellow with black leather cord...


I love the way they look together, and create a bit of interest in the corner of my living room...
They may not have been a 5 minute make, but they are not difficult and, assuming you've already got some paint, the materials needed to make two will cost you less than £20...
....and in return you'll have something unique to put your plants in...

What do you think??

And as it is the last day of voting today...Pretty please spare a moment and give me your vote for best DIY blog in the Amara Interior Blog Awards:

One Room Challenge logo
"