
...A boy's scull dresser
So the other week my friend commissioned me to paint a pine wardrobe for her two boys' room!
I love doing up battered old furniture, and was excited to do this one as my friend had some great ideas on how she wanted the wardrobe to look....also , I had been meaning to do a post about furniture painting ABC for a while, and this project has given me the kick up the backside I needed!!

I will try to cover as many different aspects of furrniture painting as I can in this post, including all the little tricks I've picked up along the way! I have scoured the internet and collected the best furniture painting practices and techniques for this post.
Lets start with: WHY PAINT FURNITURE??
Sometimes I see people taking beautiful old wooden furniture and slap a bit of paint on to try to revive it...Now, I love the look of wood, and when people paint over beautiful oak or mahogany furniture, I feel so sad...sometimes it would be better to try and revive the wood and bring the piece back to its former glory...Having said that, sometimes the look of the wood is beyond repair, or maybe the piece needs a transformation to suit the owners taste...Lets face it: New quality furniture cost a bomb, and if you happen to have...or come across an old bit of furniture, that is not to your taste, a lick of paint is sometimes the best and cheapest option!!+ you can transform it to suit your taste completely!!
This is exactly what my friend wanted...

Her battered pine wardrobe ( "pine is fine" is my rule when it comes to the question of whether to paint or not to paint a piece of furniture...Yellowing pine furniture from the 80's and 90's especially!!) was a cheap e-bay find, and although it was a solid and practical bit of furniture, it really had seen better days. There was nicks and scratches a thick layer of grime and glue residues from stickers.
So the first thing to do was Giving it a good clean and Prep treatment!!

Take off any hardware, like knobs and drawer pulls before anything else!It will also make things easier if you remove all doors and drawers and paint these separately.

Removing the sticker residues: The best way I've found to remove glue gum from furniture is to use some cosmetic brush cleaner or isopropyl alcohol, as it will dissolve the glue: Wipe it over the marks, then use a kitchen scourer to rub it off...
Cleaning the grime off your piece: Use a solvent degreaser, and some elbow grease and simply scrub your piece clean(This will also take care of any previous wax finish your piece may have)....have a bucket of sugar soap and water at the ready, and use this on a rag to rinse off the dirt as you go...
If your piece has a thick layer of paint on from before, it may be worth stripping the old paint off before repainting...You can use chemical paint strippers for this or you can use a scraper.
If you decide to paint over the old paint, make sure you clean your piece well and either use some liquid sandpaper to key the surface ready for paint (Just make sure it will work with the piece and the primer and paint you are going to use: Best way to make sure is to do a test patch in a inconspicuous area)...or sand!!

Lets talk about SANDING!
Everybody hates sanding!!
You don't HAVE to sand furniture down before painting, but it will give better adhesion for your paint...The general rule is: If the surface is shiny or feels slick: DON'T skip sanding!! Also if your piece has lots of dinks and scratches, you may want to fill these with some wood filler and sand back to improve the surface!
Using a palm sander on the larger surfaces will speed things up, and sand paper and sponges are great for getting in to all the detail and awkward areas.
If you want to make sure your new paintjob will last, then I will always recommend that you at least do some scuff-sanding...just to key the surface ready for the paint...(Unless you are painting Laminate furniture...NEVER sand Laminate, just make sure you Prime!See my post on how to paint laminate furniture here)

Because I suspected that the Pine Wardrobe had been previously waxed, I spent some time scuff sanding the surfaces, and neatened up any dinks and scratches in the process...
ALWAYS make sure your piece is dust free after sanding, before proceeding to the next step!
PRIMING

If you have decided to skip sanding, make sure you prime....and use a oil or shellac based primer as they cure faster than a water based primer! (if you have sanded down your piece,like I did,water based primer is fine!)
Primer will help seal in any stains (although you may benefit from using a knotting solution first on any wood knots if you are painting on raw wood) and will even out the surface and help your paint go on more smoothly and evenly, as well as creating a bond between the wood and the paint.
Using a primer first will also reduce the amount of paint needed on each project, so investing in a tin of primer will pay off in the long run(especially as quality paints can be very expensive).
As a rule, if your piece is already painted, and you just want to paint over the previous paint job, you don't need to prime...but make sure you scuff sand your piece before painting, to key up the surface so the paint will grab on...

With the wardrobe prepped and primed, the next thing to do is to go over the primer with some sand paper!
For the best finish, I will always recommend that you do a quick scuff sanding in-between all coats of paint. This will prevent any flaking and bond the coats together!
Always allow the coats to fully dry before and wipe away any dust in-between coats.

PAINT TYPES
So what Paint should you use when painting wooden furniture?
Depending on what sort of furniture you are painting, and how much wear and tear it will be exposed to, there are numerous paint types that lends itself well to furniture painting:
Flat paints (Like matt emulsions, generally used for painting walls and ceilings in living rooms and bedrooms) works well for furniture that will not have too much traffic and use, like a shelf .
Use eggshell or enamel paints (generally used in hallways, dining rooms and kitchens) for any pieces that need to withstand some of wiping down, like a side table.
Satin Paint( generally used in bathrooms) will make for an even more durable surface and
Semi gloss and gloss paint (generally used for window sills and trims and doors) works great for painting cabinetry, like kitchen cupboards.
If using latex/vinyl paint, please remember that it can take up to 30 days to fully cure.
If you are painting something like a kitchen table, that will have to resist quite a lot of heavy use, I would recommend that you use an oil based paint or lacquer, or a 100% acrylic paint, like an enamel paint.
Chalk paint is also a very durable paint finish for furniture, but has a totally different set of rules when it comes to application...See my post on PAINTING WITH CHALK PAINT.
Always choose the best quality paint you can afford...Here in the UK, in my opinion, Farrow&Ball is the best for both colour range and finish!

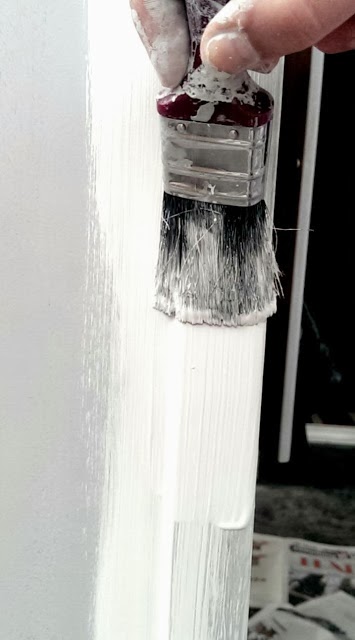
APPLYING THE PAINT
The best way to avoid those pesky brush strokes marks when painting, is to paint with a good quality paintbrush then , use a foam roller over the painted areas as you go, smoothing away any brush strokes...
Only roll in one direction to avoid dark streaks...go lighter and lighter with the roller until the sheen is perfectly smooth.
So another thing worth spending a bit more money on is your brushes and rollers...
You will get a better finish with a good quality brush....

Having spent money (probably more than you wanted) on quality brushes, you'll want to take good care of them , so they'll last you a while, Here's a few tips on how:
In-between coats of paint, stick your brush in a zip lock bag and store in the fridge.

When cleaning up your brushes, use half'n'half vinegar and hot tap water to soak the brushes clean in 30 minutes.

If your brushes a clogged with dried on paint, stick them in a pot, cover with vinegar and bring to the boil...let it simmer for a few minutes, then remove from the heat and allow to cool before washing away the remaining paint with water...

Some more little painting tricks:
If you are using your paint straight out of the can, a neat little trick is to place a rubber band across the paint kettle, so you can use this to wipe away any excess paint from your brush, before painting.
If you use a paint tray, you can line the tray with some foil before pouring the paint in to save yourself some cleaning up..

Having primed the wardrobe, I did 3 coats of paint to get the perfect finish.(Sanding in-between coats, remember??)
All paints and projects are different, but 2-3 coats of paint should generally do it!!
FINISHING TOUCHES
Sometimes it's nice to plainly paint an old bit of furniture, but why go to all that trouble , when, with just a bit more effort ,you can take it one step further and make it something special....I mean : You are already there in your overalls....
How about doing some distressing? Mixing the colours up? some gilding? Some glazing? Some decoupage?....or maybe even doing some stencilling??
(click on the links above to see my related posts, or visit my pinterest board painting and finishing for some great ideas)
STENCILING
Stenciling your furniture is a great way to make your piece extraordinary!
If you cant find a stencil to suit your taste or budget, don't fret....there is a way to make almost any image into a stencil...
My friend had her heart set on these cute sculls, available to download from Shutterstock, So I printed them out in the right sizes on my home printer, then made them into stencils in the same way that I did here.

Use a foam brush to apply the paint over the stencil for maximum control.

When stencilling is a good idea to tape the stencils down with masking tape..which is also useful, if you want to add a different colour on any part of your furniture....simply mask off any areas you don't want to paint, like we did with these black frames around the stencils...

THE DEVIL'S IN THE DETAIL
I also painted the legs of the unit in black to tie in with the black frames, and I refinished the original knobs, by spray painting them black, then gluing on some cute little skull images I found on some cupcake wrappers in our local supermarket...finished off with a coat of clear varnish.

As my friend wanted this wardrobe to go in her two young boys' room, and planned on keeping nappies and stuff on the top, we decided to varnish the top for extra protection...

So, lastly, lets talk about...
FINISHES
Painted furniture will, as a rule, need to be finished with some kind of protection, usually in form of a varnish or wax.
Polyurethane is very hard wearing and glossy, but will yellow over time, and I would not recommend using it over light colours...
If you want a glossy finish, but have used a light paint colour, Polycrylic varnish is your product!!
These two are fairly straight forward to apply, just paint on with a quality brush...
If you would rather have a soft sheen, than a glossy finish, furniture wax is what you are after...
There are several brands on the market, and again, the law of averages apply: Buy the best that you can afford...as some are easier to use than others.... Generally you will brush the wax on (or wipe on with a rag) then leave for a bit and buff off with a clean rag...elbow grease is essential when using wax to finish furniture!! (You can also get antiquing wax, which is slightly brown in colour, and will give your finished piece an aged look) See my post on painting with chalk paint for more detailed instructions on using wax to finish painted furniture..
If you are after a matte finish on your painted piece, you can of course leave the paint untreated, or you can wipe on some hemp oil for a bit of protection.
That just about covers it, I think!
I hope you have found this post useful, and if you know of any tricks or tips not mentioned here, please leave a comment below...The same goes for any questions you may have...I will try my best to answer.
I know that there is an awful lot of information in this post, but please don't be put off, painting old furniture is so rewarding and can be so much fun...
...just think about all the unique pieces you could create...
....custom made to your taste!!
xxx
June