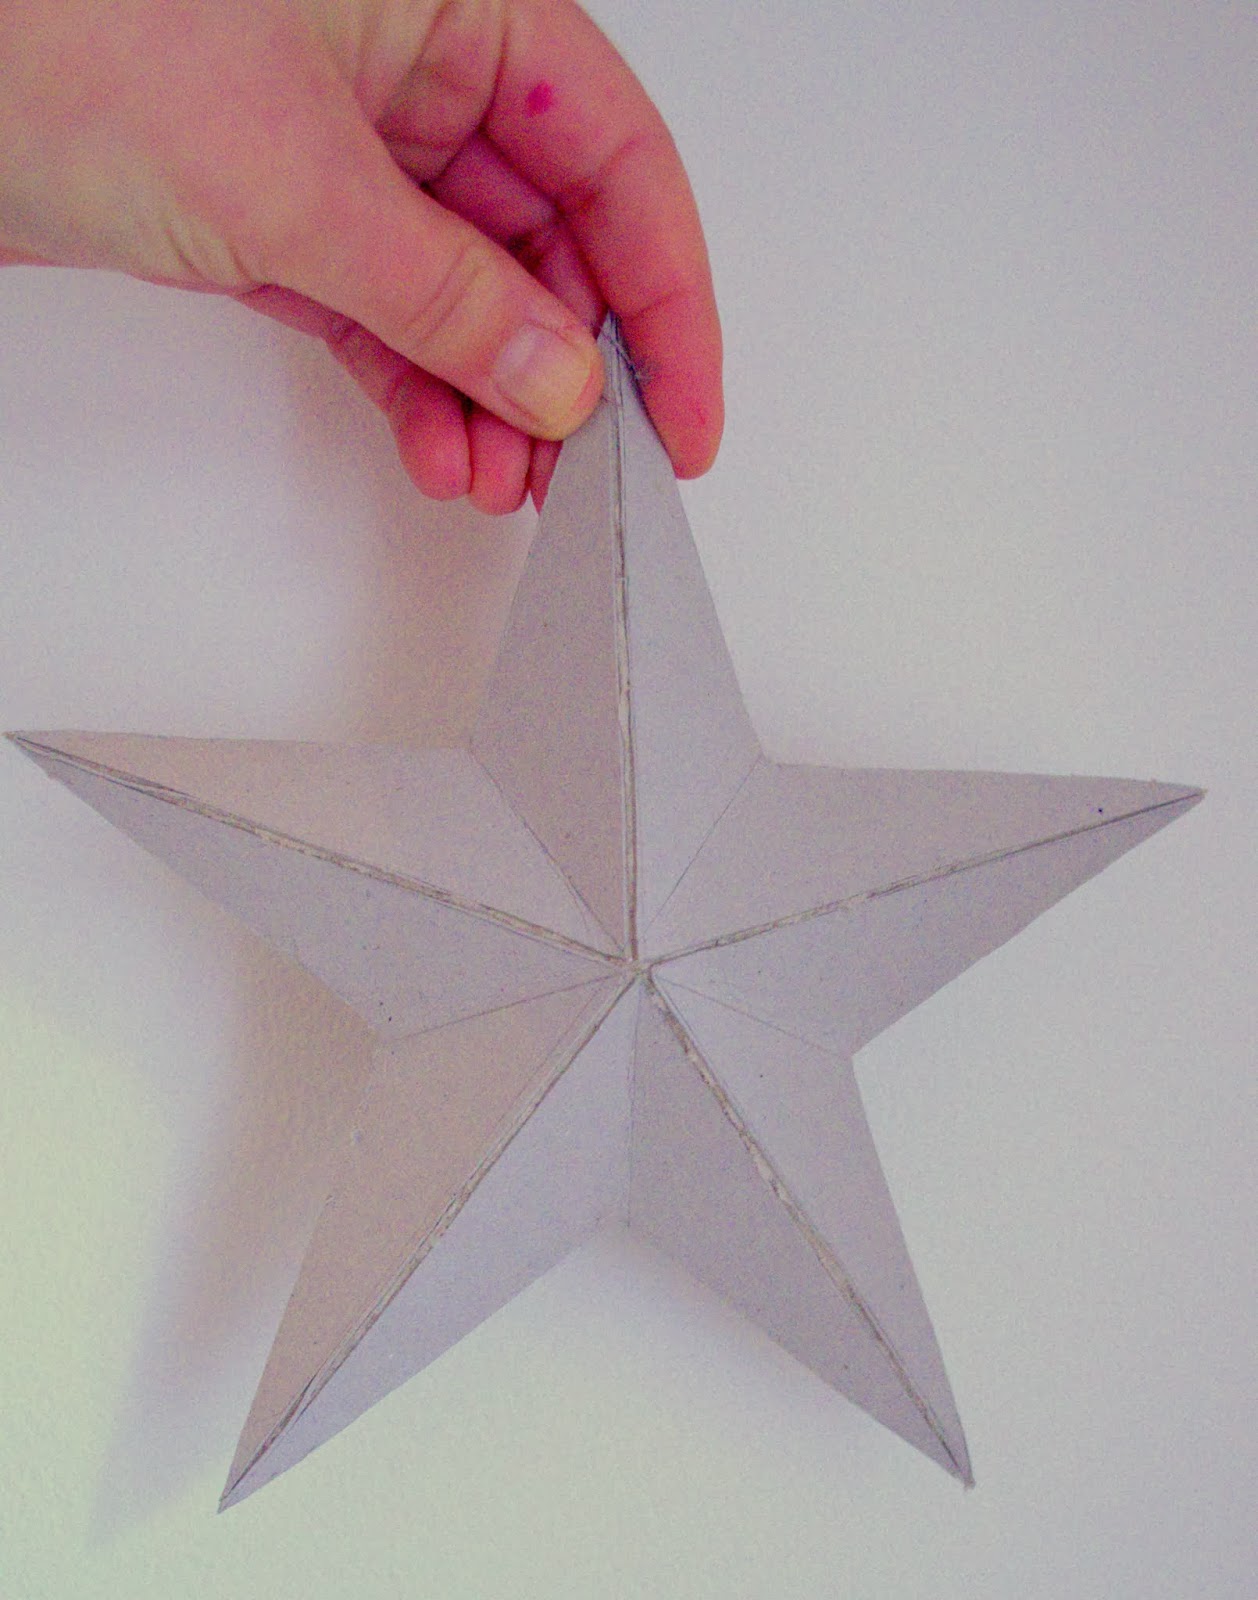
Friday, 14 March 2014

Concrete stool...DIY

....DIY


So, in my last post I showed you my shopping wish list for our impending bedroom make-over, and top of my list was this concrete stool from Cox&Cox..
But as it was out of my budget I decided to DIY one for using as a bedside table...


In today's tutorial, I will show you how!


You will need:


A long piece of 1,5" thick dowel(from any hardware shop)
A bucket
Fast setting Concrete mix (I used Postcrete )
Water
A measuring tape
A pencil
A wood saw
A palm sander
Sandpaper
Masking tape
Paint

Cut the dowel into 3 equally long pieces...
The length depends on how tall you want your stool to be...I cut mine to 18".


Plan the positioning of your dowel "legs" prior to mixing up the concrete:
Place them into your bucket to decide on the positioning of the legs...
...because I used an old empty paint kettle with a low rim, I stuck 3 bits of offcut wood to the sides of the "bucket" with tape to improve the angle of mine..


Take the "legs" out again and poor about 1 inch of tap water into your bucket...
...add the concrete and mix well!
You need to aim for about 3" of concrete mix!


Tap and shake the bucket to knock out any air bubbles and let the mix settle, then place your dowel legs about 1/3 into the concrete...

Leave to set for at least 24 hours...


...preferably 48 hours...
If you have accidentally got any concrete on your wooden legs, use a bit of sandpaper to get rid of any unwanted lumps at this stage..
Then turn the bucket upside down and press the sides of the bucket to release the concrete...jiggle it off.
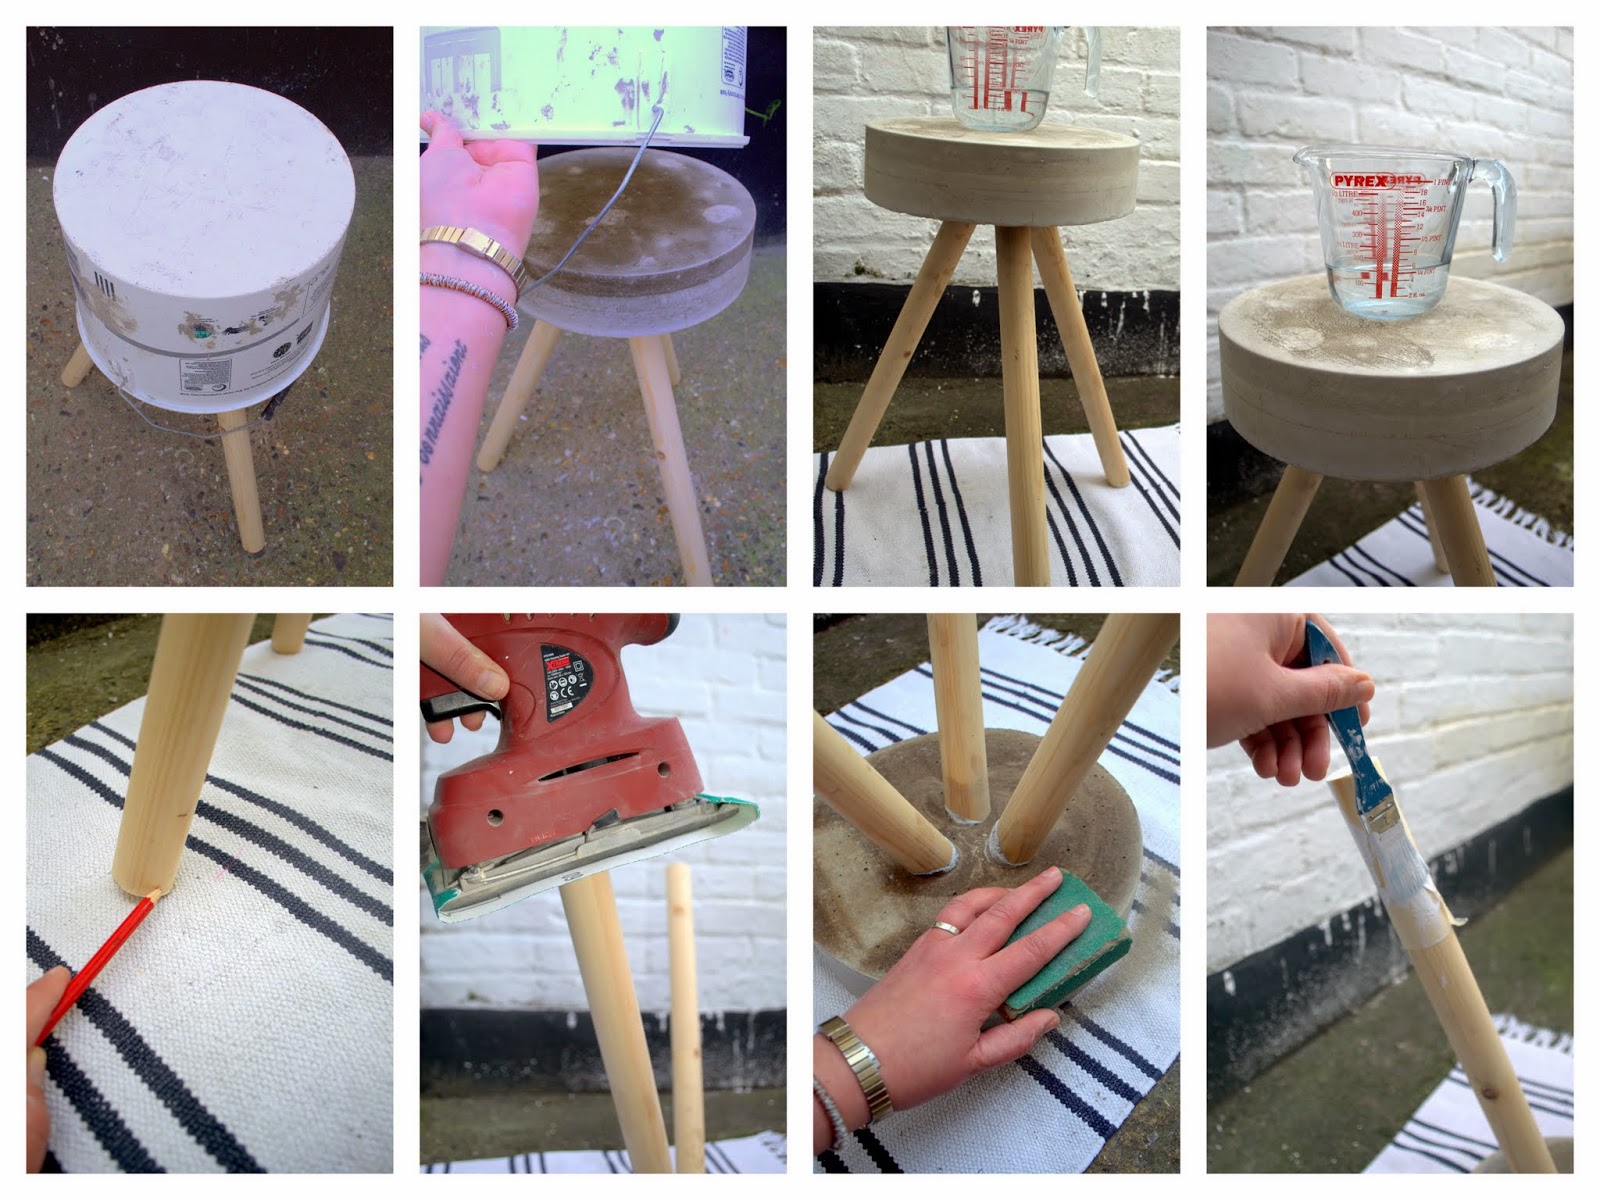
If your stool is not completely level, like mine , use a spirit level (or a measuring jug.... I couldn't find my spirit level) to determine where you will need to take some off the legs, them mark each leg that will need shortening. Use a palm-sander (or similar) to sand back the longest legs...
Run some sand-paper over the sharp edge of the concrete on the underside of the stool for safety..
I masked off  3" on each leg and painted with white gloss (Not only does this look nice, but it will also protect the wood from staining at the bottom).

That's it!


 I love that I could create this so easily for less than £25,-


It is going to look perfect in our "new-look" bedroom, which by the way is finished painted now (Sneaky peek of my new wall colour in the pic above...)

What do you think of my DIY concrete stool?
Doesn't it look easy??
It is!

Or would you have rather spent over £100 for a ready made one?

Have a great week-end folks!
I am hoping to take Mr shopping for new laminate flooring ...
so fingers crossed we find something we can agree on and commit to!

xxx
June

Wednesday, 12 March 2014

My bedroom wish list...My guide to Shopping for Scandinavian design

...And where to shop for Scandinavian Design!!


On my wish list: Wicker cone chair with curly sheep skin from Cox&Cox

There is no stopping me now!
My decorating marathon is like a run-away freight train...
So with the hallway pretty much done, I am now turning my attention to our bedroom makeover..

We are expecting our new built in wardrobes to be installed very soon, so I am spending this week preparing the room: Making a start on the paint job and planning our wood-panelled wall....and more!

We are going for a Scandinavian look, with shades of grey and white.

Like I said in my previous post, decorating has sparked a "desire to shop" in me...(ME...I NEVER shop....I make?? what's happening??)
I blame it on all those wonderful and inspiring pictures from interior design enthusiasts from Norway on Instagram...That simple Scandinavian style with it's clean white walls and mid century inspired furniture has got my heart beating!!

Scandinavian design is very "now"...Brands like House doctor, Bloomingville, Madame Stoltz, Ferm living and Hay design (to mention a few)all capture the simplicity and functionality of traditional Scandinavian design in a modern way: The look consists of  a neutral palette with shots of colour...Pale wood, concrete and copper...geometric shapes, and textured soft furnishings inspired by nature...


I love this Rug from House Doctor...


Even some of the more accessible, in terms of price, high-street and mail order shops in Scandinavia is bursting with  functional , yet beautiful design for the home...
...Of course you have IKEA- the "mother of cheap and functional design" but I have also recently discovered that H&M's home ware range is bang on trend and reasonably priced, and a great place to get those little accessories that make a house a home... But my favourite Scandinavian shop  for low-cost home ware and accessories has got to be ELLOS, a mail order company that has been around since I was a little girl...
 Unfortunately Ellos is unavailable here in the UK....

I have put together this "Look book" of products from the Scandinavian shops mentioned above that I would like for our new bedroom:


 1 Cotton rug from H&M home
2 Copper candle stick from H&M home
3 Sheer geometric curtains from ELLOS
4 Light chain from ELLOS
5 & 7 Geometric copper wire window lights from ELLOS
6 Grey linen curtains from ELLOS
8 White and grey zig zag bedspread from ELLOS


Fortunately for me, I have a very kind mother that lives in Norway, and has ordered me everything on my wishlist above and is bringing it to the UK later this month...
Lucky me!!
Takk Mamma!


But don't despair if you love Scandinavian design and live in the UK, most of the Design companies mentioned above will have UK stockists (click on the links)
+
I see more and more Scandinavian design influences in home-ware here in the UK as well...
Habitat has a definite Scandinavian feel to most of their design and the online shop Cox&Cox has the Scandinavian trend spot on with their current collection.
Even Sainsburys has got in on the trend with their Nordic folk collection ...


This Concrete topped stool from Cox&Cox is top of my unattainable wish list for our new look bedroom....

But because it is out of my budget, I have decided to DIY one...
So watch this space...tutorial coming soon!

I am really itching to get started on the bedroom now...
Time to dig out the paint and brushes again...

What do you think of my bedroom look-book?
Do you like Scandinavian design in your home?
Have I missed any retailers of Scandi-inspired home ware worth mentioning?
Let me know by leaving a comment below!

xxx
June


Saturday, 8 March 2014

Up the stairs: Hallway reveal


So having had a week off my decorating marathon, mostly due to having had a stinking cold, I have finally "finished" decorating our hallway....I showed you my downstairs hallway here, but today I want to show you the upstairs..

BEFORE:

Keeping it crisp and white, I had gotten as far as to the top of the stairs...The previously dirty beige landing was next: A few coats of brilliant white later and it was starting to look better already...
I deliberately chose to do it all white coming up the stairs as I didn't want the struggle of having to cut in a different colour in those hard to reach areas....Practical or lazy - you be the judge!


I ripped off the stained old carpet on the landing, and replaced it with these pretty rugs from H&M.
My macramé wall hanging got a nice spot on the wall....


 ....and I have placed our big mirror on the landing opposite our bedroom ...to reflect the light coming through our bedroom windows...
Now, I will just have to nag Mr until he gets his finger out and hang the mirror properly...


THE STAIRS:


Once I got started on ripping out the old carpet, there was no stopping me...
Off it came on the stairs as well...
It was quite a job, I will not lie, and once I had chucked out all that dirty old carpet and got rid of all those dangerous nails and tacks, it revealed that the wood underneath is in quite poor nick...
My hopes of just painting the stairs were dashed!
Undeterred I dug out my sand paper, and got rid of the most offending lumps and bumps, as well as any dangerous splinters then gave the sides of the stairs a couple of coats of white gloss paint...
.Mr and I decided that a new carpet would be the way to go....
...But being the impatient soul that I am... I came up with another solution:


When faced with the prospect of a new carpet on our stairs, my heart sank...I am not a big fan of carpets, and after some research I realised that my options would be quite limited in terms of design...
Then I spotted these long minty green zig zag runners at Urban outfitters, and thought why not?
Until we get around to getting proper carpets fitted: Why not make a statement?

So I whipped out my measuring tape, and luckily I realised that 2 of these runners would "perfectly" cover the stairs...And even more luckily: I had a discount voucher making the total cost of the two runners £30,- ...Bargain!

I simply stapled the runners to the stairs.
I love the way the minty green brings a fresh burst of colour to our otherwise white and grey hallway.... It looks fun and playful!
 In fact I like it so much that there is no rush for the carpets now....and if they get dirty, I can just whip them off and chuck them in the washing machine, then staple them back on...it only took about 1/2 hour...


I still need to whip out my gloss paint again and touch up some of the unpainted wood...


....and I want to get a new doormat!
(If you like my folk art 3D wall stars, see how I made them here)


I am getting really in to mixing up patterns now, and I love the way the minty green zig zags in my stairs runner juxtaposes the silvery birch wood stencil on the opposite wall downstairs..

Our entrance area is quite small, and the issue of shoe storage has always been a problem...But we had this tall and narrow IKEA bookshelf that no longer fitted in Little Miss Moo's room....We were going to chuck it out, but it turned out to be perfect for shoe storage by the front door...and it hides away nicely behind the curtains...
I am still looking for a new coat rack, although I am not sure I want one, as I quite like how clean and tidy it looks now...But I guess we need somewhere to hang our coats...??


I am loving my new look hallway and stairs, and to think that so far it has only cost me £80 to do....and that is mostly for my new rugs!
Never underestimate the power of improvement!! (Or the determination of a woman...)

And I am now eager to get cracking with our bedroom make over...
I have already started clearing it out....And shopping(?) for it!!
(I never "shop" anymore, but decorating has brought out the urge again...Anybody else get this??)
So over the next couple of weeks, I will be focusing on THE BEDROOM!
(YAY!!)

What do you think of my hallway makeover then?
Would you consider using rugs on your stairs as a quick fix?
I love to hear what you think, so please leave a comment below!

xxx
June

Wednesday, 5 March 2014

It's starting to feel a bit like....spring!


....spring!

Ooooh the joy!!
After what seems like endless rain and miserable weather, it seems that spring is in the air here in the UK now!

The skies are blue, and although it still feels quite fresh, I decided to pull out my converse this morning and went for a little stroll with my "new" camera...

I haven't actually had much time to play around with my new toy yet, so it was nice to take it for a local stroll this morning to try and capture those first signs of spring...

Everywhere You look there are little green buds reaching for the sun, and the trees are covered in blossom....


And the daffodils are rearing to go...


I haven't been out much recently, as I have had a nasty cold that has left me lacking in energy, but spending a little time in the sunshine this morning sure has helped!
Even the geese along the canal seems to be soaking up the sun...


Sorry there is no project to share with you this week...but I have been very busy...
I  may have some news that I am dying to tell you guys, but I don't want to jinks it...lets just say: I am working on an exciting new venture...Hopefully I can tell you more this weekend! If you are really curious now, check out my instagram gallery for a few little visual hints...

In the meantime: get out in the sunshine and soak in the feeling of spring!!
xxx
June

Saturday, 1 March 2014

FOLK ART WALL STARS...DIY


Today I want to show you how I made these 3D paper stars to hang in my hallway..
I am nearly ready for the last bit of my hallway reveal, as upstairs is now finished decorated and looking shiny and new....post coming soon...
I am trying to find a new mirror/coat rack ....(still searching) and I am adding some details, like these lovely, easy to make 3D stars:
I have chosen to use wallpaper samples to decorate these stars that compliments my birch forest stencil, I showed you last week here

Anyway, lets get on with it...they might be easy, but they wont make themselves...

You will need:
A 5point star template
3mm grey card
Offcuts of wall paper or samples
Pencil
Ruler

Scalpel and cutting mat
Spray adhesive
Double sided tape
Scissors


I will start by showing you an easy way y to create a perfect 5 point star to use as a template:

MAKING A 5 POINT STAR....

You will need:
A piece of 21x25cm paper
Scissors


Ruler
Pencil


Fold you piece of paper in half (12,5cm)
Fold and unfold in half both ways to create creased centre lines (whilst still folded in half)


Bring corner A right to meet with the centre crease line.(Fold from the vertical crease line).
Fold corner A back on itself until the paper edges coincide.
Bring corner B right until the edges coincide in the fold.
Then fold corner B back over itself, towards the right, until the paper edges coincide.


Use a ruler to mark a straight line at an angle, as shown in the picture above, then cut this piece off.
THIS LITTLE PIECE IS YOUR STAR
Unfold the little piece of paper to reveal your perfect 5 point star!

If you use stiff card to do this, you can now manipulate the folds and create a 3D star, but We are going to use tis as our template to make some sturdier 3D stars in 3ml grey card:

MAKING THE 3D STARS


Copy your star template onto the grey card (Enlarge if you'd like)
Use a pencil and ruler to draw the lines between the points of the star, like in the picture above.


 Using you ruler as a guide, cut out the star using a scalpel.
On one side score the 5 short lines (red) from the middle and outwards..(Take care not to cut all the way through, but aim to cut 2/3rds into the thickness of the grey card)
Turn the star over and draw out the lines between the points on this side as well...
Score the long (Blue) lines.
Bend the card along your scored lines and manipulate the folds until you get a 3D star.


Have a coffee and a snack whilst perusing your wallpaper samples.
(I ordered mine online and got some from homebase for free, but you could use any leftovers you have from decorating, to match up with your décor)
You can of course use other patterned medium -weight paper, but wallpaper is perfect for this project, as the fibrous nature of wallpaper can stretch and bend better, reducing the risk of tearing when you bend the star.


When you have chosen your wallpaper, its time to get

DECORATING THE STARS: 


Lay your wallpaper right-side down on a clean surface.
Flatten your card star and spray the front with spray adhesive.
Press it down onto your wallpaper.
Cut the wallpaper around the star, leaving a 2cm margin all around.
At each inner point of the star, trim away some of the wallpaper (As shown in the picture above), then place strips of double sided tape along each side of each star point.
Remove the backing of the tape and fold the edges of the wallpaper back onto the double sided tape...trim away any excess wallpaper at the star points as you go.
Turn the star over and gently manipulate the folds back into a 3D shape.


I made 7 stars in 3 different sizes...with different wallpapers (and two in copper leaf)
To hang them up, I simply wedged some sewing thread in-between 2 pieces of double sided tape to create a hoop, then used little stick on picture hooks to hang them off on the wall.


And that's it: Grouped together they look great! 


...and the wallpapers I have used perfectly compliments the grey and white theme of my new hallway...whilst the copper ones adds a bit of sparkle...
And they have added a bit of interest to the other ways bare wall going up the stairs...


 Here's a little sneak peak of my stairs....no carpet yet!


 These are so easy to make, I hope you will give it a go:
They make nice little pieces of interest...even just with one casually placed in a shelf!
One of the things I love about making my own home décor, is that you can make it exactly how you want it : in this case, you can decorate the stars to fit YOUR style!!

Have a great weekend!
xxx
June


Wednesday, 26 February 2014

competition time!


In March I will be celebrating the first anniversary of Nostalgiecat!
 
I cant believe I have been blogging for a whole year already!
But I can honestly say that starting Nostalgiecat has been one of the best decisions I have ever made!
It has motivated and inspired me in a very positive way!
I feel like I have finally found my calling in life and it has reignited my passion for interior design!
 
I truly enjoy my new creative life, and I am constantly buzzing with inspiration and ideas!
There is just not enough hours in the day....
And I love the feedback I get on my various projects from all you lovely people!!
 
So I wanted to celebrate my first year of blogging by having a give-away with a difference....
....Nostalgiecat style!!
 
Before I started blogging I was one of those people that would see something I liked...in a shop or online, and I'd think: "I could make that!!"....But I never did!!
Now I hardly ever buy anything for our home...I make it! And it gives me a great sense of pride!
I guess that's what I hope that this blog would inspire all of you to do, as well!
 
 
How about a gorgeous crochet bowl made from T-shirts, like this one from how to turn a fly into an elephant.
 
 
So for my 1 year anniversary competition I would like to encourage you all to get involved!!
 
If you have seen something you like for your home, that you think would be DIY-able, or you have seen a project that you would like to do, but you don't know where to start...please share your ideas with me!

It could be a piece of art, a lamp or a piece of furniture....a decorative object or some unique curtains or any other home ware  that you like the look of!

...Or maybe some decorative plates like these from Pretty handy girl ?

Not only will I do a project tutorial on the winners suggestion, but the winner will also be given the end result!!

It can be as big or as small a project as you'd like, but I may have to ask the winner to pay for postage/shipping if it is a particularly large piece! So please bear this in mind!

If you need any inspiration, feel free to peruse my Pinterest board: Projects!

 
....Or something made from concrete, like this funky diamond from a merry mishap?
 
I am doing this competition via my facebook page, so that it is easier for you to upload pictures of your project suggestions.
So to take part you need to follow my page on facebook, so that you can easily share your idea with me...all I ask is that you help me out by sharing my  fb-page with all your friends...

In about a months time, I will shortlist all your suggestions into my top 5 favourites, and then put it to the public vote on facebook!
So make sure you get your friends to vote for YOUR project!

So keep'em peeled for décor ideas you like the look of, and maybe YOU will be the winner of a custom made piece of home décor...


 xxx
June


"