

Today I want to show you how I made these 3D paper stars to hang in my hallway..
I am nearly ready for the last bit of my hallway reveal, as upstairs is now finished decorated and looking shiny and new....post coming soon...
I am trying to find a new mirror/coat rack ....(still searching) and I am adding some details, like these lovely, easy to make 3D stars:
I have chosen to use wallpaper samples to decorate these stars that compliments my birch forest stencil, I showed you last week here
You will need:
A 5point star template
3mm grey card
Offcuts of wall paper or samples
Pencil
Ruler
Scalpel and cutting mat
Spray adhesive
Double sided tape
Scissors

I will start by showing you an easy way y to create a perfect 5 point star to use as a template:
MAKING A 5 POINT STAR....
You will need:
A piece of 21x25cm paper
Scissors
Ruler
Pencil

Fold you piece of paper in half (12,5cm)
Fold and unfold in half both ways to create creased centre lines (whilst still folded in half)

Bring corner A right to meet with the centre crease line.(Fold from the vertical crease line).
Fold corner A back on itself until the paper edges coincide.
Bring corner B right until the edges coincide in the fold.
Then fold corner B back over itself, towards the right, until the paper edges coincide.

Use a ruler to mark a straight line at an angle, as shown in the picture above, then cut this piece off.
THIS LITTLE PIECE IS YOUR STAR
Unfold the little piece of paper to reveal your perfect 5 point star!
If you use stiff card to do this, you can now manipulate the folds and create a 3D star, but We are going to use tis as our template to make some sturdier 3D stars in 3ml grey card:
MAKING THE 3D STARS

Copy your star template onto the grey card (Enlarge if you'd like)
Use a pencil and ruler to draw the lines between the points of the star, like in the picture above.

On one side score the 5 short lines (red) from the middle and outwards..(Take care not to cut all the way through, but aim to cut 2/3rds into the thickness of the grey card)
Turn the star over and draw out the lines between the points on this side as well...
Score the long (Blue) lines.
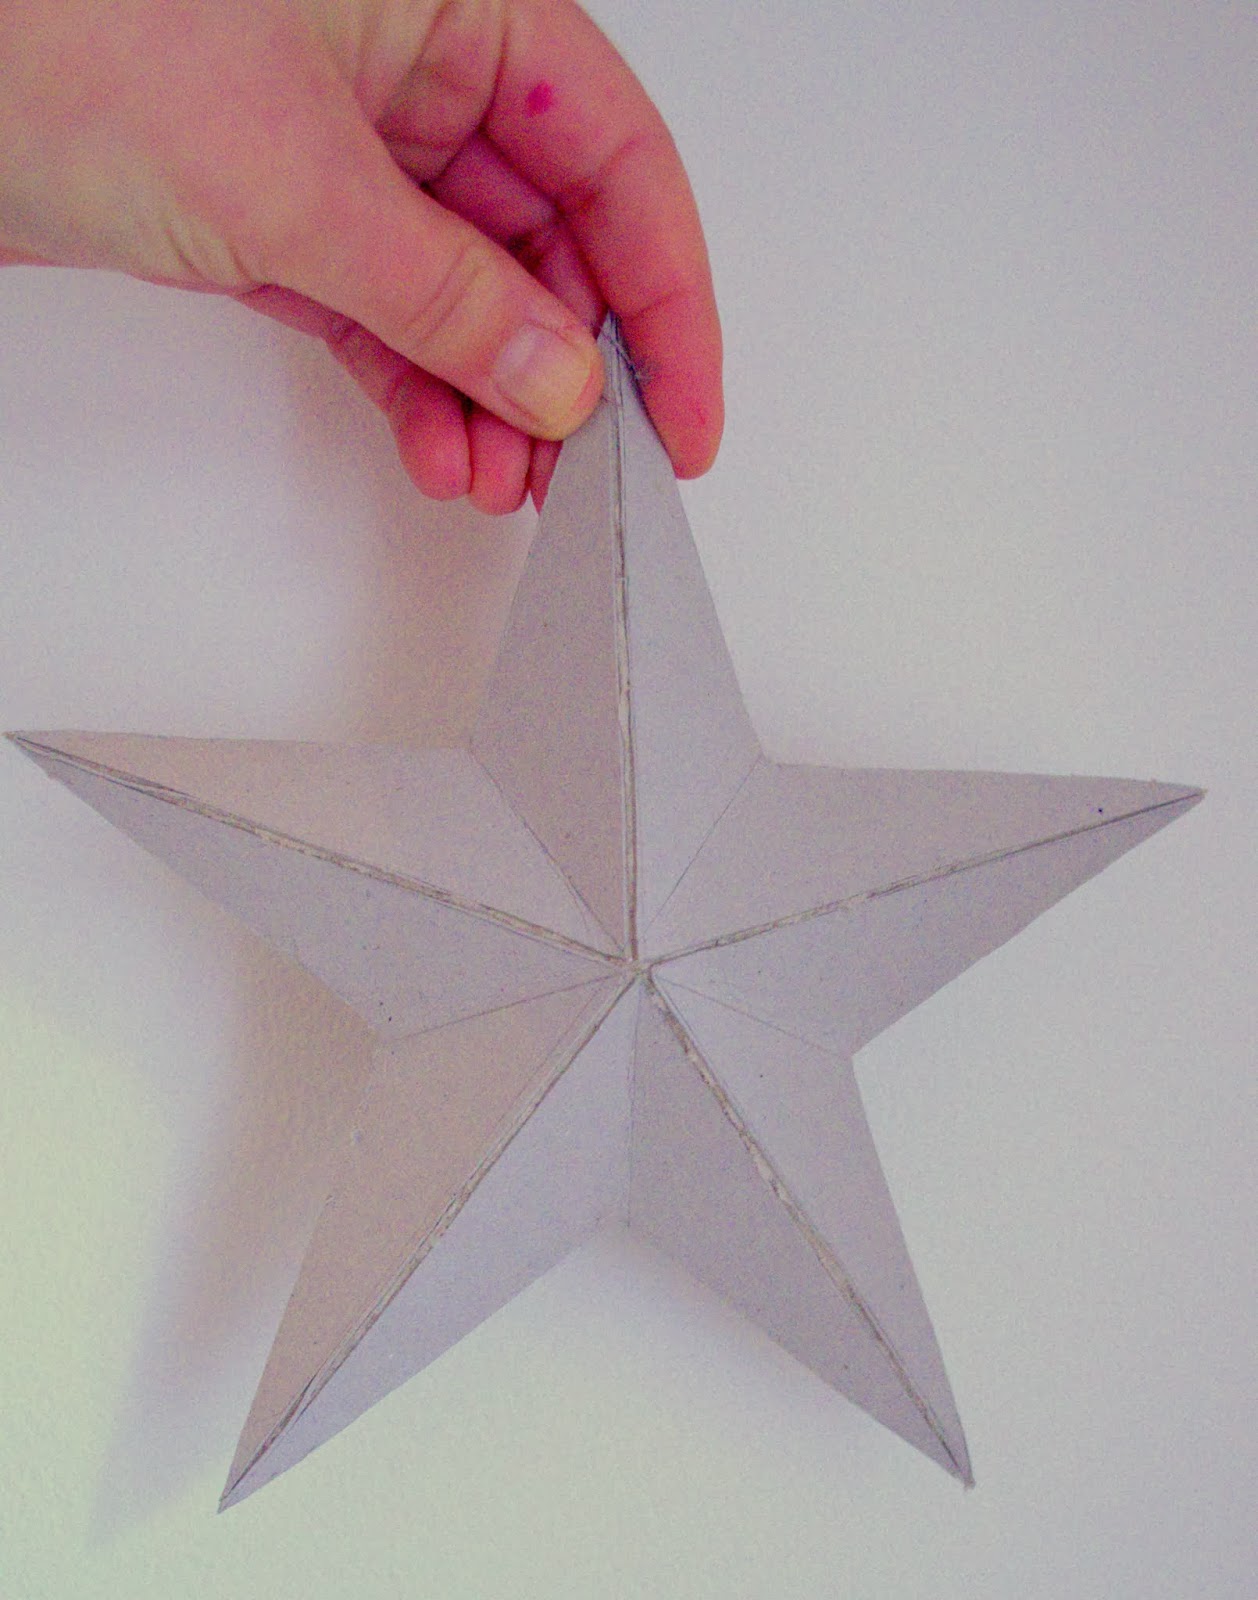
Bend the card along your scored lines and manipulate the folds until you get a 3D star.
Have a coffee and a snack whilst perusing your wallpaper samples.
(I ordered mine online and got some from homebase for free, but you could use any leftovers you have from decorating, to match up with your décor)
You can of course use other patterned medium -weight paper, but wallpaper is perfect for this project, as the fibrous nature of wallpaper can stretch and bend better, reducing the risk of tearing when you bend the star.

When you have chosen your wallpaper, its time to get
DECORATING THE STARS:

Flatten your card star and spray the front with spray adhesive.
Press it down onto your wallpaper.
Cut the wallpaper around the star, leaving a 2cm margin all around.
At each inner point of the star, trim away some of the wallpaper (As shown in the picture above), then place strips of double sided tape along each side of each star point.
Remove the backing of the tape and fold the edges of the wallpaper back onto the double sided tape...trim away any excess wallpaper at the star points as you go.
Turn the star over and gently manipulate the folds back into a 3D shape.

I made 7 stars in 3 different sizes...with different wallpapers (and two in copper leaf)
To hang them up, I simply wedged some sewing thread in-between 2 pieces of double sided tape to create a hoop, then used little stick on picture hooks to hang them off on the wall.

...and the wallpapers I have used perfectly compliments the grey and white theme of my new hallway...whilst the copper ones adds a bit of sparkle...
And they have added a bit of interest to the other ways bare wall going up the stairs...


They make nice little pieces of interest...even just with one casually placed in a shelf!
One of the things I love about making my own home décor, is that you can make it exactly how you want it : in this case, you can decorate the stars to fit YOUR style!!
Have a great weekend!
xxx
June
5 comments:
I love this idea... I hope I get a chance to try this!
Thanks Helen! Really: try to do this...they look great!!
Upgrade your interiors with premium wall decor from Vibecrafts. Designed to add elegance, colour, and personality to any space, our wall décor pieces blend modern aesthetics with quality craftsmanship. Perfect for living rooms, bedrooms, and offices.
Great information, thanks for sharing with us… check out my service
Just a smiling visitor here to share the love (:, btw outstanding layout.
Post a Comment