Wednesday, 22 January 2014

Monochrome Graphic print cushion...


....an Easy DIY


Today I want to show a very easy way to DIY your own print on a cushion cover...
You really wont believe how easy this is!

I have had a love affair with graphic prints for a while now, and with the introduction to our living-room décor of the graphic art I made last week, I wanted to update my cushions to compliment it...

So when I came across this little "colouring in" book in Tiger (a bargain at £1!!!), stuffed full of wonderful graphic prints, I felt inspired!!


I chose some prints that appealed to me and enlarged them on our printer....


Then I simply stuck the image to my work-surface with some masking tape, then placed a pre-cut (to the size of my cushions) square of fabric over, and tacked it down smoothly using more masking tape...


As you can see from the image above, the print shows through the white fabric.
Then I used a ruler and a Dylon fine nib fabric pen and simply traced the pattern onto the fabric..


I found that it took the risk of confusion away if I dotted the beginning and the end of each line first...that way I could quite quickly ,using the ruler, trace over each line with the fabric pen...


When I was finished, I covered the drawn out patterned cloth with a piece of cotton and ironed for a few minutes to set the ink...


Then I used my mini sewing machine and stitched the cushion together...
(If you want to make this a really, really easy project, why not buy some plain cushion covers and draw a design on these....and skip sewing all together)

I love this simple make...

...You could even take it one step further, (if you would like to add some colour to the prints) and colour in the shapes in the patterns with some fabric paint.


But I liked how by keeping the pattern simple and monochrome , the cushions works like accents to my décor...


...Like this big one with a "star"- pattern...(The little cushion was made using fabric paint that I stamped on in the same way that I made the artwork above)


...and this round one, also just made by tracing one of the patterns from my Tiger "colouring book"...


The grey and white chevron cushion I made this morning by simply masking off the pattern on the fabric using masking tape and then painting on some grey fabric paint...

I am really pleased with how these simple DIY cushion covers have turned out...they have given my living room décor a more modern feel, and the sparseness of the patterns on the white cushions have helped lighten our space....
....and all for less than £15 (fabric and the pens + the round cushion fillers)

So keep your eyes peeled for patterns you like, and YOU can make your very own printed cushion covers...

Please let me know what you think of my DIY cushion prints by leaving a comment below...I love to hear from you all!!

xxx
June


Friday, 17 January 2014

Graphic Gold-leaf wall art.....

....you can make yourself


AND I AM GIONG TO SHOW YOU HOW!

Assignment no.6 in the January Cure was to Choose a piece of art to frame, and I knew straight away that this meant a DIY project for me...and as I had two pieces of art I made for Christmas still up on my gallery wall that was in need of changing, I knew I needed something new for these frames...

I love graphic prints, so I decided to make two complimentary gold-leafed pieces of art...
...and my starting point was the triangle shaped stamp:


I made my own makeshift stamp by simply sticking a stack of 5 triangle shaped pieces of Little Miss Moo's craft foam together with double-sided tape before sticking them on to the bottom of a glass (with the double-sided)...I also cut up 6 triangle shaped pieces in the same size, of double sided tape extra....
...these will be used to add some glimmer gold-leafed triangles to the first  piece of art I will show you how I made:


 After experimenting a bit I mixed up my colours: I chose black, peach and a minty turquoise that I felt went well with the gold-leaf...Of course the beauty of making your own artwork, is that you can mix up any colours that you feel would compliment your space the best....And of course you don't have to use gold leaf: how about silver...or so-right-now: copper!!??


I stuck down a piece of quality drawing paper to my work surface using masking tape, then using one of the foam triangles as a template for size, I very faintly drew up a "grid" with a pencil, so that I could use this as a guideline when placing the triangles onto the paper...
I started by sticking down my double sided triangles in a random pattern spread out on the paper, some facing up, some down...
...I then peeled off the backing and gently tapped the gold leaf onto the tape using a soft brush.
Using circular motions I gently brushed away any excess gold leaf...

With the gold-leaf triangles now in place, it was time to get stamping:


I brushed the paint onto the makeshift stamp, (I had a piece of paper on the side so that I could blot the stamp of excess paint before stamping)...
The fact that the stamp was on a clear glass helped me place my stamp where I wanted with precision...
You can do this as randomly or systematically as you like, but try stamping with one colour at the time and spread the aesthetic of this colour all over the paper...Every now and then, step back and squint to get a feel for where to place your next triangle! When you feel like you are stuck, change colour...This is a bit like playing colour Sudoku!
Keep stamping your chosen colours until you are happy with the aesthetics of the colour mix...
Know when to stop!
You don't have to fill the entire piece of paper, a few gaps looks good!!
Use an eraser to get rid of any pencil-marks.


It is amazing how complicated it can get trying to put together colours randomly like this....just try to do something in a way that looks good to you!!
I had 3 attempts before I was happy with the result...
I now LOVE it!!


So to compliment my graphic triangle art, I made this Gold-leafed ampersand art:
(Ampersand is the name of the symbol for the word "and", there are many different designs...click on the link above to see a few)
First: Print out an ampersand you like the look of to the scale you need...

Next we'll work on the back-ground:


I chose a pale aqua-blue card, not too dissimilar in colour to the minty-blue I used above.
Again,I drew up a faint grid on the card with a pencil, like I did before.
Using the makeshift triangle-stamp again, this time stamping with just white paint, this time I simply stamped a row of "monster-teeth" at the top, then, turning the stamp, to make the bottom row of "teeth"...this creates a zig-zag of blue in the middle (see picture above)...then for "row 3", I mirrored the row above, so that I created white diamond-shapes...Then I repeated until the paper was filled!

 Whilst the paint was drying, I prepared my ampersand:


In the same way that I used double-sided tape to apply the gold-leaf to the artwork above, I basically wanted to make an Ampersand double-sided sticker.
First I taped a sheet of baking paper down on my work surface, then I slid my Ampersand print-out underneath, and covered the image with double sided tape (making sure they were butted tightly up against each other). Then using a (very)sharp scalpel, I carefully cut out the Ampersand.(Starting with the "middle-bits")


I placed the cut out Ampersand sticker onto the background I made earlier, and marked off the positioning with a pencil.
I then peeled off the baking paper and stuck the double sided tape down, peeled off the backing and applied the gold-leaf as before.
After gently brushing away any excess gold-leaf, I drew around the Ampersand with a black sharpie, making the lines on the right-hand side of the symbol a little thicker to create a shadow effect...

Using an eraser, I then got rid of all my pencil marks.


And I was done...


I love the way these turned out...


...And the way the Gold leaf shimmers and compliments my Concrete lamp shade... 


This has been such an enjoyable project...I just love having creative days like this, just playing with shapes and colours!! You could probably do these in a few hours...they are so easy to do....when you know how!!
And the result is definitely something I am proud of: Striking on-of-a-kind artworks that really has lifted my gallery wall!
...And it feels so good to have another tick off on my January cure to-do list!!

I hope you like them too, and that maybe I have inspired you to give DIY artwork a try!!

xxx
June

Saturday, 11 January 2014

January cure update....

 
...Kitchen purge


Pheeew! I thought I was lagging behind in the cure...I had just vaguely done the outbox thing...plan to make my own artwork and gently pondered what changes I could make!!(not sitting still for 10 minutes and "meditate" as instructed!!) So thank goodness I made it my mission to get THE KITCHEN (Vague description of the task, I know!!) ticked off my To Do list for task #5!!
 
 
My kitchen is my "ground control centre"....where I do everything! From cooking and cleaning to crafting and making! No wonder it gets in a mess! My shelf area in the corner could be really beautiful, but as it serves as a dumping ground for all my "in-progress" projects, it has become crowded with craft supplies....so that was a big task: Clearing and reorganising this whole area left me swomped in various piles of stuff to be reorganised....
 
 
...But with a lot of effort, I think I've managed to get this area under control again!! (Admission: all my craft supplies are now crammed in to the cupboard under the stairs, and that has been added to my project list to be reorganised....that's allowed, right??)
 
Because I'm in the UK, I don't get the new Cure task until late in the afternoon, when I was already knee deep in pots and pans in my kitchen (with a bit of PJ Harvey blaring out)and I was soo happy when I saw that Cure task #7 for the weekend was to sort out the kitchen!! This meant that I am now back on track with the Cure!! 


  I do find: Once you start these things...it's hard to stop! My kitchen got soo messy in the process today, it was unthinkable not to clean and tidy it all!!
 
 
I found it quite an cathartic experience...Purging my un-wantables (Some things I didn't even know I didn't want until I started running out of floor space for piles of stuff I didn't know where to put!!)
Good riddance useless stuff!!


My cupboards where actually "not too bad" ...I thought, as I had had a rummage through them for un-perishable food items that I gave to the local food bank just before going away to Norway for Christmas! (If you are in the UK, doing the Cure, or having or planning a kitchen purge, Your local food bank will very much appreciate any donations all through the year: Find the one nearest to you here !) But after going through all my cupboards, cleaning and reorganising them, I actually had 2 1/2 bin bags full of  rubbish!!
 
 
I wont bore you with loads of pictures of my messy "before" cupboards...Lets just say that once I got rid of food stuff out of date, cracked and chipped glasses and mugs, un matching table ware and, tupper ware without any lids and a lot of things I've been hoarding over the last year (like empty soup tins???) I was left with more than enough cupboard space (unthinkable!!) to create a designated cupboard for Little Miss Moo's Crafty bits and colouring in books!!
 
 
...Just goes to show: We accumulate so much more stuff than we actually need!! I also ended up with quite a lot of stuff in my "outbox"...most of which I am already planning on taking down the charity shop (Princess Diana mugs anyone??)
 
 
It was a lot of hard work...I'm not gonna lie, but it has definitely been worth it!!
I even managed a trip to the local garden centre to pick up these gorgeous green plants (don't ask me what they are...I threw away the labels!!) for my kitchen window....AND picked up the ingredients to make a risotto for me and Mr last night!! Task complete!!


Not only am I now enjoying a morning coffee in my freshly cleaned and tidy kitchen, but I am so pleased I have finally caught up with my assignments in the january cure....(well, apart from still having to get around to making my artwork...post coming next week)
 
And just as well I got it all done before the weekend, as we are heading into London today for Christmas celebration number 3/my birthday with the in-laws!
 
I am still working on my post about our renovation plans for the house, but I promise you it's coming soon!!
 
How are you doing with the Cure??
Got any useful tips for a hoarder like me??
I'd love it if you would share your progress with me by leaving a comment below!!
 
 One last thought: I love my Clean and tidy kitchen, but I cant help wondering: How long will it last??   
 
xxx
June

Thursday, 9 January 2014

DIY Calendar and Blackboard Organiser....

 ....to help reset your mind!


 New year...fresh start! I LOVE the thought of starting a new year with a clean sheet...
....and what better symbolises this than a brand new Calendar?
All those empty squares, ready to be filled in with life as we walk through time!!

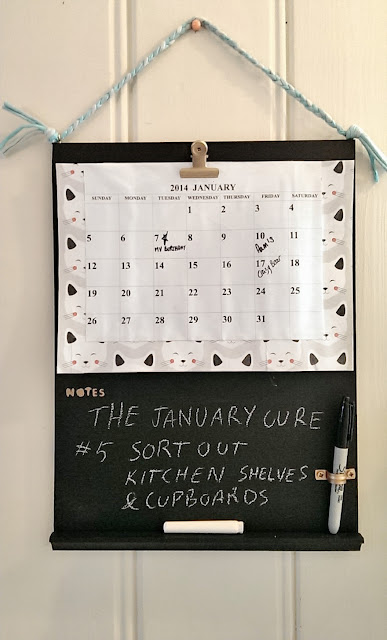
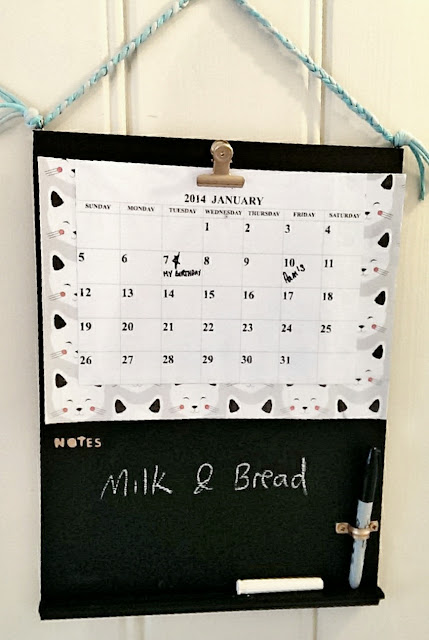
So today I want to share my DIY calendar and Blackboard organiser...


Seems like only yesterday we were still in 2013, in holiday mode and only really worrying about what to wear for New years eve(?) ...Then BANG, back to reality: Mr started back at work, Little Miss Moo was back at school, I started purging the house with the January cure, had my birthday AND finally found some time for this years first DIY....HECTIC!
How appropriate then, that my first make should be this Calendar, so that I can plan ahead and keep a bit more organised for weeks like this....because, no doubt, this is not the last time this year when things are going to feel a bit out of control....

I could've of course gone out and simply bought a calendar, but this way, I got what I really wanted...and for next to nothing!!


To make one like mine, you will need:

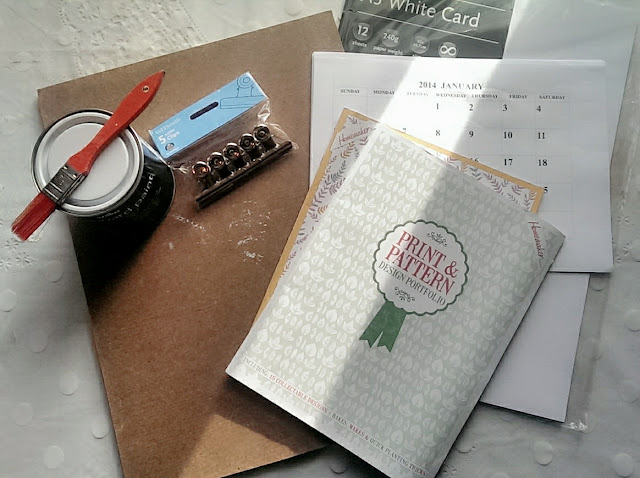
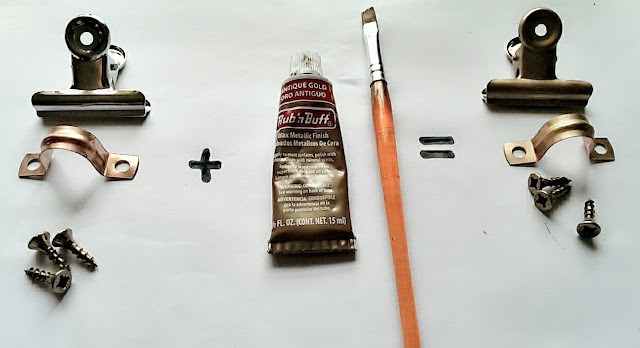
 a piece of wood and some wooden listing for the chalkboard (I was lucky I had some offcuts in the shed) Chalkboard paint (We had recently purchased some for Little Miss Moo's room...post coming soon....Or you can make your own in ANY colour like I did here). Hardware: Spring paper-clip (I got mine from WHS), 3 small stud screws, 2 Eye hooks and a pipe bracket ....and some Rub'n'buff to make all the hardware match.
You will also need some strong contact adhesive (like No More Nails) , a drill and drill bits and something to string it all up with (I used pleated textile yarn, but any rope will do)

For the actual Calendar, you can download and print off a variety of styles for free from here.

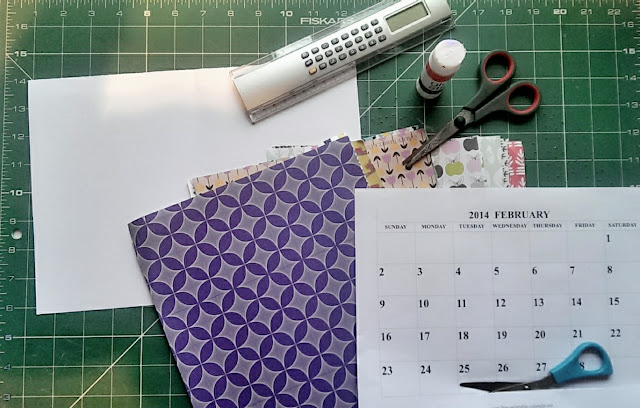
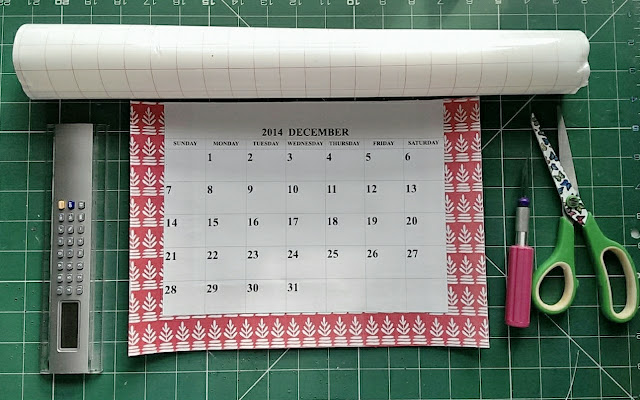
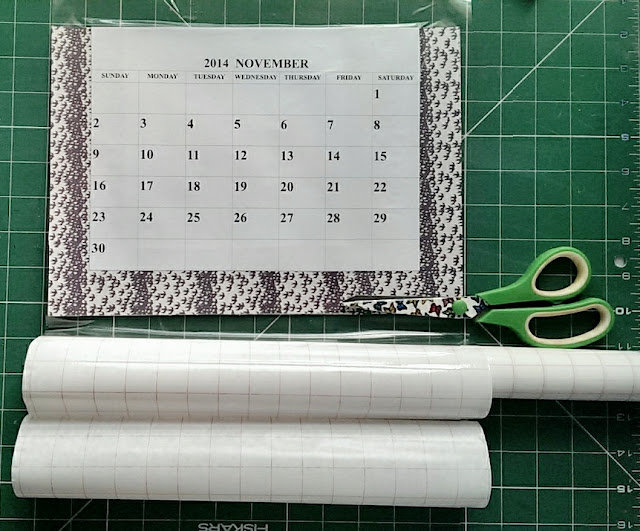
You'll also need some clear sticky back paper (WHS), Some Scissors, a scalpel, a glue stick ,some A4 Card and of course some lovely patterned paper....This could be anything you'd like, from your childs drawings to some leftover wrapping paper...


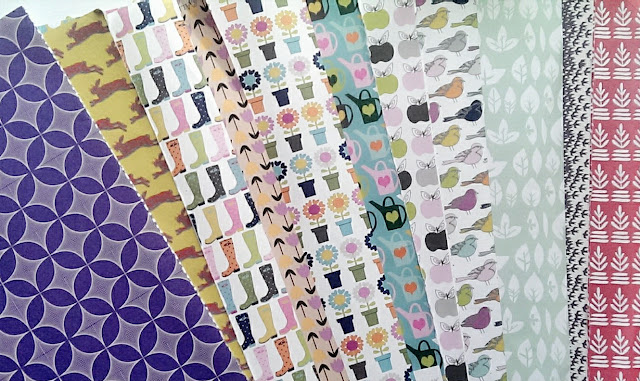
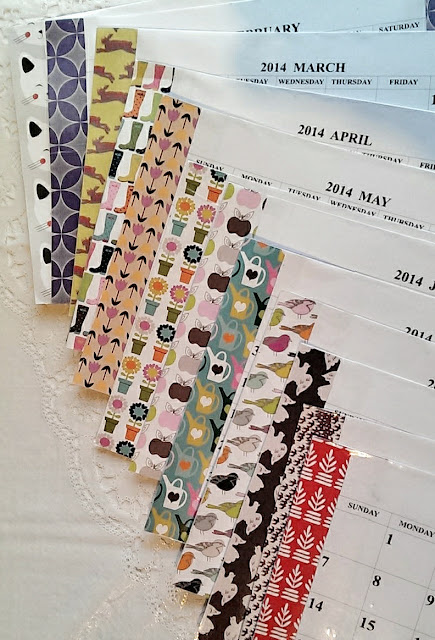
I've been saving these lovely "print and pattern" portfolios from homemaker magazine for a project like this...
 There are some gorgeous prints from Stephanie Thannhauser from ric-rac (the bird and the boot print being my favourites), Alice Rebecca Potter (the red print being perfect for December) ,Rebecca Hoyes , the senior designer for habitat (Febuary's purple graphic print) and Luzelle van der westhuizen from Mengsel (Whose gorgeous Cat print adorns My January)


If you are a whizz with Photoshop, unlike me, you can probably do this first step on your computer.
But I am going to show you how I did it the "old fashioned way" with scissors and glue:

STEP 1: MAKING YOUR CALENDAR DESIGN


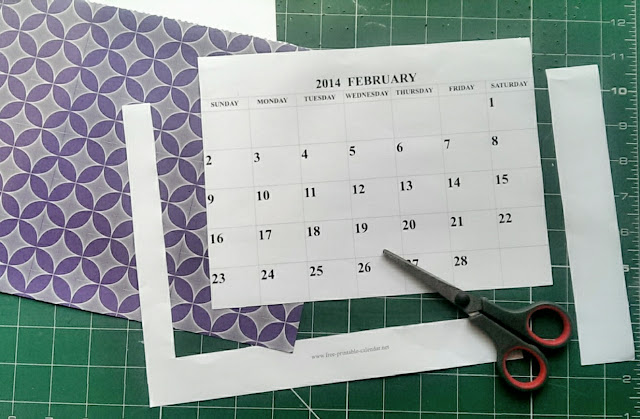
I downloaded and printed out my chosen calendar design...I went for quite a simple one with squares to write in for each day. I then trimmed off the blank edges around each calendar month.

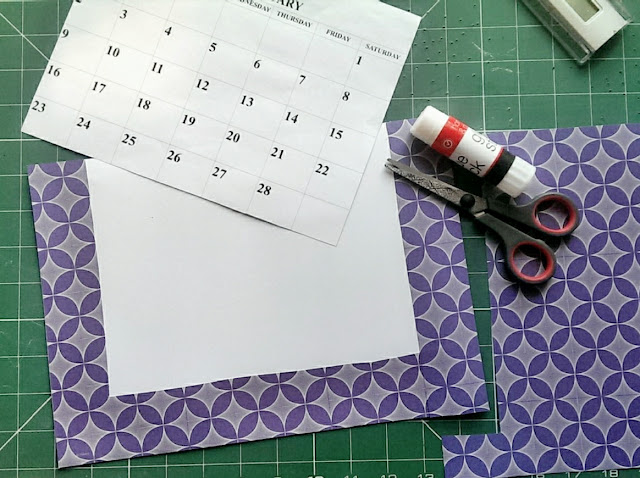
When I had chosen my prints for each month, I glued a border of these onto some white card for each month ( I only glued a border of the printed paper because I'm a cheapskate frugal, and wanted to save some of my lovely printed paper for a future project...YOU can of course, just cover the entire card with your printed paper)
I then glued the printout of each month onto the card.


You can of course use some spray adhesive to ensure the papers are thoroughly glued on...in which case you can probably skip the next step... 
But I wanted my calendar to work a bit like a whiteboard, so that I can wipe off any unwanted scribbles as I go...
So I decided to stick with the glue stick (pun intended) and cover my calendar sheets with sticky back plastic:

STEP 2: COVERING THE CALENDAR DESIGN WITH STICKY BACK PLASTIC


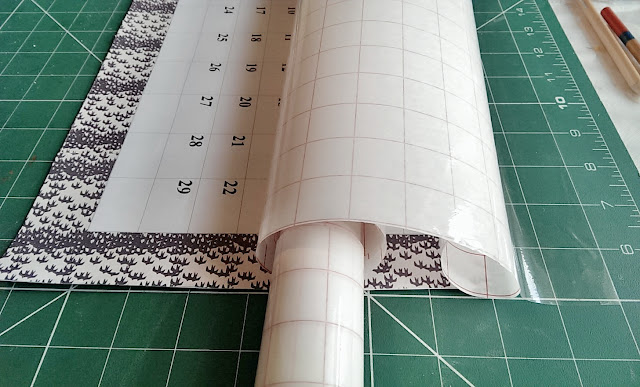
Tip: As you can see in the picture above the roll of sticky back plastic is quite a lot wider than my calendar sheets....Use some scissors and cut the sticky back plastic to size ON THE ROLL to reduce waste and make this job easier. Roll up the off-cut and tape in place...


This job is easier if done on a cutting mat like mine, where you can use the grid as a guide.
Stick down the top of the Sticky back plastic on your surface, then place your calendar underneath the roll, taking care that they are aligned with each other. Pull the SBP taught over the calendar and as you peel off the backing, smooth  the SBP down. Take your time...you don't want any creases!!


Use some scissors....or better yet, a scalpel (If you have a cutting mat) to trim off any excess.
Repeat with all 12 months...


Now you have made your calendar bit, its time to make the Chalk Clipboard...

STEP 3: CHALK CLIPBOARD


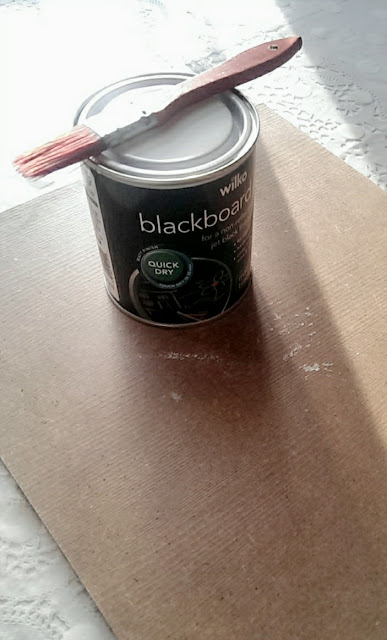
Paint your piece of wood with chalk paint


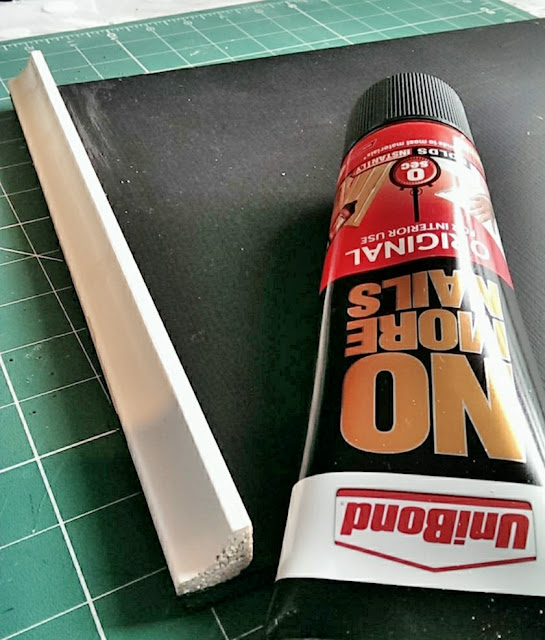
 Attach some wooden listing to the bottom of your chalk board. I used "No-more-nails", but any strong adhesive, even a few tack-nails will do the job!
Paint this as well.

STEP 4: HARDWARE


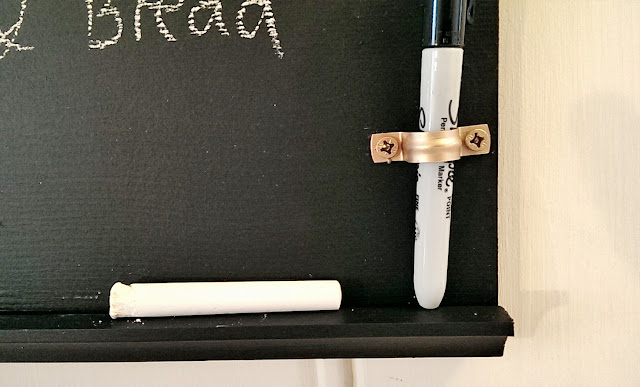
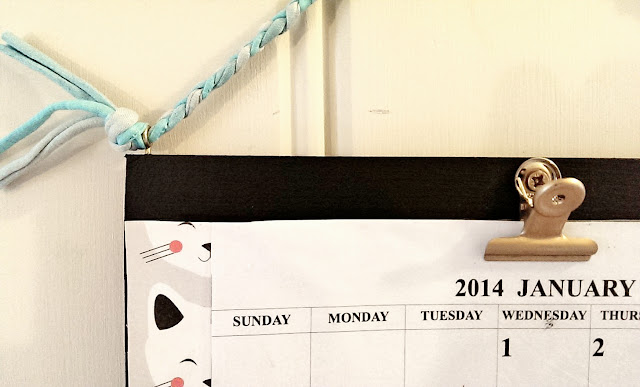
I used some Antique gold Rub'n'buff to make my Paper clip, pipe bracket and screws match.
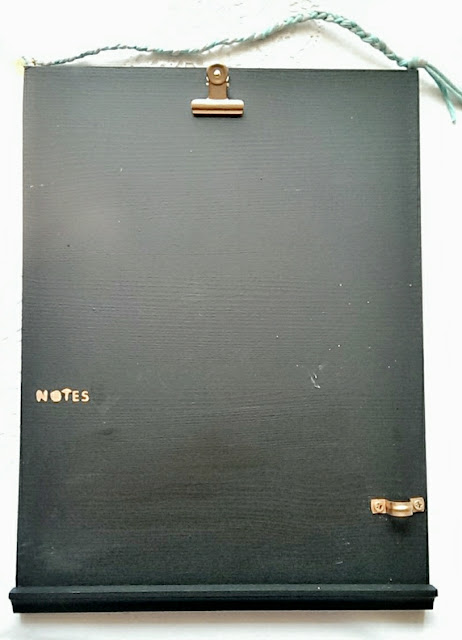
Worked out the layout of where everything should go, then attached using my drill.


STEP 6: THE DETAILS


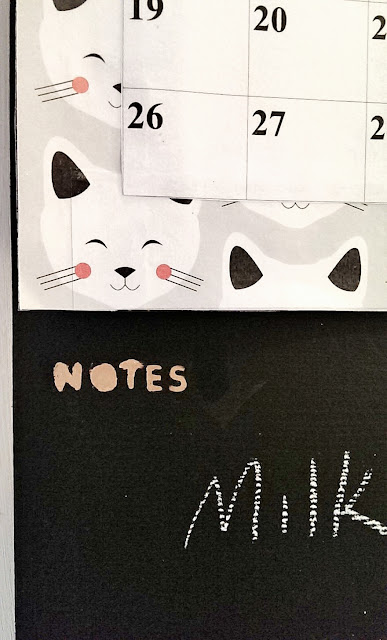
Using a template, I used my rub'n'buff to mark out the word NOTES.


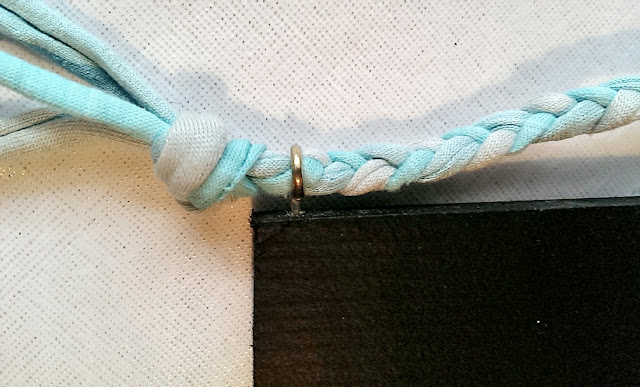
I attached a couple of eye-hooks at the top of the Chalkboard , and treaded through 3 strings of textile yarn, that I pleated before knotting off at the ends...

THAT'S IT!


My very own, unique Calendar/Chalkboard home Organiser..


with a little shelf to put my chalk on, and a space for my pen...(I still need to get a whiteboard pen)


Feeling more and more ready for a fantastic year!


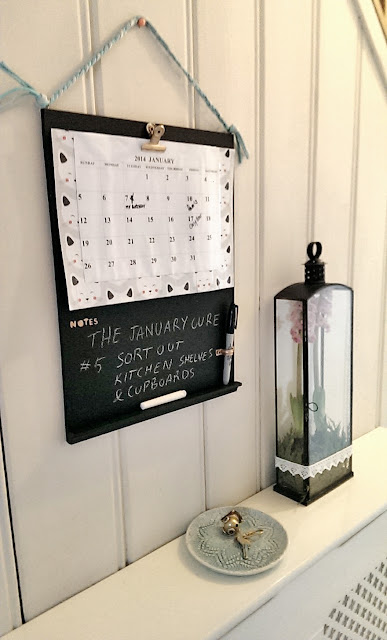
Hanging in my hallway where it is easily accessible for updates and notes!

Notice my comment on the board about the January Cure??
I am lagging a bit behind, but am hoping to have task #5 done today!!

The last few tasks since my last post have been more about resetting your mind:
Task #3 was to spend 10 minutes observing and visualizing your space, trying to imagine it at it's best and working out what changes you would have to make to realise this.
Task #4 was Creating an "Outbox" ...a space designated for the clutter around your home, where they must sit for at least a week , or until you decide their fate: bin, charity shop, e-bay or back in the house!
The idea is that by leaving things in the outbox, you gradually release your financial or personal attachment to them...
I am already feeling ready to let go of some of my "nic-nacs" (as my mother-in-law calls ALL my things)...

I have also signed up for #100happydays.
An easy but life changing challenge: Take a picture of something that makes you feel happy every day for the next 100 days, and upload these with the hashtag #100happydays to instagram, twitter or facebook....the idea being that by raising your own awareness of what makes you happy will lift your mood and improve your life.
If you want to do this sign up here !

Lets try to make 2014 the best year ever, and fill all those empty squares on the calendar with joyfull moments!!

xxx
June


"