
....to help reset your mind!
New year...fresh start! I LOVE the thought of starting a new year with a clean sheet...
....and what better symbolises this than a brand new Calendar?
All those empty squares, ready to be filled in with life as we walk through time!!
So today I want to share my DIY calendar and Blackboard organiser...

Seems like only yesterday we were still in 2013, in holiday mode and only really worrying about what to wear for New years eve(?) ...Then BANG, back to reality: Mr started back at work, Little Miss Moo was back at school, I started purging the house with the January cure, had my birthday AND finally found some time for this years first DIY....HECTIC!
How appropriate then, that my first make should be this Calendar, so that I can plan ahead and keep a bit more organised for weeks like this....because, no doubt, this is not the last time this year when things are going to feel a bit out of control....
I could've of course gone out and simply bought a calendar, but this way, I got what I really wanted...and for next to nothing!!
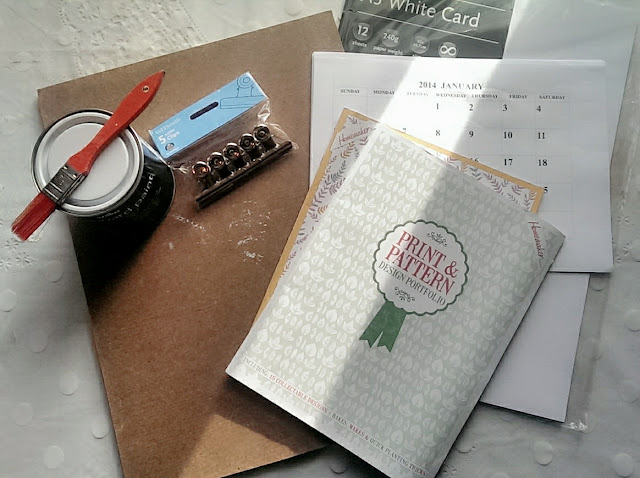
To make one like mine, you will need:
a piece of wood and some wooden listing for the chalkboard (I was lucky I had some offcuts in the shed) Chalkboard paint (We had recently purchased some for Little Miss Moo's room...post coming soon....Or you can make your own in ANY colour like I did here). Hardware: Spring paper-clip (I got mine from WHS), 3 small stud screws, 2 Eye hooks and a pipe bracket ....and some Rub'n'buff to make all the hardware match.
You will also need some strong contact adhesive (like No More Nails) , a drill and drill bits and something to string it all up with (I used pleated textile yarn, but any rope will do)
For the actual Calendar, you can download and print off a variety of styles for free from here.
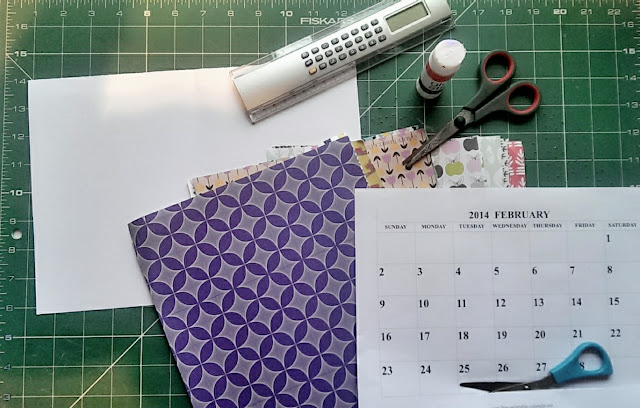
You'll also need some clear sticky back paper (WHS), Some Scissors, a scalpel, a glue stick ,some A4 Card and of course some lovely patterned paper....This could be anything you'd like, from your childs drawings to some leftover wrapping paper...
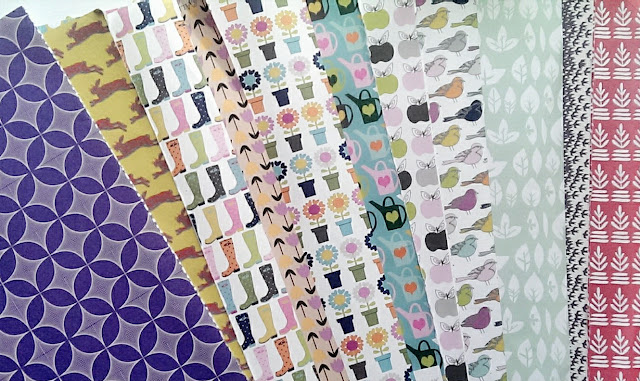
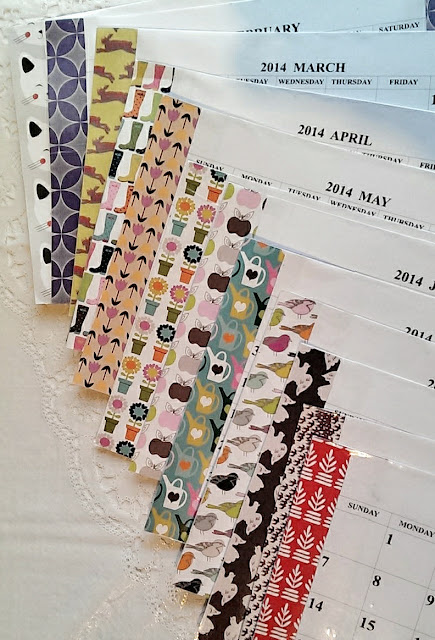
I've been saving these lovely "print and pattern" portfolios from homemaker magazine for a project like this...
There are some gorgeous prints from Stephanie Thannhauser from ric-rac (the bird and the boot print being my favourites), Alice Rebecca Potter (the red print being perfect for December) ,Rebecca Hoyes , the senior designer for habitat (Febuary's purple graphic print) and Luzelle van der westhuizen from Mengsel (Whose gorgeous Cat print adorns My January)
If you are a whizz with Photoshop, unlike me, you can probably do this first step on your computer.
But I am going to show you how I did it the "old fashioned way" with scissors and glue:
STEP 1: MAKING YOUR CALENDAR DESIGN
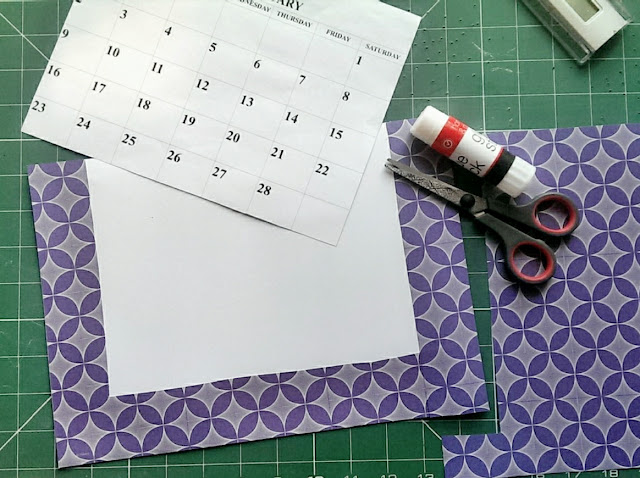
I downloaded and printed out my chosen calendar design...I went for quite a simple one with squares to write in for each day. I then trimmed off the blank edges around each calendar month.
When I had chosen my prints for each month, I glued a border of these onto some white card for each month ( I only glued a border of the printed paper because I'm a cheapskate frugal, and wanted to save some of my lovely printed paper for a future project...YOU can of course, just cover the entire card with your printed paper)
I then glued the printout of each month onto the card.
You can of course use some spray adhesive to ensure the papers are thoroughly glued on...in which case you can probably skip the next step...
But I wanted my calendar to work a bit like a whiteboard, so that I can wipe off any unwanted scribbles as I go...
So I decided to stick with the glue stick (pun intended) and cover my calendar sheets with sticky back plastic:
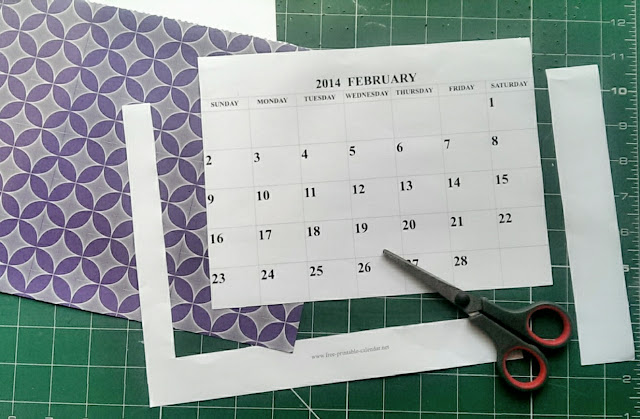
STEP 2: COVERING THE CALENDAR DESIGN WITH STICKY BACK PLASTIC
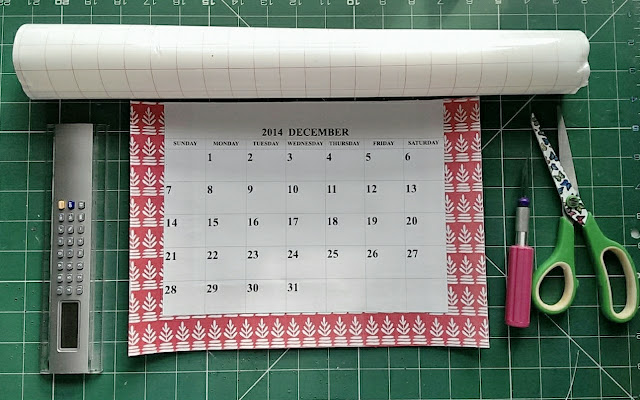
Tip: As you can see in the picture above the roll of sticky back plastic is quite a lot wider than my calendar sheets....Use some scissors and cut the sticky back plastic to size ON THE ROLL to reduce waste and make this job easier. Roll up the off-cut and tape in place...
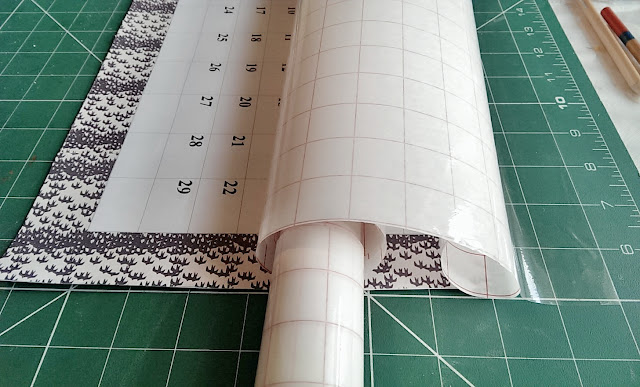
This job is easier if done on a cutting mat like mine, where you can use the grid as a guide.
Stick down the top of the Sticky back plastic on your surface, then place your calendar underneath the roll, taking care that they are aligned with each other. Pull the SBP taught over the calendar and as you peel off the backing, smooth the SBP down. Take your time...you don't want any creases!!
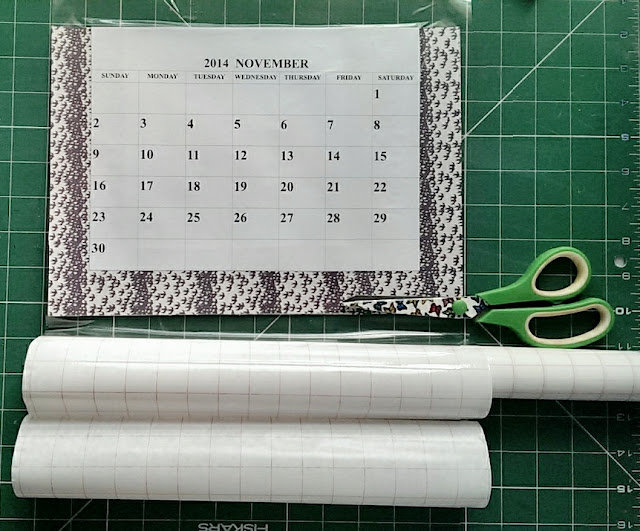
Use some scissors....or better yet, a scalpel (If you have a cutting mat) to trim off any excess.
Repeat with all 12 months...
Now you have made your calendar bit, its time to make the Chalk Clipboard...
STEP 3: CHALK CLIPBOARD
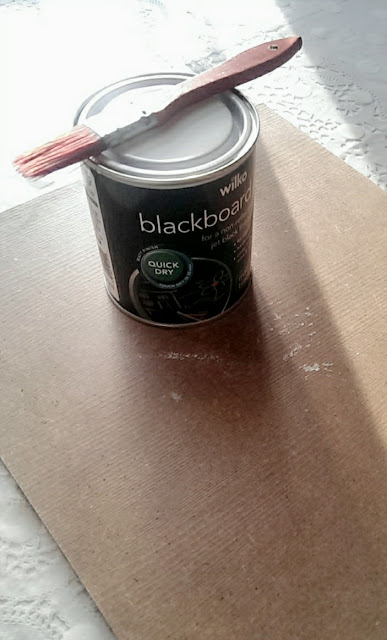
Paint your piece of wood with chalk paint
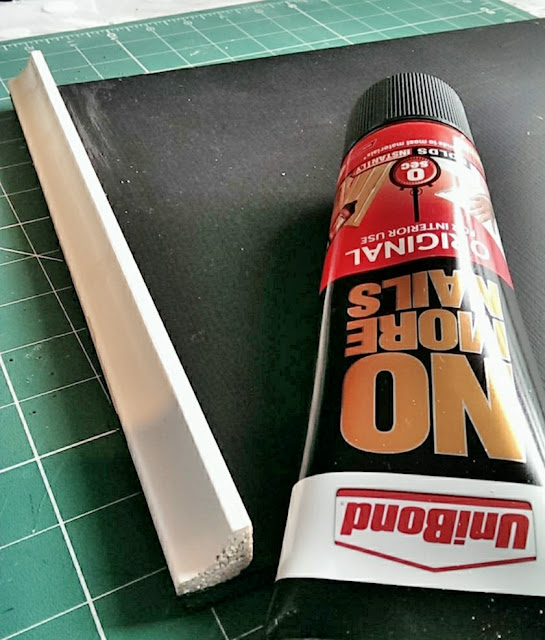
Attach some wooden listing to the bottom of your chalk board. I used "No-more-nails", but any strong adhesive, even a few tack-nails will do the job!
Paint this as well.
STEP 4: HARDWARE

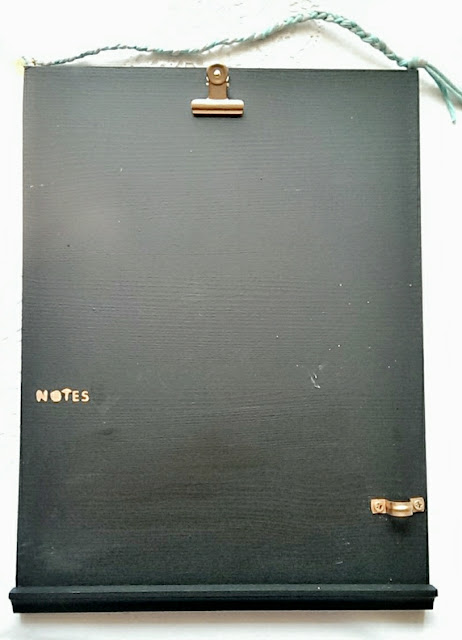
I used some Antique gold Rub'n'buff to make my Paper clip, pipe bracket and screws match.
Worked out the layout of where everything should go, then attached using my drill.
STEP 6: THE DETAILS

Using a template, I used my rub'n'buff to mark out the word NOTES.
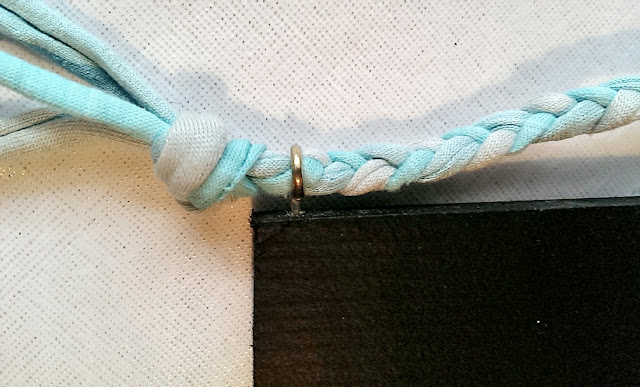
I attached a couple of eye-hooks at the top of the Chalkboard , and treaded through 3 strings of textile yarn, that I pleated before knotting off at the ends...
THAT'S IT!
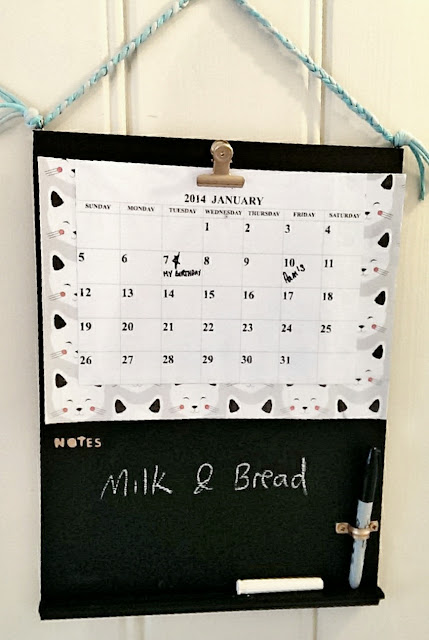
My very own, unique Calendar/Chalkboard home Organiser..
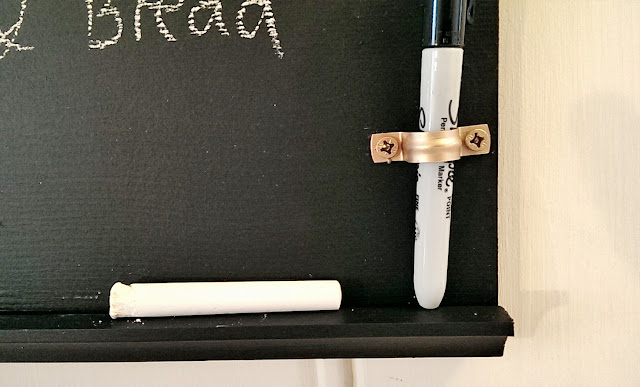
with a little shelf to put my chalk on, and a space for my pen...(I still need to get a whiteboard pen)

Feeling more and more ready for a fantastic year!
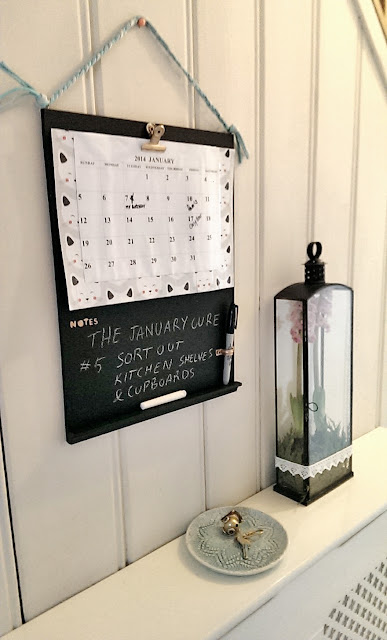
Hanging in my hallway where it is easily accessible for updates and notes!
Notice my comment on the board about the January Cure??
I am lagging a bit behind, but am hoping to have task #5 done today!!
The last few tasks since my last post have been more about resetting your mind:
Task #3 was to spend 10 minutes observing and visualizing your space, trying to imagine it at it's best and working out what changes you would have to make to realise this.
Task #4 was Creating an "Outbox" ...a space designated for the clutter around your home, where they must sit for at least a week , or until you decide their fate: bin, charity shop, e-bay or back in the house!
The idea is that by leaving things in the outbox, you gradually release your financial or personal attachment to them...
I am already feeling ready to let go of some of my "nic-nacs" (as my mother-in-law calls ALL my things)...
I have also signed up for #100happydays.
An easy but life changing challenge: Take a picture of something that makes you feel happy every day for the next 100 days, and upload these with the hashtag #100happydays to instagram, twitter or facebook....the idea being that by raising your own awareness of what makes you happy will lift your mood and improve your life.
If you want to do this sign up here !
Lets try to make 2014 the best year ever, and fill all those empty squares on the calendar with joyfull moments!!
xxx
June
9 comments:
Love, love, love it June - very clever - can I feature it on my blog? : ) PS: Thanks for mentioning me x
Thank you so much ric-rac! So glad you liked it! It would be an honour if you would feature it on your blog!! Of course I had to mention you..I absolutely adore your prints!!xx
Thank you so much ric-rac! So glad you liked it! It would be an honour if you would feature it on your blog!! Of course I had to mention you..I absolutely adore your prints!!xx
Congratulations, simple, neat and clever
Hope you don't mind I copy the idea/design
Glad you liked it anonymous! No problems! that's why I post tutorials like these...in the hope that I will inspire others!!
Thanks for popping by!!
June
Great project! I just figured out how to use Google plus communities that's where I found you, becoming a new follower!
Welcome to Nostalgiecat Krystie! Thanks for your kind words!
Time really flies fast. It's already 2015 in just a couple of months, and you have to prepare another calendar to mark your days in it. I look forward to seeing new themes and patterns for your DIY calendar by then. Cheers!
Faye Fowler @ Master CopyPrint
Thanks for stopping by Faye! I've not really thought that far ahead yet, but I'm sure I will come up with something new for 2015!
Post a Comment