Friday, 11 September 2015

DIY wire laundry baskets


I am so happy!
I've taken my own advice from my last post, and prettified some of my laundry essentials: I've de-cantered my laundry detergent, fabric conditioner and stain remover into some pretty bottles and jars, and even treated myself to some new wooden pegs that I'm keeping handy in  a nice storage basket...It is a good start...and doesn't it look good?

But the stars of my new look laundry station are these DIY wire laundry baskets.
Not only do they look good, but they are also super functional, as they are on castor wheels, making them easy to move around.
And of course, being a DIY, they are custom made to fit that little space under the shelves in my mini-hallway just outside the bathroom!

In today's post I will show you how I made them.
Of course you should make them to fit your own space, and maybe you can think of another use for the, other than laundry...They would also make great craft or toy storage, I think!


Super useful!
It took me 1 day to make two of these laundry baskets, but as I have done all the hard work of figuring out how to for you, it shouldn't take YOU that long, making this an ideal weekend project!

Here's the step by step:


YOU WILL NEED:

Piece of wood, cut to size (I used Plywood)
2 X Galvanised mesh panels (or you could use chicken wire)
Screws
Canvas (I used some that I had left over, but something like this would also look nice)
polymer clay (you'll need 2 packets)
Twine

TOOLS:
Jigsaw/wood saw
Sandpaper
Drill and drill bits
Wire cutters
pliers
hammer
Pencil
Sewing machine and thread
Scissors

BEFORE YOU START....

When deciding what size to make your laundry basket, obviously keep in mind the space it is going to be in, but also , to make life easier for yourself, consider your materials...
For instance, the size of the mesh panels I bought for this project made me change my original measurement when I cut the wood for the base, so that I knew that two of these panels would be sufficient to fit around the wood, and with a little (Ca 1cm) to spare...


This will make more sense to you further down this tutorial.

Now lets get started:


So baring in mind what I mentioned above, cut your wood to size, then use some sandpaper to remove any splinters or rough edges.
Attach the castor wheels to the corners of the wooden base. Make sure you drill pilot holes into the wood before screwing the castor wheels in place.
The reason I attached the castor wheels on to the wood before I got started with the with the wire mesh, is because the height of the wood with the wheels attached would help me decide how tall I wanted the wire basket to be....


And considering the space I wanted my laundry baskets to fit in to , this helped me determine the measurement to which I cut my mesh.
Using wire cutters, I snipped the mesh as close to the previous square in the mesh as possible, this way avoiding any sharp sticky-outy bits!
I then used my pliers to bend over (by ca 1cm/1 square) and flatten the top of the entire length of each cut-to-size mesh panel. I did this for two reasons: To minimize any sharp bits of mesh along the top of the basket, but also to add a bit of strength to the structure...


I Then folded each of the panels, by pressing along a square edge, to fit around the wooden base.


This is where my earlier advise will come in handy:  If you considered the length of the mesh panels when you cut the wooden base to size, two of these panels should fit perfectly around the base, with a 1 cm/1 mesh square extra lip at the corners where the two panels meet, for attaching them together.(More on this a little further down...)


Starting at the corners, where the mesh panels are bent, use your staple gun to fix the mesh to the base. Try to get the staples to form a nice, neat pattern, if you can....it'll look nicer!
Use a hammer to gently tap any protruding staples flat to the wood..
NOTE: Make sure the two mesh panels are level with each other at the top of the basket before stapling in place!

At the corners, where the two mesh panels meet, use your pliers to bend the little overlap into place all the way up to the top of the basket. Then attach some florist wire near the base of the basket, by twisting using the pliers, as shown above. Use the wire to "sew" the two mesh panels together where they meet. Use your pliers to tighten  the wire throughout for a neater look...


That's it: 
You're Laundry basket is almost done:


Now, all you'll need to do is make a canvas lining, so that your laundry doesn't get snagged on any protruding mesh or wire we may have missed:

SEWING THE CANVAS INSET:

I am, as often stated here on Nostalgiecat, NOT a sewing expert, but the canvas lining for these baskets are really easy to make, and require hardly any skills with a sewing machine.
The trick is to make the pattern do most of the work for you, so that all you'll need to do is stitch it together in 4 places.
I simply laid my canvas out flat on the ground, then drew up the pattern, below, on to it and cut out...


Insert your own measurements , taken from the inside of your basket, to this pattern, and you can whip this basket lining up in no time...
The extra 15 cm to the height of the canvas lining compared to the height of the basket, will form a nice fold to the top edge of the basket...


No need to hem up the top edges of your lining , as you can simply fold it under when placed in the basket.


ADDING THE FINISHING TOUCH...

If you like the look of my little basket labels, these are also really quick and easy to make:


In a similar fashion to what I did HERE, I simply rolled out a ball of white polymer clay, and stamped the words into it...I used a butter tub as a template for the shape, then cut out....and I used a straw to make the holes in the clay....
Ovenbake according to the instructions on your polymer clay and leave to cool...


 I then just neatened up the edges with a bit of sandpaper, and used a pencil to color in the wording..

Then I attached the clay labels to my laundry baskets by tying on with a bit of twine...

Simple and stylish...


The perfect solution if you have an awkward space, like me, that you are struggling to find a use for...now you can squeeze a little handy storage in!


I love how they've neatened up this space in a useful way...Goodbye junk-space, Hello beautiful linen baskets!

I hope that you enjoyed this tutorial. But if you have any questions, please leave a comment below and I will get back to you asap. And if you like this or any of my other DIY tutorials, please spare a minute to give me your vote for best DIY and craft blog in the Amara interior blog awards, by clicking on the link below:

IMAGE DESCRIPTION
Please vote for me for best DIY blog
Oh, and if you like the look of my DIY laundry labels on the pretty bottles and jars, sign up for my weekly newsletter, by entering your e-mail address in the minty-blue bar at the bottom of the page, as I will treat all my subscribers to a free download of my design + instructions on how to apply them to plain glass jars in next weeks newsletter!

Next week I am hoping to announce a very important project I am involved with...
...stay tuned , you don't want to miss it!!


Tuesday, 8 September 2015

Beautiful Laundry Essentials

Image from Indulgy
Last week I talked about how choosing nicely designed house keeping and cleaning essentials could improve the aesthetics of your everyday home living, and I investigated classy storage options for these, no matter how much space you've got in your home, can help you keep organised.
This post is a continuation of this subject, as I will be talking about THE LAUNDRY.

Anybody with a busy household will know that keeping on top of your laundry pile is a never ending task, and inevitably, your washing will be a visual part of your home life....
If you are lucky enough to have a room  in your home dedicated to your utility and Laundry needs, you may consider your utility room as one of the most used spaces of your home, so in this post I am sharing some images from the www. of some beautifully designed utility rooms that are both functional and stylish for your inspiration...

But even if you, like me, are not fortunate to have such a room in your home, there are lessons to be learned from these spaces: 


Image from Pottery Barn

My washing machine is in the kitchen, and without any designated area for my laundry essentials, it ends up all over the house.
As it is at the moment, Bigger laundry items , like towels and bedding invariably gets hung over doors around here when the weather does not permit outdoor drying...Installing a wall hung airer/drier will free up valuable floor space and give you a more flexible option when hanging your laundry to dry, especially in the winter months...

Image from House and garden
I keep my detergents and other laundry essentials in my already cramped cupboard (this is also where I keep my cleaning supplies) under the kitchen sink, but decanting these into pretty jars and bottles, would mean that it wouldn't look so bad if I was to leave them out on the worktop...
Image from country living
Using pretty baskets to sort the laundry in, in or near rooms like the bathroom or the bedroom , would make it easier to carry the washing loads to and from the washing machine, as well as looking a lot better than a pile of dirty clothes on the floor...

Image via Clean and scentsible
And of course, choosing nicely designed storage and essential tools for the Laundry, like a ironing board with a nice cover, will make it less of an eyesore in your home when in use...

I've picked out a few useful, yet good looking products, below to help you keep your laundry storage and the job itself more stylish:


1/ House by John Lewis laundry hamper 2/Nomess Copenhagen gold clothes hanger 3/Black washing tablet box from John Lewis 4/Ferm living clothes pegs in a bag 5/Garden trading peg bucket 6/Brabantia Black Dunes Ironing Board 7/John Lewis Beech Wood Airer 8/Iris Hantverk Clothes Brush 9/Brooklyn Laundry Liquid

Lastly, I love this cool and useful poster, below, explaining all those washing symbols that you may find on your clothes tags:
Laundry symbol poster from Lettered and lined
Perfect for dressing up the walls in (should you be so lucky) laundry or utility room!

I was planning on covering office and paperwork organisation and even kids toys and storage in my BEAUTIFUL UTILITY blogpost series, but as I am currently very busy working on what is probably the most important project I've ever undertaken  (All will be revealed very soon) and loads of other creative projects and collaborations, I am going to leave it here for now....
I have loads of interesting news to share with you all soon, and I am so busy at the moment, sometimes I'm just spinning around on the floor wondering what to do next (LOL)...
But I will try to squeeze in another Utility based DIY for you all towards the end of the week, as I am attempting making my own super functional Laundry baskets!
So do pop back for that!

Oh, and please spare a minute to give me your vote in the AMARA INTERIOR BLOG AWARDS for BEST DIY AND CRAFT BLOG, by clicking on the link below:

IMAGE DESCRIPTION
Please vote for me for best DIY blog


Saturday, 5 September 2015

Beautiful Utility ...My back to basics blogpost series!


In my recent series of posts, labelled Beautiful Utility, I have been investigating my own theory that your home's everyday essentials, All those things that you use in your everyday life, from making the first cup of coffee in the morning, to general housekeeping and cooking... should be equally stylish as your interiors to become a more integrated part of your home and thus improving the aesthetics and quality of your home-life.

Considering design as well as functionality when purchasing essentials for your home and considering storage of these tings in an aesthetic way, will make your home feel more pulled together and maybe even make the jobs around the house seem a little less of a chore...

This is a round up of my posts covering this theme,including some useful, put pretty DIY's,  so far....more to come.
Click on the images to see the full blogposts on each theme:


IMAGE DESCRIPTION
Introducing my beautiful Utility post series


My first post introduces my theory and gives you an indication of the theme's I'll be covering.
IMAGE DESCRIPTION
Inspirational coffee stations
My first post started as I start my everyday: with coffee...posting some inspirational images from the www. of beautiful coffee stations...
IMAGE DESCRIPTION
My coffee station essesntials
My second post reveals my own coffee station...
IMAGE DESCRIPTION
DIY print cork coasters
A fun an easy DIY for your hot drinks...
IMAGE DESCRIPTION
Stylish sink-side organisation and tools
Then on to washing up: How to keep your sink-side looking stylish...
IMAGE DESCRIPTION
DIY print tea-towels
Create your own stylish printed tea-towels for all sorts of useful purposes...
IMAGE DESCRIPTION
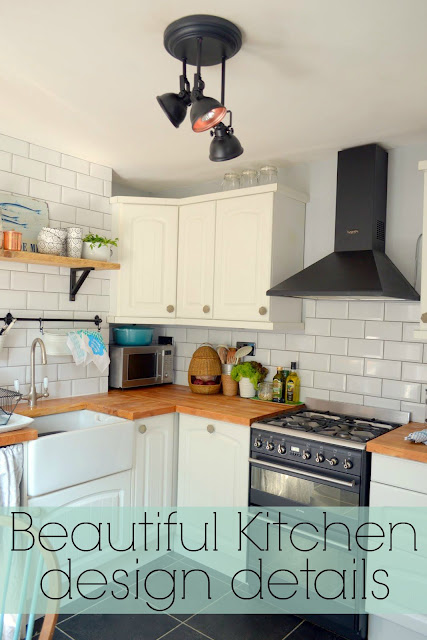
Beautiful Kitchen design Details
Moving on to stylish kitchen and cooking essentials...
IMAGE DESCRIPTION
DIY wooden bead trivet
A simple and useful DIY that will add some style to your kitchen...
IMAGE DESCRIPTION
Beautiful House keeping essentials and storage
How to make your housekeeping and cleaning supplies and tools look stylish and talking about storage stations...
IMAGE DESCRIPTION
BEAUTIFY YOUR LAUNDRY
Then, lastly (for now) I am talking about how to make your laundry essentials more stylish...

There will be more to come in the future in this blogpost series, such as offece and paperwork organisation and even Kids toys and storage...watch this space!

Thursday, 3 September 2015

household cleaning essentials

Image from An angel at my table
Today's subject for my beautiful utility post series is Household cleaning.
I've lost your interest already, haven't I??
But wait!
Nobody likes cleaning, ok, I get that...and if you are anything like me, your cleaning tools and supplies are not what you want to spend your money on, right?
But in all honesty, doesn't your arsenal of cheap plastic brooms and buckets, ugly, branded bottles of cleaning products and your old, washed out cleaning cloths kind of ruin the aesthetics of your home? 
I've been stuffing all that crap under my kitchen sink for years...outta sight , outta mind, right?
Only, the truth is : Housekeeping and cleaning is an ongoing job...never ending (Uuuurgh!) and inevitably all that stuff will be found laying around the house as it's being used...or not put away, like little eyesores in my otherwise well thought out interior!
Image found on Elements of style
I'd love to have a separate room to house all my cleaning and laundry tools and supplies...a Utility room! But in our tiny Victorian terraced cottage, space is at a premium, and unfortunately such a luxury is in-achievable...And I'm guessing that I'm not alone!
So in terms of storing my cleaning supplies, I have to get creative, as the little space under the sink is quite frankly insufficient...I mean, it may be fine for housing a few bottles of bleach etc., but this does not help me hide away the hoover, buckets and brooms and other large things needed around the house....things that I quite frankly do not want to feast my eyes upon whilst eating at the kitchen table, or trying to relax on the sofa.... Their bright and ugly plastic-ness only serves as a reminder of all things not done in a day!
Image from Kitchen source book
Just a little area, a spare nook in our home would have been great, as keeping all those household essentials i one place would be ideal.

Image from A beautiful mess

I'd love to have a peg-board covered wall to organize my cleaning supply storage and I'd use wall hooks to hang dusters and brooms from....


Even just a few shelves on a wall where I could keep everything handy but out of sight would be great...
Image from BHG
I'd use pretty storage baskets to house unsightly washing paraphernalia and decanter all my cleaning liquids into pretty jars and boxes to make it visually more pleasing...

Image from Ollie and Seb
But unfortunately I have not got any such spare nook in my tiny home . At least not in a suitable space....

The only option I currently have, is to convert the little cupboard under the stairs, which is currently being used as a general dumping ground for stuff, into a designated storage station for all things household...
And quite frankly, it is not a bad option at all, and I count myself lucky to have such a space...
It will be my next project in the house.

If you have not got the luxury of having such a space to your disposal, why not try to convert a free standing cupboard in your home into your household supply station, like below:

Image from Kitchen source book
To convert such a small space to hold things like the hoover, mops and buckets and other necessary cleaning supplies, will take a bit of planning, and a few clever ideas to maximize the storage potential of the space, like using the back of the door, as pictured, below....
And if you'd like to follow along at how I do mine, sign up to my weekly newsletter by entering your e-mail in the bar at the bottom of this page, as I will be posting updates on my cupboard design and makeover over the next few weeks...

Image from Kitchen sourcebook
But, even with a great storage space for all my housekeeping and cleaning equipment, there is still the element of the ongoing nature of keeping a home tidy and fresh to consider, and as mentioned above, this stuff inevitably becomes a part of a home's make-up...

Image from House to home
So my solution to prevent garish eyesores in the form of cheap plastic dusters etc. laying about is to pledge to invest in some well designed, functional but good looking cleaning tools and other household essentials, along with the aforementioned stylish storage solutions...
Here's a few nice examples:


A handy cleaning caddy ,will mean that I can carry what I need for the job around the house in style, and a nice looking bin is top of my wishlist for the kitchen. The idea of having beautiful tools, like a good-looking mop (did I just say that??) and bucket appeals to the glamour-puss in me (I have been known to clean my floors wearing high heels whilst dancing to loud music....I mean: Making the best of a dreary situation, like cleaning, has got to be a good thing , right??) And I've recently replaced my broken plastic duster with a gorgeous ostrich feather one, and quite frankly, I now proudly display that thing in my kitchen. I've also been on the look-out for a nice long-handled dustpan and brush to replace my "get-on-your-hands-and-knees" plastic set for ages, and love the one in my collage above.
When researching for this post, I must say that John Lewis has the most stylish range of cleaning and household products out there, and they are NOT paying me to say that! I adore the packaging on their Brooklyn range of cleaners...in fact their entire Brooklyn home range  is beautifully designed, and I'll be sharing more from it next week when I tackle the subject of Laundry!

Image from Garden trading

In my recent series of posts, labelled Beautiful Utility, I have been investigating my own theory that your home's everyday essentials should be equally stylish as your interiors to become a more integrated part of your home and thus improving the aesthetics and quality of your home-life.

Considering design as well as functionality when purchasing tools for housekeeping, will make your home feel more pulled together and maybe even make the jobs around the house seem a little less of a chore (Optimistic, I know)...At the very least, if your duster is as gorgeous as mine, you wont mind taking it for a spin every now and then!

Pop back next week to see me trying to bring some style into doing the Laundry!

"