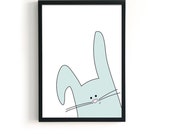
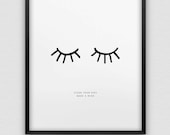
Thursday, 23 April 2015

One Room Challenge

DIY Origami Lampshade

If you are new here: Hi and welcome to Nostalgiecat !
You can read more about me and Nostalgiecat here, and you can catch up with my One Room Challenge journey so far by clicking on the thumbnails in my sidebar ->
If you have no idea what the One Room Challenge is all about, please visit Calling it home for the low-down and links to all the fabulously talented interior bloggers taking part!

I decided to join the One Room Challenge™ as a linking participant, as I needed a kick up the backside to redecorate my 5 year old daughter, Mia's room.
Being week 4 of the Challenge, It is all coming together now, and apart from some last finishing touches, like finishing off her DIY desk and making some funky cushions, it is pretty much done.
So today I am holding back a bit in terms of images of the room and instead showing you all how I made this DIY origami lampshade to fit in with our room design:


Mia had her heart set on one of these origami lamps from Studio Snowpuppe, but as it was not in our budget, I decided to DIY one....and it cost me less than £1 to make!!
£1??? I hear you say!! YEP! £1!!
I will show you how!


I bought a roll of wallpaper lining at my local Pound shop for £1, because I wanted a continuous long sheet of paper (And I still have loads left ) But you can always stick together several sheets of A3 paper (That way you can choose whatever colour you'd like)...just make sure it is quite a weighty paper.

Because I used the plain Wall paper lining paper, I wanted to add some colour to it, and I wanted it to fit in with Mia's chosen colour scheme: So the first thing I did was to mix up some of the paint I've used in Mia's room (Some minty coloured emulsion) with some water in a spray bottle.
Then I rolled out a long lenght of the lining paper, tacked it down to my work surface and sprayed the paint mixture on, creating the fun paint splatter effect you can see on the finished lampshade, above.


I let the paint dry fully, before moving on to the next, and MOST IMPORTANT step:
FIREPROOFING THE PAPER:

The MOST important thing to consider when you make a lampshade out of paper, is safety, So always fire-resist your paper before folding!

I already had a bottle of Fire Check spray from a previous project, that I simply sprayed both sides of the paper with,  but you can also make your own fire proofing solution with borax and water...See how here.

NOTE: Paper can never be fully fire-proof, but this will make the paper fire-resistant (meaning it won't burn without contact with a flame or ignition source).


Then, I ironed the paper to make sure it was nice and flat (and fully dry) before I started gridding out the folding pattern on the back.

I have made this downloadable template, so that you can easily reproduce the pattern on your paper:


It has some basic instructions on it as well, make sure you read these properly! 
I have added the actual measurements that I used to the template, but feel free to adjust these to fit.

Tip: Print out a copy or two, cut out the sample pattern and use it to practice the folding on!

Ok...So that is the pattern you want to reproduce on the back of your paper:


Use a pencil and ruler to draw up the folding grid...the pencil lines will actually help you create neat folds later on...


When you have finished gridding out the folding pattern, cut off any excess paper, and you are now ready to start folding your lampshade.

If you have never done any origami folding before ,watch This video to get a basic understanding of "mountain" and "valley" folds .
And do practice on a copy of the template first, to get the feel of the folding!
I am not going to lie to you, it can be a bit tricky to fold, and very tricky to explain how, but I will do my best:


Step 1: Accordion folds

You'll need to divide the entire length of the paper into 24 equal parts with these accordion folds.
Start by folding the vertical lines into mountain AND valley folds Fold one way, then fold it back the other way creating a reverse fold. Take your time to get these first folds right, this will make it easier to fold the rest of the lampshade shape in the next steps.

Accordion folds
Now comes the tricky bit:
Step 2: Folding all the diagonal lines


Starting at one end of the paper, fold all the diagonal lines (maked in red on the template) into Mountain folds (towards you). 
Fold ,then unfold and let the paper lay "flat", until you get to the point where it becomes difficult due to the amount of paper you have to fold over.
 At this point, fold together the part you have already folded, so that the paper becomes more manageable...
This can be very fiddly, but take your time (and some deep breaths) and be gentle (You don't want to rip the paper...but if you do repair with tape!)
Continue to make all the folds in the paper untill you've done it all and have created the shape you see  in the bottom picture, above.


It may help to lay the folded paper out, then using your fingers to gently pop the folds into shape...


You should now be able to see the shape of your lampshade when spreading the folds apart, like above.


Use a hole puncher (Or a sharp pencil) to punch out aligning holes at both the bottom and top of your foldes paper, as shown above.


This is for your cord to go through...


But before you pull the shape together, using the cord, tape together the paper (on the inside) to create a continuous hoop...


Now you can tighten the cord to see the shape come together...


Thread both top and bottom loosely with the cord.
Do the top bit first, and try to let the paper folds inside create a spirally pattern, like this^.


The origami shade is now ready for hanging:
Tighten the cords when the shade is in place on the light fitting.

NOTE! Use a low wattage light bulb to further minimize any risk of fire!


It turned out great, don't you think??


It is quite a time consuming make....and requires a lot of patience , but having saved more than £70 by making it muself: TOTALLY WORTH THE EFFORT!


I love paper lampshades as they give off such a nice glow, and I adore the geometry of origami...I just love it! 
And so does Mia...She is very proud that her mummy has actually made the lampshade for her new room!
I am really looking forward to showing you all more of how it is coming together next week, and if you want to pop back on Saturday, I have a little tutorial on a fun decoration Mia and I've made for her room!


Thursday, 16 April 2015

DIY halfmoon print wall


I am currently doing up my 5 year old daughter, Mia's bedroom for The One Room challenge and on Thursday I showed you all how it's progressing, but could not fit in this tutorial on how I created the graphic feature wall.

 Ferm Living Half Moon Wall paper

When we were gathering our inspirations and putting together the concept board for the new design in her room, Mia really liked this wallpaper from Ferm Living. But as it was a out of our budget, I decided to DIY a similar pattern straight onto the wall, and as I promised in Thursday's Progress report post, today I am sharing the tutorial on how I did it...For less than £8!!


I used the blackboard paint that I had leftover from making her blackboard wall and some POTATOES to create the print!
Yes you heard: Potato printing on the wall!!

The only thing I spent money on, was some frogtape. And although it could be tempting to buy a cheaper masking tape, I suggest that if you want to recreate this pattern on a wall in your own home DO NOT SKIMP ON THIS!! A good quality painters tape will give you the best result!

You will also need:
Black paint (Or any other colour you fancy....it doesn't have to be Chalkboard paint)
Potatoes
Paint tray
Sponge (I simply cut mine in half so it was slimmer)
Ruler
Pencil 
Spirit level


First of all I drew up a straight line at the bottom of the wall, using my spirit level.
Although it could be tempting to use the skirting board as a guide, most houses (at least here in the UK) are not strictly straight....and it will look better if your pattern is level!


Then I applied the masking tape on the level pencil line all along the wall...
Repeat this process up the wall, making sure your tape is level throughout!


Leave a gap of about 2"/ 5cm between each line of masking tape.
The potato printing will happen between the two lines of masking tape, and the wideness of the tape (mine was approx 2,5 cm wide) will make up the gap between each row of print


Keep going until you've covered the wall.
This can be quite time consuming, but spending the time doing this right will give the best result!


Before you get ready to start potato printing, use your hands to smooth down the tape properly onto the wall...you don't want to risk the paint bleeding in under the tape...


Cover and protect any areas you don't want any paint on with masking tape , like window frames and adjoining walls etc.


Cut about 3-4 different shaped/sized potatoes in half. You want to have a variety of sizes for your print, and enough of the same potato shapes to last you for the entire wall for a consistent look.
TIP:
Make sure there is enough potato for you to grip onto, or stick a fork in the potato halves for a better grip....they will get slippery as they get covered in paint!


Place the sponge in the paint tray and pour over the paint.
Press the potato half into the paint soaked sponge and get printing...


Simply press the potato, loaded with paint, with a rolling motion onto the wall, on the upside of the masking tape.


Sometimes you may find that the print comes out a bit uneven....I didn't mind a bit of unevenness, but if I thought it was a bit much, I used the edge of the potato to drag the paint to cover, like in the video, above. Same goes for any smudged edges!
TIP:
Maybe do a practice run on a piece of wood or cardboard first to perfect the technique.


I would also suggest that you start printing in an inconspicuous area first.
 I started under the window, as I know that Mia's bed will be covering this area!


It will look quite messy as you go, but when you peel off the tape you will see that it's actually OK...
See....I had to have a look, above, to make sure!! ;D

When it comes to creating a pattern with the different shapes and sizes of potato, I found it quite productive to work on 3-4 rows at the same time, using the different potato shapes in a staggered manner!


You will get quite messy, and I would like to suggest that you regularly clean your hands to avoid smudging on the wall. You may also want to rinse your potatoes in cold water ever so often, as they get slippery and difficult to hold when they're covered in paint!
And WHATEVER you do- DO NOT try to catch a potato should it slip out of your hand: Chances are you'll catch it up against your wall, thus creating a big paint smudge!!

When the paint has fully dried, just peel off the masking tape, and use a rubber to erase your pencil marks.
Should you have a paint smudge or two, just touch up with your base colour!


I'm not going to lie to you: This is quite time consuming work, and gripping onto those potatoes was quite tiresome...but stick some music on and take your time....I love how Mia's Half moon print wall came out!
It is not quite as uniform as the wallpaper inspiration, but I think the odd shapes makes the pattern even more fun....don't you??

IMAGE DESCRIPTION
Please vote for me for best DIY blog


Wednesday, 15 April 2015

The One Room Challenge

Progress report
Week 3

If you are new here: Hi and welcome to Nostalgiecat !
You can read more about me and Nostalgiecat here, and you can catch up with my One Room Challenge journey so far by clicking on the thumbnails in my sidebar ->
If you have no idea what the One Room Challenge is all about, please visit Calling it home for the low-down and links to all the fabulously talented interior bloggers taking part!

I decided to join the One Room Challenge™ as a linking participant, as I needed a kick up the backside to redecorate my 5 year old daughter, Mia's room.


Before: So Mia's room was painted Pink and purple, the usual choice for a little girls bedroom, and I guess it was OK....not bad, but only just OK! 
But This last year Little Mia has grown up so much, and she's started to find confidence in who she is and what she likes, and at the tender age of 5, she's already worked out that being different is not so bad- it's what sets her apart!
 So when I decided to treat her to a room makeover for the One Room Challenge, she jumped at the thought of getting involved with designing a room that was more of an expression of her personality than the standard pink and purple girls bedroom...
Then there was some practical issues: Her room is very small, and besides her bed, there is not much floorspace. And although she can use our LOFTSPACE for playing and getting creative, she really wanted a desk in her new room to sit and do her homework/ some drawing at. So that was one of the challenges we were faced with when designing her new look room....Then there was the issue of storage: She needed somewhere more accessible to keep her books and toys, as before they just got shoved in the drawers underneath her bed, which could be utilized in a much better way!

First we poured over Pinterest to find inspiration for a look she liked, Then we sat down together and chose some of the elements that she wanted to incorporate in her new room and came up with a moodboard and a plan for her new room design.


Mia has been very involved in choosing the look she wants in her "new room" (with guidance from mum , of course) And above you can see the base of the colour palette we decided on.
 But the practical elements and the execution was best left to me.
So, as Mia is still off school for her Easter holiday, She's been staying with her Dad at her nanny's in London over the last weekend, giving me the chance to decorate her room in peace:


Having cleared out everything and cleaned down the walls with sugar soap the night before, I started by painting the walls: 
Where I was changing the colour from purple to pale grey, I first bleached out the previous wall colour with a coat of white primer paint. I find the best way to paint a wall is by first cutting in the edges (where a paint roller cant reach) with a brush .
I always start in a corner where I know there is going to be a different paint colour on the adjoining wall, this way the corner will be dry by the time I come to cut in with the other wall colour.
TIP:
If you are painting a room in more than one colour, always start with the palest colour, so that when you're cutting in the corners, the darker wall colour will go on top: If you use a good quality decorators tape (like frogtape) or just take extra care when cutting in the corners, you should get a neat finish this way!


By priming the purple wall first, I only had to do two coats of the grey paint on those walls, saving paint (and money) in the process! I always keep a tin of primer for this exact reason!

Mia really liked the blackboard section she already had on one of the walls, so I extended it to fill the entire wall. I love blackboard paint, as not only is it fun , but it also has a great coverage and a lovely matte finish, that will hide any imperfections in a wall surface! I bought one small tin of blackboard paint (the cheapest I could find) and it covered the entire wall + I had enough left for doing the feature wall (more on that further down).


On the opposite wall from the blackboard, I was painting the pink wall pink!!???
I know this sounds like a waste of time, but the old candy pink hue was soon replaced by a softer and more peachy tone of pink(Crown honey fever), that sits beautifully next to the pale grey (crown seldom seen) .
As I was going pink on pink here, I didn't bother priming this wall, but went straight on with the new paint colour.....and I was pleasantly surprised that all it needed was one coat (saving more paint, thus more money....win win)


Now you may think: I can see how she's saving paint, but she's already paid for it, so how is she saving money??
Well, the truth is : When we were picking the paint colours for Mia's room, in the back of my mind I was trying to find a paint combination that Mia loved, but would also work for the spare room, which will be my next decorating project. I figured , as Mia's room is so small that it wouldn't take that much paint, leaving enough left over to redecorate another room. And I love this pale grey and peachy pink combo! 

But I don't really want the two rooms to end up looking the same....so that's where the graphic element, inspired by the wall paper from Ferm Living comes in...
I was so pleased when Mia pointed out that she thought this pattern was fun when we were doing our research, but although not ridiculously expensive, the wallpaper was unfortunately out of our budget!
So in true Nostalgiecat fashion: I DIY'd it..See how I did it, using a potato, for less than £8 here.


Anyway, with the walls all painted, the patterned feature wall finished and the wood trim refreshed with a coat of paint....I called it a night for day 1!! (Yep: All this was done in one day: I know right: I'm crazy.....but once I get started I'm like a run-away train! LOL)

So the next morning, safe in the knowledge that all the paint was fully dried, I got started on the floors! In the picture above you can see that I have just finished sanding down the yellowing waxed wooden floorboards and given them a clean, ready for painting. 
I know some of you will probably think it's sacrilege to paint old wooden floorboards, but they were not really that nice, and painting them white will really lighten up the feeling of the room, as it did in the master bedroom when I did the same there. See my tutorial on how to prep and paint previously waxed wooden floorboards if you'd like to know how to do it!


And in between waiting for paint to dry, I got some other little bits sorted as well: Like making a wall hanging desk for Mia, and choosing some quick and affordable artwork for her wall (She'd actually already kind of chosen what she wanted, I just had to narrow it down a little) . And yesterday, the floors all done, I headed out to pick up some bits and pieces for the finishing touches, like curtains and other accessories...

There will be some cute little DIY's coming up, as I am having to get quite creative due to lack of money. But as they say: Necessity is the mother of all invention! And I love getting creative!!

Don't forget to pop back again on Saturday if you want to see how I created that feature wall!
Have a great day!


Sunday, 12 April 2015

Instantly downloadable art...

For Mia's room!
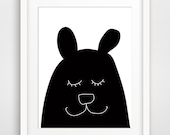
I love Etsy for art you won't find anywhere on the highstreet!
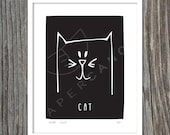
And I love instantly downloadable art: It's quick,cheap and convenient!
Once you've paid, you'll get sent a PDF of your chosen artwork that you can print out at home (Or take it to the print shop for larger sizes!)
That's it!

I am doing up my daughter's bedroom for the OneRoomChallenge, and Mia has her heart set on a wall filled with art. 
So I have been spending the morning looking for some new art for her room, and have curated this treasury of prints from Etsy I think will work well!
They're fun, they're inspirational and cute for a kids room, yet "grown up" and stylish at the same time!
 As they are to go on Mia's blush pink wall , I've kept them monochrome with hints of mint to complement the colour palette she's chosen.

If you see any you like, simply click on the image to be taken to the Etsy shop!

'ART FOR MIA'S ROOM' by olsenjune

Cheap and cheerful! "Grown up" art for Mia's Scandinavian big girls room!Instantly downloadable and printable for your convenience...Monochrome with hints of mint!


Scandinavian art print, Bear...

$3.5

Typography Poster Instant Do...

$5

INSTANT DOWNLOAD Original Mr...

$10

INSTANT DOWNLOAD Be Kind Be ...

$10

Donut Art //Printable Wall A...

$5

Black Cat | 8 x 10 in PRINTA...

$7.5

Turquoise Printable Art - Ty...

$5

Home Decor Wall Art Printabl...

$3.25

Not my circus, not my monkey...

$5

printable 'abc alphabet ...

$4

North Star printable wall de...

$5

Hello Black Kitty. Illustrat...

$4.99

funny minimalistic kids wall...

$3.5

printable inspirational home...

$5

Printable art matryoshka sca...

$2.49

COOLEST KID poster, kids roo...

$3.5
Powered By Handmadeology

Do check out the Etsy shop  72PaperPlanes for a 3 for two offer on all posters using the code:  ALLISLOVE3

Now, I'm off back to Etsy to order a few....you'll have to wait until the BIG reveal before you can see which ones I'll choose!


"