Wednesday, 29 January 2014

Monster high ...DIY artwork for Little miss moo's new big girls room.


So we've finally finished re-decorating Little miss Moo's room: Six months later than we planned, she has finally got her "big girls room"! But before I share the full transformation, I wanted to show you all the new artwork I made for her....

Gone are the teddy's and cute kitty pictures..(See my post about her toddler room)....in with her latest fad: Monster high!!
So I made her two pieces of monster high art for her new Pink walls, much in the same way as I did my Ampersand gold leaf art last week...

But I will show you a quick step by step guide to how I made these using gold leaf and glitter:


Step 1: Make a textured background


 I placed some A3 paper on my work surface, and secured it using masking tape...Then I used the same paint as we've painted LMM's walls with, to tie the art in with her new room décor...
I then used some of LMM's play-dough rollers to add a textured pattern to the paper...

Step 2: The image


Like I said above, LMM is really into Monster high at the moment, so I printed out a monster high image (I added the crossbones for more interest)

Step 3: make some stickers for the gilding


I covered the entire image with double-sided tape, then added another layer of double-sided over the bits I wanted to gild with gold-leaf and glitter....


I then drew out my sticker shape with a pen on top of the tape...
...I then put another layer of double-sided on top of this again, crossing the direction of the tape layers. (Because I wanted to make 2 stickers, but also because this meant it would be easier to transfer the sticker in the next step:


 I transferred the double sided tape (stickers) onto a sheet of baking paper, and put it to the side...

 Step 4: Make a stencil


Going back to the image covered in one layer of double sided tape, I then cut out the image to make a stencil...I basically wanted to make a stencil so that I could easily paint out the shape of the monsters high image in black...
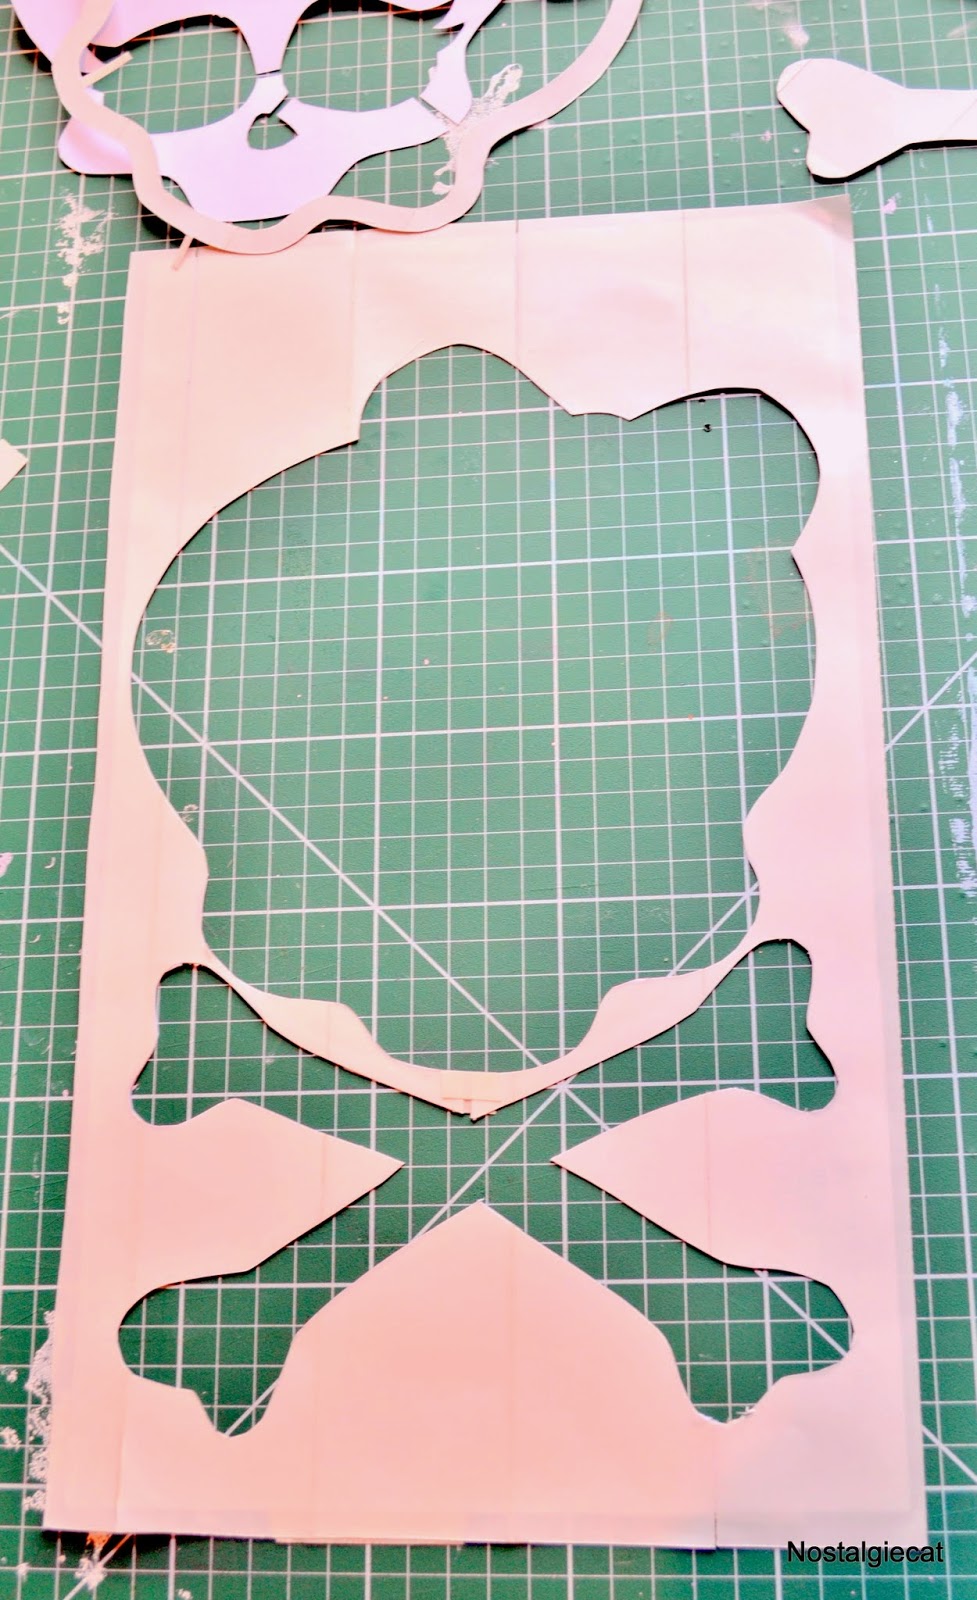


I then placed my stencil on the paper I textured earlier, and dabbed on black paint using a sponge...


Whilst this was drying, I went back to finish my stickers

Step 5: Cut out your stickers


Using a sharp scalpel, I Cut out the shapes of my stickers (Slightly smaller than the stencil, so that there would be a black outline around my gilding...
I then placed the stickers on top of my black painted stencil on the paper...


The stickers will come away from the backing in parts, so I puzzled them carefully together before sticking down...


 Step 3: Add some gold leaf


Peeling away one section of the backing of the sticker at the time, I used a soft brush to gently smooth down a sheet of gold leaf onto the image...


When I had covered the area I wanted (The "skull") with the gold-leaf, I carefully buffed away any excess by using my soft brush in circular motions...


I repeated this on my second picture.

Step 6: Add some glitter.


I got Little Miss Moo to help me add some glitter to the bows:
We peeled away the backing of the bow-stickers, and poured over some glitter...


LMM then rubbed the glitter into the tape, and we tipped away the excess.
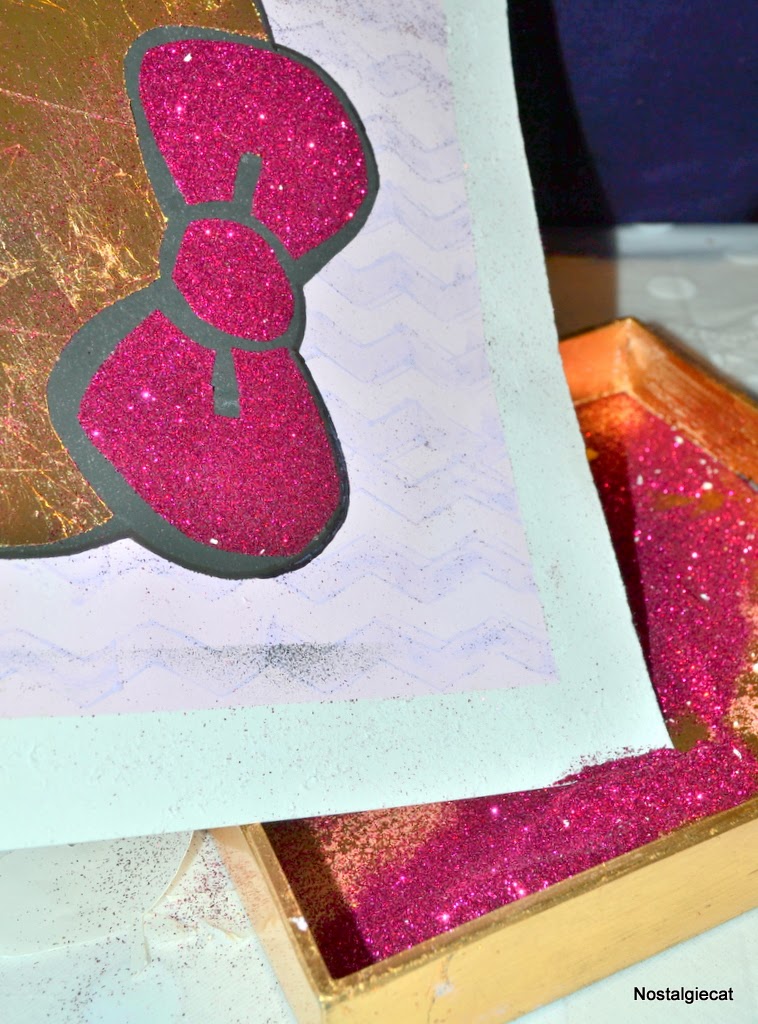


That's it: LMM's DIY Monster High gold-leaf and glitter artwork for her new big girls room!! 


All that was left to do, was to frame and hang the art...


 LMM is very happy with her new artwork, and proud that she had a hand in making them...


They look great in her new room , as you can see in my Miss Moo's big room reveal post !


xxx
June

Saturday, 25 January 2014

The Chair.....


....The game changer!

 THE EAMES RAR ROCKER


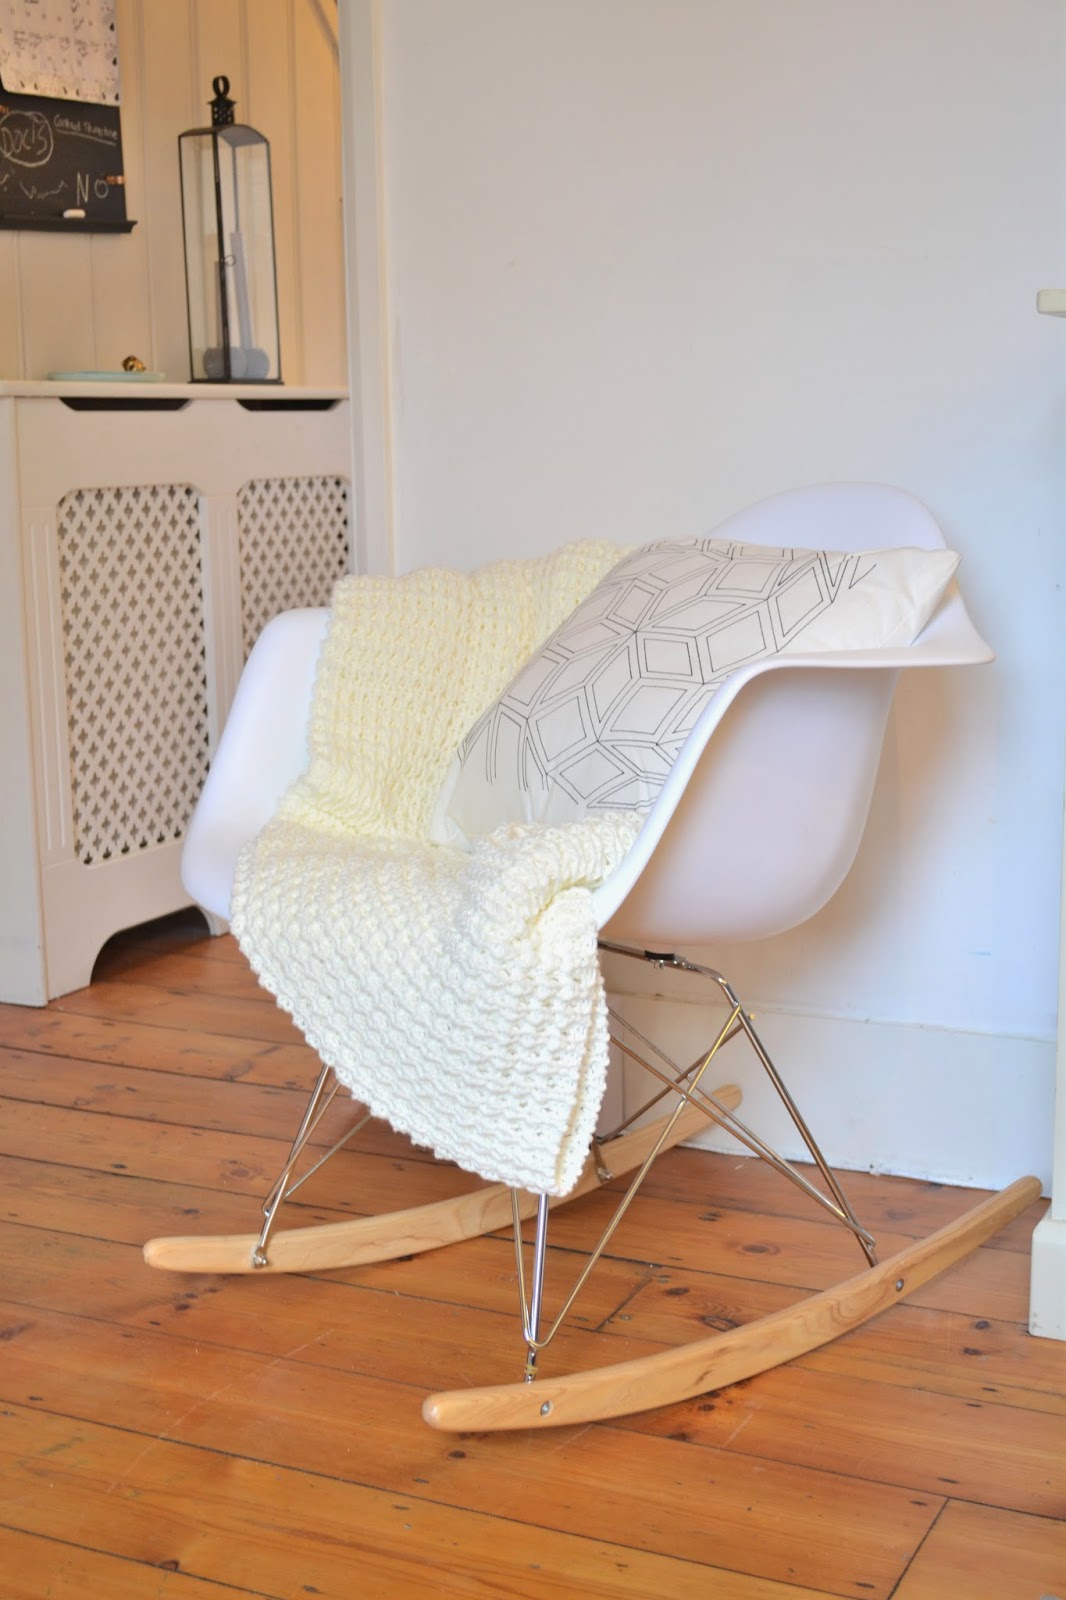
Just before Christmas I was contacted by the online retailer One Kings Lane, and asked to do a post about a statement chair in my home...
At the time I thought I'd get an old chair and do it up, but faith would have it that this sparked a big change in my ever evolving taste for design....


On our Christmas break in Norway, I spent a lot of time perusing Norwegian interior magazines and discovered some wonderful and inspiring Scandinavian interior blogs, and there was one piece of furniture that kept popping out of the pages at me:

The Eames RAR rocker...

I admit it: I knew nothing about this chair, only that I fell in love with it straight away!
But it was not in my usual taste, and I figured it would also be beyond my reach financially, so I simply put it to the back of my mind as one of those unachievable dreams....


But it must have been faith, because a few days after we got back to the UK, when I was out doing some guilt free shopping with a fist-full of gift vouchers: There it was!!
...and at a wonderful bargain price!!
My heart started beating so fast, I had to leave the shop to get some fresh air....

Actually I already had about as many chairs as our little home could take...and I knew that Mr would "kill me" if I came home with another chair...So with a heavy heart I left it behind and headed home...

But that night the chair was haunting my dreams, and by the time I woke up the next morning, I had decided: If the chair was still there on my birthday (3 days away), I would get it!! (I figured that Mr could not get angry with me for treating myself on my BIRTHDAY!!!)

So three days later, with my heart in my hands, I went back....and, YES! There it was, waiting for me!!
OOOOH THE JOY!!

My friend gave me a lift back home with my price, and I placed my new soul-mate the only place it would fit, then sat down and stared at it....


No, it wasn't  in my usual taste (my usual taste being oldie-worldly and antiques)....but somehow it didn't look out of place...
In fact, if that chair had feelings, I truly believe it felt right at home straight away!!

I knew then, that this would be the chair that would change the way I thought about décor in my home...


Like I said: I had no idea what sort of chair this was...only that I loved it!!


I loved its simplicity, its curvy lines, the whiter than white plastic(!!) and the aluminium wire base(that reminded me of the Eiffel tower and our honeymoon)...


...I loved the playful shape and functionality of the rockers...


I just loved it!!

But after doing some research through the  One kings lane home décor resource site I realised why this chair had "spoken to me".


The Eames RAR plastic rocker is an iconic classic designed by the golden couple of Mid-century American design, Charles and Ray Eames...

The more I found out about this amazingly creative husband and wife duo and their designs, the more my instant affections for this chair started making sense:

Their names have become synonymous with one of the most important and influential movements within architecture and design, that took place in California between 1930- 1963...
There was a boom of creativity amongst a large group of artist, designers ,film makers and stylists, inspired by Scandinavian minimalism and elements of art deco and art nouveau, that over time merged into a new design aesthetic...


No wonder it appealed to my Scandinavian nature...and I have always had a passion for the geometric lines in Art deco design...

Charles and Ray Eames lead the way and took full advantage of  the development of new technologies and materials during World war 2, and they pioneered  the use of plywood and fibreglass in furniture design.
 
 
The Eames moulded plastic chair was originally designed in metal for a prototype entry to the 1948 Low cost furniture design competition organized by the Museum of Modern art.
In 1950 the Eames' changed it to fibre-glass, but Ray was never  happy with this finish, and unfortunately didn't live to see the matte finish he had envisioned, thanks to the advances of materials like recyclable polypropylene...

The original  was THE VERY FIRST industrially produced plastic chair,
and in the words of Eames Demetrios (Charles' grandson):

"The chair that Charles and Ray were designing, is the chair that's made tomorrow"


The Eames' , true to their Scandinavian influences, focused on usability and functionalism in their designs, and the moulded plastic armchair was a prime example of this: With a range of different wire bases, they designed a chair that was versatile around the home as well as for the office.


My RAR plastic rocker is one of these evolutions of that first moulded fibreglass that the Eames' designed...

Since 1956, the Eames's iconic chairs (like their 670 Lounge chair: THE icon of modern American design) has been produced and sold by Herman Miller, :
And so reads their introduction on the Herman Miller store website:

"Plastic, plywood,Play...The fertile, curious minds of Charles and Ray Eames invented the modern American furniture vocabulary."


So my Eames RAR plastic Rocker symbolises to me,
 not only a change in my décor taste, but also how the Scandinavian sensibilities of mid century design helped influence a change in the way furniture was designed and manufactured forever,
 through  Charles and Ray Eames visions and persistence, making design more accessible to people!


 The Eames' never stopped innovating and making the world a more beautiful and comfortable place...including my front room!

I feel like I have discovered another room in my aesthetic universe...a room that takes me back to a childhood filled with mass produced functional furniture...
...growing up in Norway in the 70's, I have never really appreciated the beauty of the design that surrounded me...
Until this Chair came into my life...

So thank you Eames, for opening my minds eye to the nostalgia of mid-century design...

Have you got a piece of furniture that has changed your perception of beauty and home décor??

xxx
June


Wednesday, 22 January 2014

Monochrome Graphic print cushion...


....an Easy DIY


Today I want to show a very easy way to DIY your own print on a cushion cover...
You really wont believe how easy this is!

I have had a love affair with graphic prints for a while now, and with the introduction to our living-room décor of the graphic art I made last week, I wanted to update my cushions to compliment it...

So when I came across this little "colouring in" book in Tiger (a bargain at £1!!!), stuffed full of wonderful graphic prints, I felt inspired!!


I chose some prints that appealed to me and enlarged them on our printer....


Then I simply stuck the image to my work-surface with some masking tape, then placed a pre-cut (to the size of my cushions) square of fabric over, and tacked it down smoothly using more masking tape...


As you can see from the image above, the print shows through the white fabric.
Then I used a ruler and a Dylon fine nib fabric pen and simply traced the pattern onto the fabric..


I found that it took the risk of confusion away if I dotted the beginning and the end of each line first...that way I could quite quickly ,using the ruler, trace over each line with the fabric pen...


When I was finished, I covered the drawn out patterned cloth with a piece of cotton and ironed for a few minutes to set the ink...


Then I used my mini sewing machine and stitched the cushion together...
(If you want to make this a really, really easy project, why not buy some plain cushion covers and draw a design on these....and skip sewing all together)

I love this simple make...

...You could even take it one step further, (if you would like to add some colour to the prints) and colour in the shapes in the patterns with some fabric paint.


But I liked how by keeping the pattern simple and monochrome , the cushions works like accents to my décor...


...Like this big one with a "star"- pattern...(The little cushion was made using fabric paint that I stamped on in the same way that I made the artwork above)


...and this round one, also just made by tracing one of the patterns from my Tiger "colouring book"...


The grey and white chevron cushion I made this morning by simply masking off the pattern on the fabric using masking tape and then painting on some grey fabric paint...

I am really pleased with how these simple DIY cushion covers have turned out...they have given my living room décor a more modern feel, and the sparseness of the patterns on the white cushions have helped lighten our space....
....and all for less than £15 (fabric and the pens + the round cushion fillers)

So keep your eyes peeled for patterns you like, and YOU can make your very own printed cushion covers...

Please let me know what you think of my DIY cushion prints by leaving a comment below...I love to hear from you all!!

xxx
June


Friday, 17 January 2014

Graphic Gold-leaf wall art.....

....you can make yourself


AND I AM GIONG TO SHOW YOU HOW!

Assignment no.6 in the January Cure was to Choose a piece of art to frame, and I knew straight away that this meant a DIY project for me...and as I had two pieces of art I made for Christmas still up on my gallery wall that was in need of changing, I knew I needed something new for these frames...

I love graphic prints, so I decided to make two complimentary gold-leafed pieces of art...
...and my starting point was the triangle shaped stamp:


I made my own makeshift stamp by simply sticking a stack of 5 triangle shaped pieces of Little Miss Moo's craft foam together with double-sided tape before sticking them on to the bottom of a glass (with the double-sided)...I also cut up 6 triangle shaped pieces in the same size, of double sided tape extra....
...these will be used to add some glimmer gold-leafed triangles to the first  piece of art I will show you how I made:


 After experimenting a bit I mixed up my colours: I chose black, peach and a minty turquoise that I felt went well with the gold-leaf...Of course the beauty of making your own artwork, is that you can mix up any colours that you feel would compliment your space the best....And of course you don't have to use gold leaf: how about silver...or so-right-now: copper!!??


I stuck down a piece of quality drawing paper to my work surface using masking tape, then using one of the foam triangles as a template for size, I very faintly drew up a "grid" with a pencil, so that I could use this as a guideline when placing the triangles onto the paper...
I started by sticking down my double sided triangles in a random pattern spread out on the paper, some facing up, some down...
...I then peeled off the backing and gently tapped the gold leaf onto the tape using a soft brush.
Using circular motions I gently brushed away any excess gold leaf...

With the gold-leaf triangles now in place, it was time to get stamping:


I brushed the paint onto the makeshift stamp, (I had a piece of paper on the side so that I could blot the stamp of excess paint before stamping)...
The fact that the stamp was on a clear glass helped me place my stamp where I wanted with precision...
You can do this as randomly or systematically as you like, but try stamping with one colour at the time and spread the aesthetic of this colour all over the paper...Every now and then, step back and squint to get a feel for where to place your next triangle! When you feel like you are stuck, change colour...This is a bit like playing colour Sudoku!
Keep stamping your chosen colours until you are happy with the aesthetics of the colour mix...
Know when to stop!
You don't have to fill the entire piece of paper, a few gaps looks good!!
Use an eraser to get rid of any pencil-marks.


It is amazing how complicated it can get trying to put together colours randomly like this....just try to do something in a way that looks good to you!!
I had 3 attempts before I was happy with the result...
I now LOVE it!!


So to compliment my graphic triangle art, I made this Gold-leafed ampersand art:
(Ampersand is the name of the symbol for the word "and", there are many different designs...click on the link above to see a few)
First: Print out an ampersand you like the look of to the scale you need...

Next we'll work on the back-ground:


I chose a pale aqua-blue card, not too dissimilar in colour to the minty-blue I used above.
Again,I drew up a faint grid on the card with a pencil, like I did before.
Using the makeshift triangle-stamp again, this time stamping with just white paint, this time I simply stamped a row of "monster-teeth" at the top, then, turning the stamp, to make the bottom row of "teeth"...this creates a zig-zag of blue in the middle (see picture above)...then for "row 3", I mirrored the row above, so that I created white diamond-shapes...Then I repeated until the paper was filled!

 Whilst the paint was drying, I prepared my ampersand:


In the same way that I used double-sided tape to apply the gold-leaf to the artwork above, I basically wanted to make an Ampersand double-sided sticker.
First I taped a sheet of baking paper down on my work surface, then I slid my Ampersand print-out underneath, and covered the image with double sided tape (making sure they were butted tightly up against each other). Then using a (very)sharp scalpel, I carefully cut out the Ampersand.(Starting with the "middle-bits")


I placed the cut out Ampersand sticker onto the background I made earlier, and marked off the positioning with a pencil.
I then peeled off the baking paper and stuck the double sided tape down, peeled off the backing and applied the gold-leaf as before.
After gently brushing away any excess gold-leaf, I drew around the Ampersand with a black sharpie, making the lines on the right-hand side of the symbol a little thicker to create a shadow effect...

Using an eraser, I then got rid of all my pencil marks.


And I was done...


I love the way these turned out...


...And the way the Gold leaf shimmers and compliments my Concrete lamp shade... 


This has been such an enjoyable project...I just love having creative days like this, just playing with shapes and colours!! You could probably do these in a few hours...they are so easy to do....when you know how!!
And the result is definitely something I am proud of: Striking on-of-a-kind artworks that really has lifted my gallery wall!
...And it feels so good to have another tick off on my January cure to-do list!!

I hope you like them too, and that maybe I have inspired you to give DIY artwork a try!!

xxx
June
"