
...reveal!

Hi!
So, the big home makeover plan that I announced back in January has now started in full...
After successfully turning little miss Moo's bedroom in to a big girls room a few weeks ago, I was itching to get on with the rest of the house...
Its funny how your dreams and ideas can lay dormant for so long, and then when you finally pull your finger out and get started, it can't happen soon enough!!
I was actually meant to do our bedroom first, but another twist of faith would have it that I felt inspired to the hallway next...
Whilst out and about snooping in antique and bric-a-brac shops with a friend a few weeks ago, I came across a beautiful little bargain: a white Le Klint style lampshade for a fiver - perfect for the hallway!!...However, as I was trying to be careful with my money, I didn't pick it up (doh!!)...Something I regretted as soon as I got home! I went back to the shop the following week...but it was gone! I could've cried!! Then I figured: Why don't I try to DIY something similar??
So I did! (See my DIY paper origami lampshade tutorial)

But then I realised that with my shiny new Origami lampshade, the hallway seemed very scruffy...
Of course I already knew this...it had not been touched since we moved in over 2 years ago...and even then it was not to our taste with its beige walls and pine bannisters on the stairs...even the light fitting was something that we just made do with as the previous owners left it behind! And Little Miss Moo had been adding her artwork on the walls in the form of crayon scribbles and mucky handprints...

As it was already on my list of things to do this year, I thought why not, and jumped to it: I already had a plan: Crisp and white with a birch forest stencil in shimmery silver along the hallway wall....
So I ordered my stencil from cutting edge stencils and got cracking....
First I Spent a couple of days painting the stair bannisters white:
When painting anything wooden, like furniture, or in this case: the bannisters, the key to success is all in the preparation: Sand, prep and prime!!

Because there was a lot of detail in the wooden banisters (and I am impatient), I skipped the messy and long winded process of sanding, and used some liquid sandpaper instead...I simply painted the solution on and wiped off any excess. I then painted on a coat of wood primer before adding two coats (?)of brilliant white one coat satin wood paint!

I then got to work on the walls and ceiling...painting everything white...
First I did two coats(?) of brilliant white onecoat emulsion (It is never actually enough with just "one coat" is it....no matter what it says on the tin!!??), then I painted a coat of brilliant white soft sheen emulsion over.... to make the light bounce off the wall, and enhance the sense of space...

With everything now looking crisp and white - a definite improvement - the hallway decor now blended seamlessly into the already white painted living room.
I was now ready for the stencil, that had arrived just in time...
My friend Tamzin kindly came around to help me, as she wants to use the stencil in her home as well, and we are splitting the cost of the stencil (It ended up costing me £80,-, with £20,- postage from the US ...and UK customs charging me another £20,-...grrrr!)
It actually wasn't that difficult to do...and NOT really a two-man job! I took us under 3 hours to do the entire wall...with a few tea-breaks thrown in!!
The stencil was easy to line up, and using a rounded dense foam roller gave a lovely and even finish...the trick is to not overload the roller with paint!!
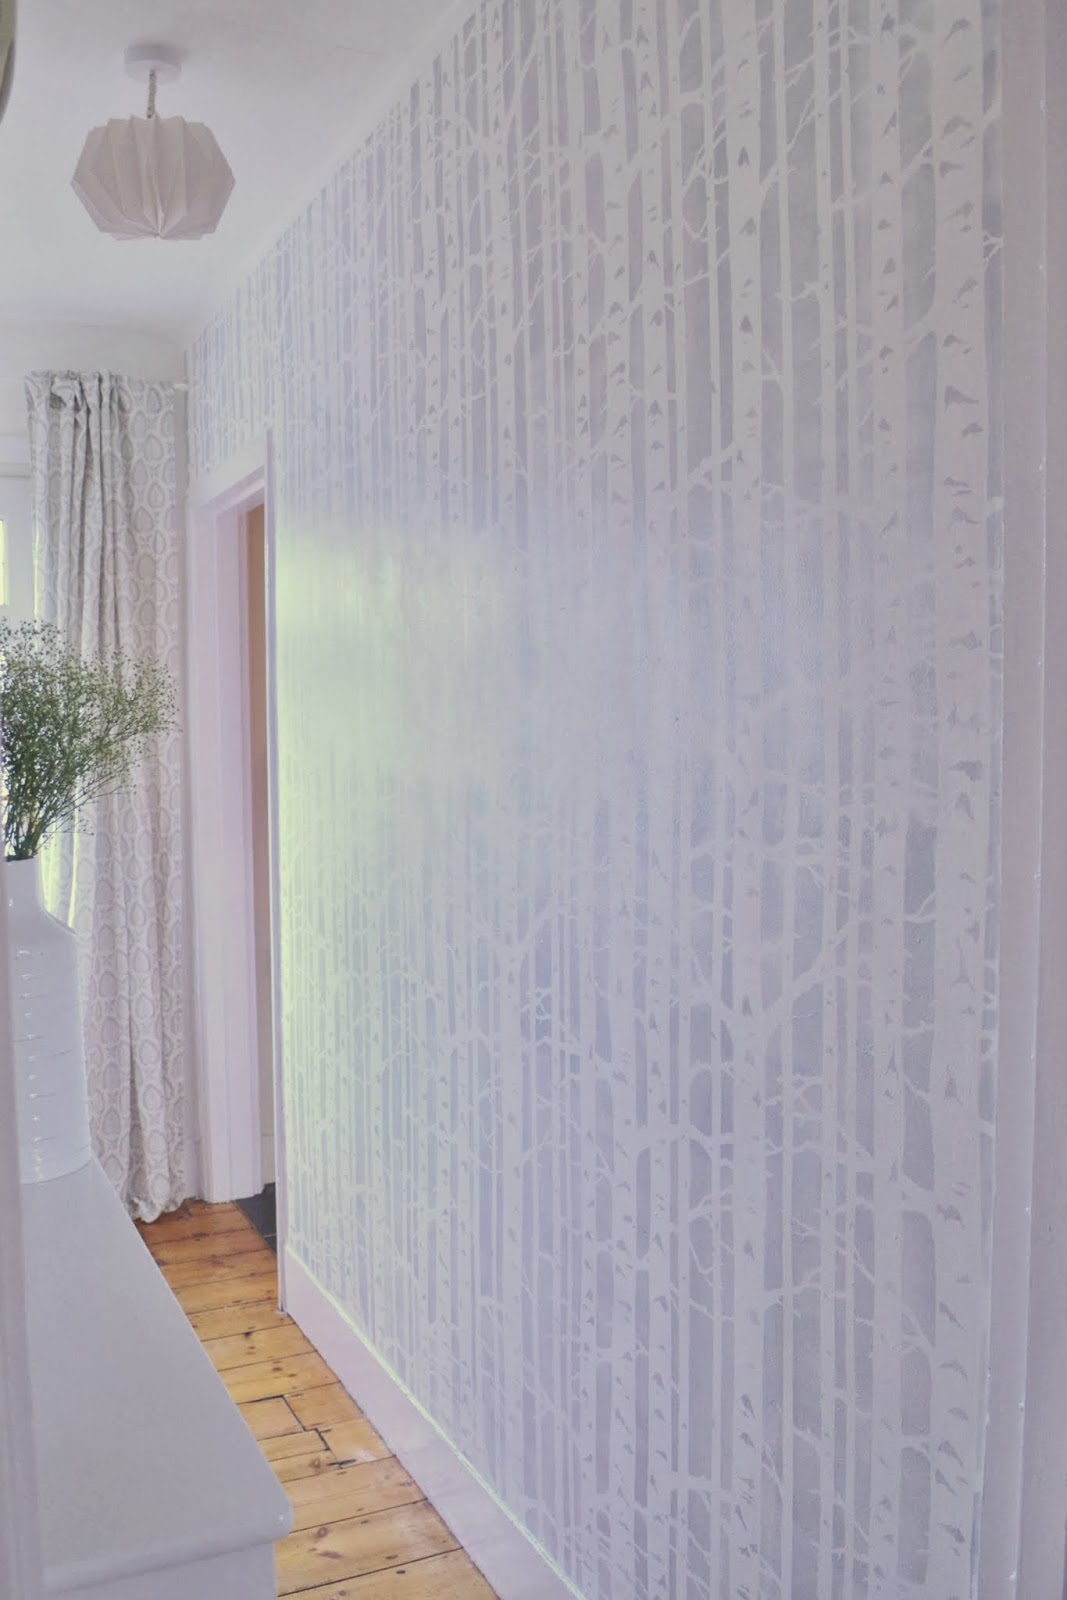
I knew I wanted a shimmery, barely there look to the stencil, and was hoping to get a pearlescent pale grey paint to do it with...however this proved to be unattainable here in the UK, so I ended up mixing some Crown "sophistication" silver metallic emulsion with some white to get a pale grey shimmery paint effect....

When mixing the paint up, it seemed to loose the silver in the pot, but it actually dried to a beautiful shimmery grey on the wall....these pictures doesn't really do the effect justice!!
Again this helps bounce the light around in the narrow hallway improving the sense of space!

I am so happy with how the stencil turned out...in fact, I spent a few days just staring at it!!
And I love how my old IKEA curtains' pattern works with my birch forest wall...
It all looks so shiny and new, it makes my heart skip a beat!!
And of course, my DIY origami lampshade now looks perfectly at home in my "new" hallway!

My decorating efforts so far has only taken me to the top of the stairs, and I am planning on finishing the rest of the hallway off next week...including creating a January cure style Landing strip.
We also still need to replace the dirty old carpet on the stairs..... and it really wont be completely finished before we have the new laminate flooring put down...
But for now I am happy that I have actually made a big start on our home improvement plans for 2014...and just coming down the stairs to our crisp and clean hallway in the morning is like fuel to my motivation to get all our decorating updates done this year...
What do you think of my new hallway?
Do you like the stencil?
All white...yay or nay
See the rest of the hallway transformation, including the stairs here
I'd love to hear what you think!
Please leave a comment below!
xxx
June


