
My inspirational 7 point guide to achieving the look!

Image via the design files
Design styles and rules come and go, but what I’m loving about design trends this year is that there seem to be no set rules! This year, as mentioned here, the emphasis is on interiors with a personal and unique style that reflect the individuals living there.
And the word, and style that sums it up, is ECLECTIC!
We are all eclectic: We like a little bit of this and a little bit of that, and our surroundings should reflect the different aspects of our personalities, and our interiors should sum up our memories and experiences that we've collected throughout our lives.
Eclectic interiors have an effortless "anything goes" feel that comes along with your road to finding YOUR decorating style: Go with what you love and see how your space takes shape!
There is something magical that happens to an interior that resists the urge to meticulously match its furnishings in ONE design style and the main rule is to do it with confidence!
Eclectic design is by definition a mixture of different decorating styles: A blend of different cultures and time periods: Unexpected elements mixed together: Old is mixed with new, shiny and bright with muted and rustic, bold and graphic with soft and feminine...The possibilities are endless...and completely individual!!
But A successful eclectic design is not just a mish-mash of styles and colours: It should be a deliberate and planned design scheme that is unified by furnishings that relate to each other through color, shape, texture, finish or scale, so today I am not only sharing some inspirational images from the www featuring some amazing eclectic interiors, but also some tips (NOT rules) on how to make it work!
1
Start with a blank canvas

Image via the design files
Neutral wall colours create a blank canvas to really make your interior treasures pop!
Don't overwhelm your space with too much colour, but equally: don't be afraid to add some bright coloured accents!
2
Add an awesome Rug (or two...)

Image via bolig magasinet DK
A good place to start is from the floor and up:
Start with a patterned rug, "the jewel of the floor": Colourful tribal or geometric ones pack a punch...Or even try layering rugs in different patterns and shapes: See some tips on how here.
3
Add a plush sofa

Image via klikk.no
Adding an inviting and comfy looking sofa will be a great investment to any interior, but choosing a colourful one in a plush material ,like velvet will really help you achieve that Eclectic look.

Image via oh joy
4
Mix up your furniture styles

Image via home adore
There are unlimited way's to furnish a room for a truly eclectic interior: Make a statement by getting furniture from an era that is in juxtaposition with your home's architecture: Ie: a Mid century modern style in a Victorian house would look fantastic!
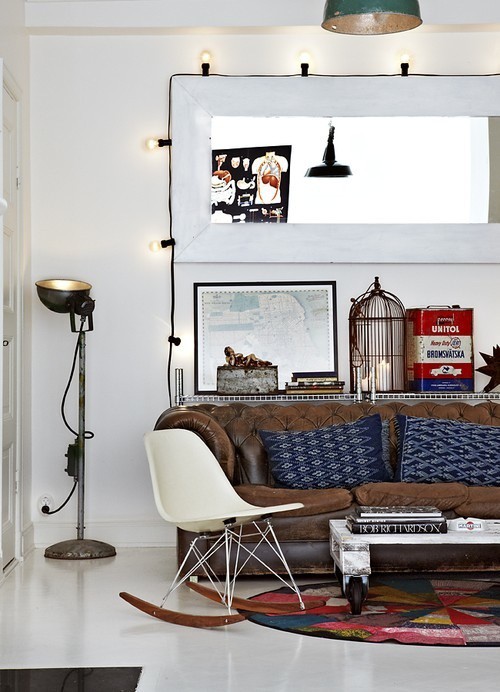
Image via home adore
Or mix up the styles of furniture you choose: Vintage with modern, retro and Mid-century Modern with traditional, Industrial with antique....anything goes! Try to not keep to one design style, but really mix it up!

Image from helt enkelt
But think, not only about the Era's your furniture is from, but also the materials, patterns and colours:
worn and weathered with sleek and shiny, an antique chair reupholstered in a modern geometric fabric and soft hues mixed with strong graphic elements..Adding your own "twist" to things will help your interior confidently stand out and reflect your personality, and is the perfect way to decorate an eclectic space..
5
Offset your accessories

Image via Emma's design blog
Opposites attract!
Again: Choosing accessories that is from completely different era's, styles and materials works wonderfully in an eclectic interior!
This goes for soft furnishings as well as decorative objects and lighting...

Image via Mikel Irastorza
6
Add Art

Image via pinterest
As you can see in pretty much all the images in this post, the addition of art is very important!
Art is very personal! What art you choose to display should be a direct expression of who you are!
Nothing makes an eclectic space more than Art!
So use it to it's full potential, and display yours with pride!!
Make a statement with a huge abstract painting (The perfect counterpart to a bold rug and an eye-catching sofa), Or display a collection of "finds" from charity shops on a gallery wall, Or why not blow up family photos on a canvas or choose some great contemporary photography or posters to cheer up your walls! I am planning a series of ART inspired posts in the near future, so if you are feeling less than confident about making a statement with art, please say tuned for that!
7
Make your home come alive with plants
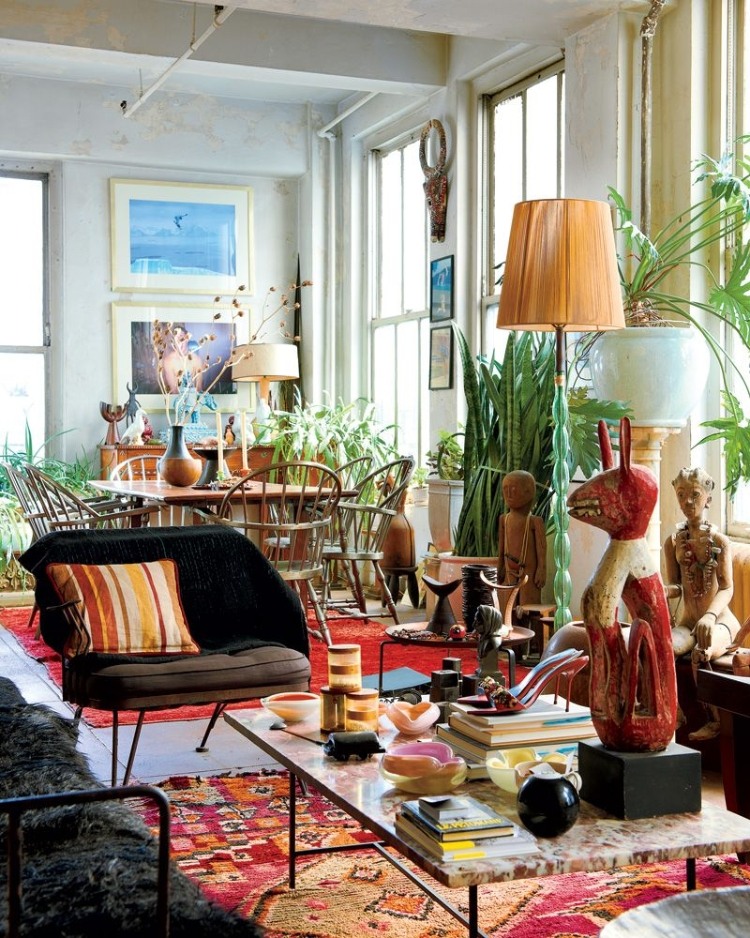
Image via home adore
Filling your home with plants is not only good for the air quality in your home and your health, but will also make your interiors literally "Come alive"!
They add a certain genuine-ness to the decor! Keeping plants is a commitment and makes your interior seem confident and less contrived!
In my opinion: A MUST for a truly eclectic interior!
If you are anything less than green-fingered, like me, try adding a few easy to keep cactuses, and follow the #urbanjunglebloggers hash-tag on social media for loads of inspiration and tips on keeping plants!
That concludes my "guide" to eclectic interiors for today: I will be back on Saturday to show you all how to shop and put together an eclectic look, with my picks from the coming spring collections!
Have a great week!


