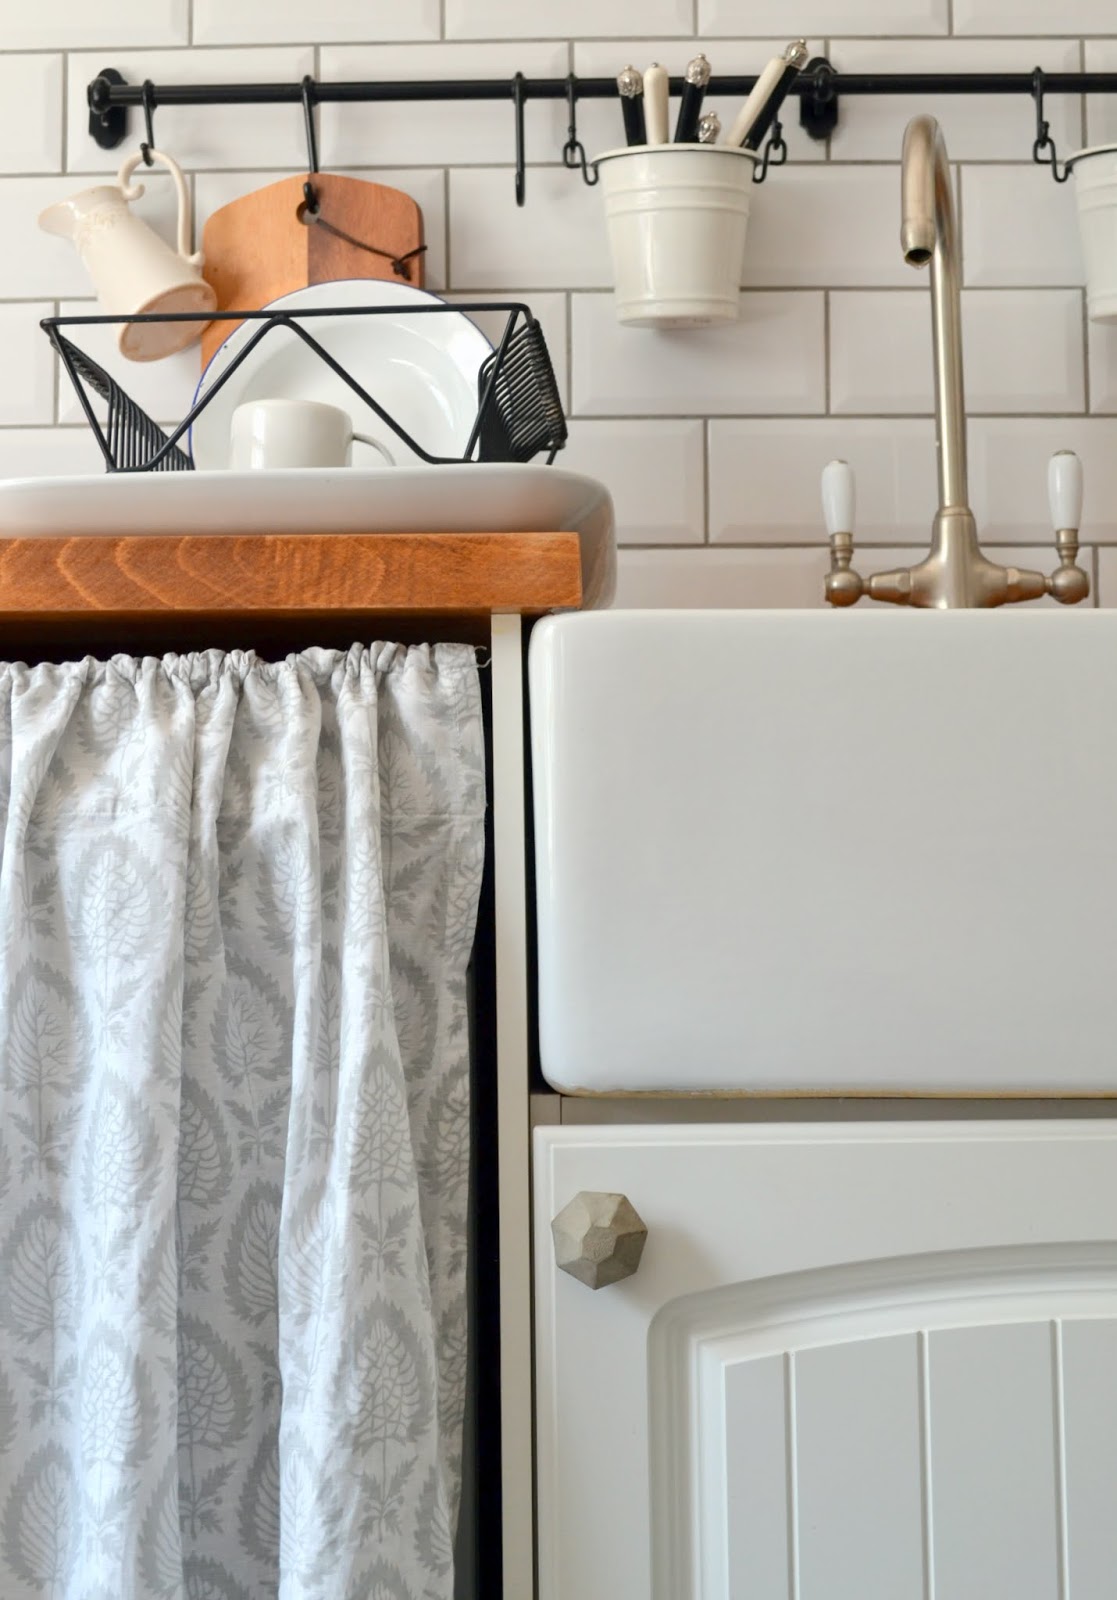
So here it is : My new look kitchen!!
What do you think??
I Love it!!
Gone is the horrid blood red walls, grubby wall tiles and mismatched fittings! See the before pictures in this post!
This transformation happened quickly: It started when my mum bought me a pot of paint (Homebase silver mist, If you want to know!!) with the instructions to "sort out the kitchen!" back in June...
Not that I needed instructions to do it, as I had been planning this makeover for quite some time, but the paint was the "kick up the backside" that I needed...
It has been a lot of hard work, but I can honestly say that I have loved every minute of it!!
And I've learned some new skills along the way....
So here it is : My new look kitchen!!
What do you think??
I Love it!!
Gone is the horrid blood red walls, grubby wall tiles and mismatched fittings! See the before pictures in this post!
This transformation happened quickly: It started when my mum bought me a pot of paint (Homebase silver mist, If you want to know!!) with the instructions to "sort out the kitchen!" back in June...
Not that I needed instructions to do it, as I had been planning this makeover for quite some time, but the paint was the "kick up the backside" that I needed...
It has been a lot of hard work, but I can honestly say that I have loved every minute of it!!
And I've learned some new skills along the way....
 ...like tiling!
Of course I got my metro tiles for cheap: Firstly I got hold of a box of tiles for nothing on freecycle , then I phoned up the company on the box, walls and floors, explained the situation, and they where very helpful and advised me on the most economical wall adhesive and grout to choose!!.....And they gave me a 15% discount and free delivery on the rest of the tiles that I needed....IF YOU DON'T ASK YOU DON'T GET!!
Anyway: I now tile like a demon!!
Even if I say it myself: I did a pretty good job for a "first-time" tiler: Even Mr was impressed!!
It was a messy job: I first had to chisel the old tiles off the wall, and most of the plaster came off ....so I had to patch up the walls and re-plaster as well ( also a new skill!!) I was thinking of doing a "novice guide to re-plastering a wall and tiling....but I think I'll leave that sort of advice to the experts!
I found some really useful advise on tiling at the walls and floors website and on re-plastering walls here!
...like tiling!
Of course I got my metro tiles for cheap: Firstly I got hold of a box of tiles for nothing on freecycle , then I phoned up the company on the box, walls and floors, explained the situation, and they where very helpful and advised me on the most economical wall adhesive and grout to choose!!.....And they gave me a 15% discount and free delivery on the rest of the tiles that I needed....IF YOU DON'T ASK YOU DON'T GET!!
Anyway: I now tile like a demon!!
Even if I say it myself: I did a pretty good job for a "first-time" tiler: Even Mr was impressed!!
It was a messy job: I first had to chisel the old tiles off the wall, and most of the plaster came off ....so I had to patch up the walls and re-plaster as well ( also a new skill!!) I was thinking of doing a "novice guide to re-plastering a wall and tiling....but I think I'll leave that sort of advice to the experts!
I found some really useful advise on tiling at the walls and floors website and on re-plastering walls here!
So with the kitchen painted ad re-tiled, I was ready to add some finishing touches to complete the look:
Like hanging up some curtains (Some old IKEA ones that I already had) to cover the washing machine!
I love IKEA for practical yet stylish solutions: I already had the
IKEA fintorp dish drainer and cutlery stands on wall rail , but had never got around to hanging up: Of course I had to drill through my tiles to hang it up (another new skill) which was a bit daunting, but actually really easy....see my post
here to find out how!!
And it really is so useful to have this wall mounted storage by the sink, as it keeps my recently
re-surfaced wooden worktop free from clutter and makes it easier to keep it damp free!
I have used a giant ceramic serving platter, that I picked up in the sales in my local supermarket, as a draining board next to the sink!
I also wanted a shelf on that wall, and had had my eye on some lovely ones with hooks for your mugs underneath from a local antique shop....but they came a rather hefty price tag (nearly £200??!!) So I decided to compromise: So when I found an old scaffolding plank in the skip, I instantly knew that this would be my new kitchen shelf! And I am so glad I did...I love the way they look against my metro tiles!!! See how I did it
here!
A feature I've always loved in my kitchen, is the built in wooden shelves in this corner: I just gave them a tidy up and use them to display my small collection of white bake ware!
And the butchers trolley is now clear of all my unfinished projects and has become the new home for all my plates etc. - freeing up some much needed cupboard space!
I did splurge on some new accessories for the kitchen, like this
Betty Jackson fruit bowl and the little faceted bowl in the back ground, from
Bloomingville....but as ever: I waited until the sales, then snapped them up at bargain prices!!
I also used
copper spray paint throughout the kitchen to add some details, like in the cubby holes and on the mini chest of drawers in the pictures above...
The copper idea all started when I found this wonderful copper pendant shade from
Dunelm mills at a bargain price of £14.99.It was perfect for over our kitchen table! I simply used a cord kit from
Claes Ohlson, and hung it up from a hook in the ceiling! (To save forking out for an electrician to come and install it!!)
I just love it!
And with the little shots of copper throughout the kitchen, like on my upcycled kitchen chair, below...
....and the details on this piece of slate, left over from when we had our roof redone recently, used as a table-top-saver....
The copper really ties the look of the kitchen together!
Another thing I splashed out on, was a new kitchen table!! Our old one was just a bit too big, making it awkward to squeeze past to get into the kitchen! I was going to DIY one, but when I found
this one ,for a bargain £95, the perfect size, with rounded corners (to avoid bumps and bruises) and just the right nod to mid-century scandinavian design, I went for it!! And as I sold my old kitchen table for near enough that, I felt I could justify it!! And I love the white tabletop....no more need for a tablecloth!!
Other than the new table and pendant shade there is not much change on this side of the room....
The window dressing is still the same, with the addition of Mr.'s bowler hat that he wore on our wedding day! And I love my Thai sweeper, given to me by a friend!!
A new basket fits perfectly on the corner shelves, another bargain from
TK maxx, and provides storage for all the paper that always seems to pile up in our kitchen.
The blackboard organizer I made
here has been given an update with a free printable calender from
Jasmine Dowling, A wire storage basket from
housedoctor is perfect for incoming mail, and the "concrete geoball bowl", part of my new, more sculptural range of concrete home accessories, provides the perfect spot for keys and change!!

I treated my self to a new
kettle and bread bin in the sales.....
.... and updated our old wooden knife block with some copper spray paint to fit in!
Everything just looks so much fresher now , set against the white metro tiles...
I adore my new condiment tray,with the amazing
Jonna Saarinen print, courtesy of
my luxe, a fab online homeware shop, that specializes in unique and affordable home accessories! I love small online shops, like
My Luxe, that promotes small and up-and-coming designers!!
It is perfect for keeping those cooking essentials in handy distance by the cooker whilst saving the worktop from stains left by oils etc!! I was also given a matching
Jonna Saarinen print tea-towel, that I love so much I have banned Mr. from using it!!
I bought some cheap glass storage jars, that I've made some simple labels for, for my cooking and baking essentials, displayed on my new kitchen shelf they not only look great but also saves me some more valuable cupboard space. I will show you how I created the labels in my next post!
I have also set my mind to keeping some living salad, fresh herbs and a few potted green plants in my new kitchen- for a fresh look!....God bless them, for I have black thumbs, and have in the past been known to kill anything green within a week!! But in my attempt at keeping the greenery in my new look kitchen, ahem....green ,I have hung a jug in handy distance from the kitchen sink, ready for a daily watering session!! Wish me (or rather: My poor plants) luck!!
I am soo pleased with my new look kitchen, and the fact that I've managed to complete the transformation for less than £200!
I have compromised, begged, stole and borrowed, used what I had, upcycled, updated and found some creative solutions to achieve the look....but most of all: It was hard work and determination ....and a clear vision of what I wanted that got me there in the end!!
So what do you think about my new look kitchen?
Let me know by leaving a comment below!

Please spare a minute to vote for me for best diy blog in the Amara interior blog awards (click on the image below)