
....DIY
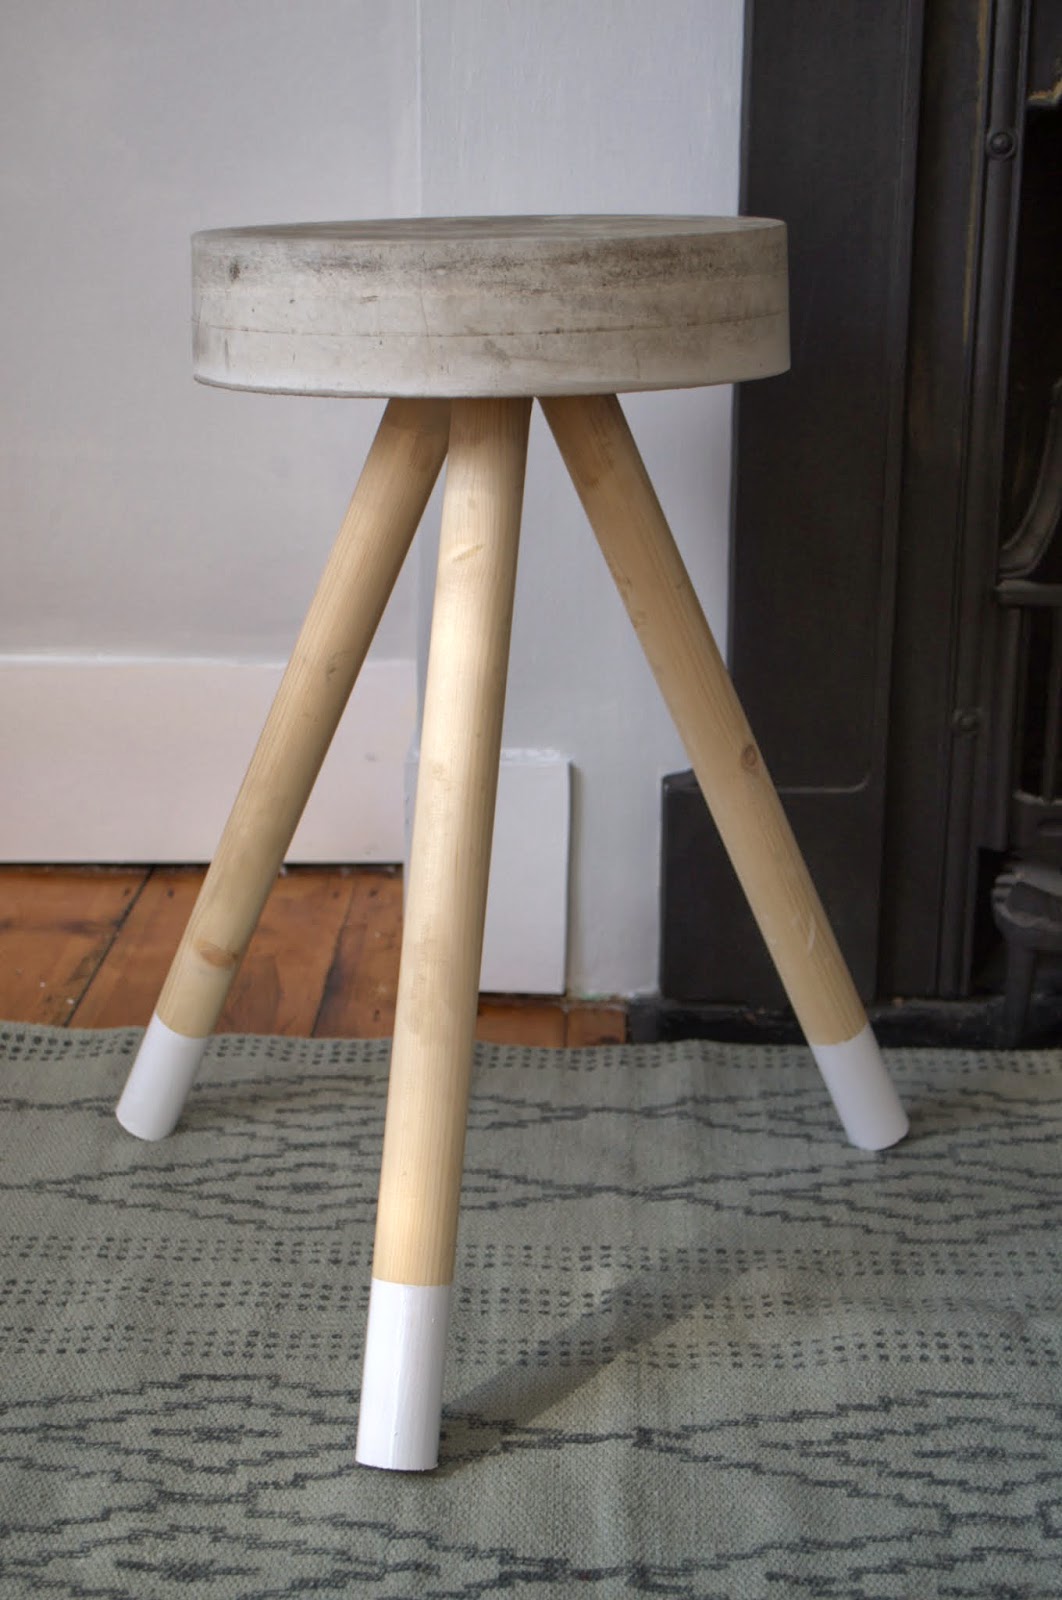
So, in my last post I showed you my shopping wish list for our impending bedroom make-over, and top of my list was this concrete stool from Cox&Cox..
But as it was out of my budget I decided to DIY one for using as a bedside table...
In today's tutorial, I will show you how!
You will need:

A long piece of 1,5" thick dowel(from any hardware shop)
A bucket
Water
A measuring tape
A pencil
A wood saw
A palm sander
Sandpaper
Masking tape
Paint
Cut the dowel into 3 equally long pieces...
The length depends on how tall you want your stool to be...I cut mine to 18".
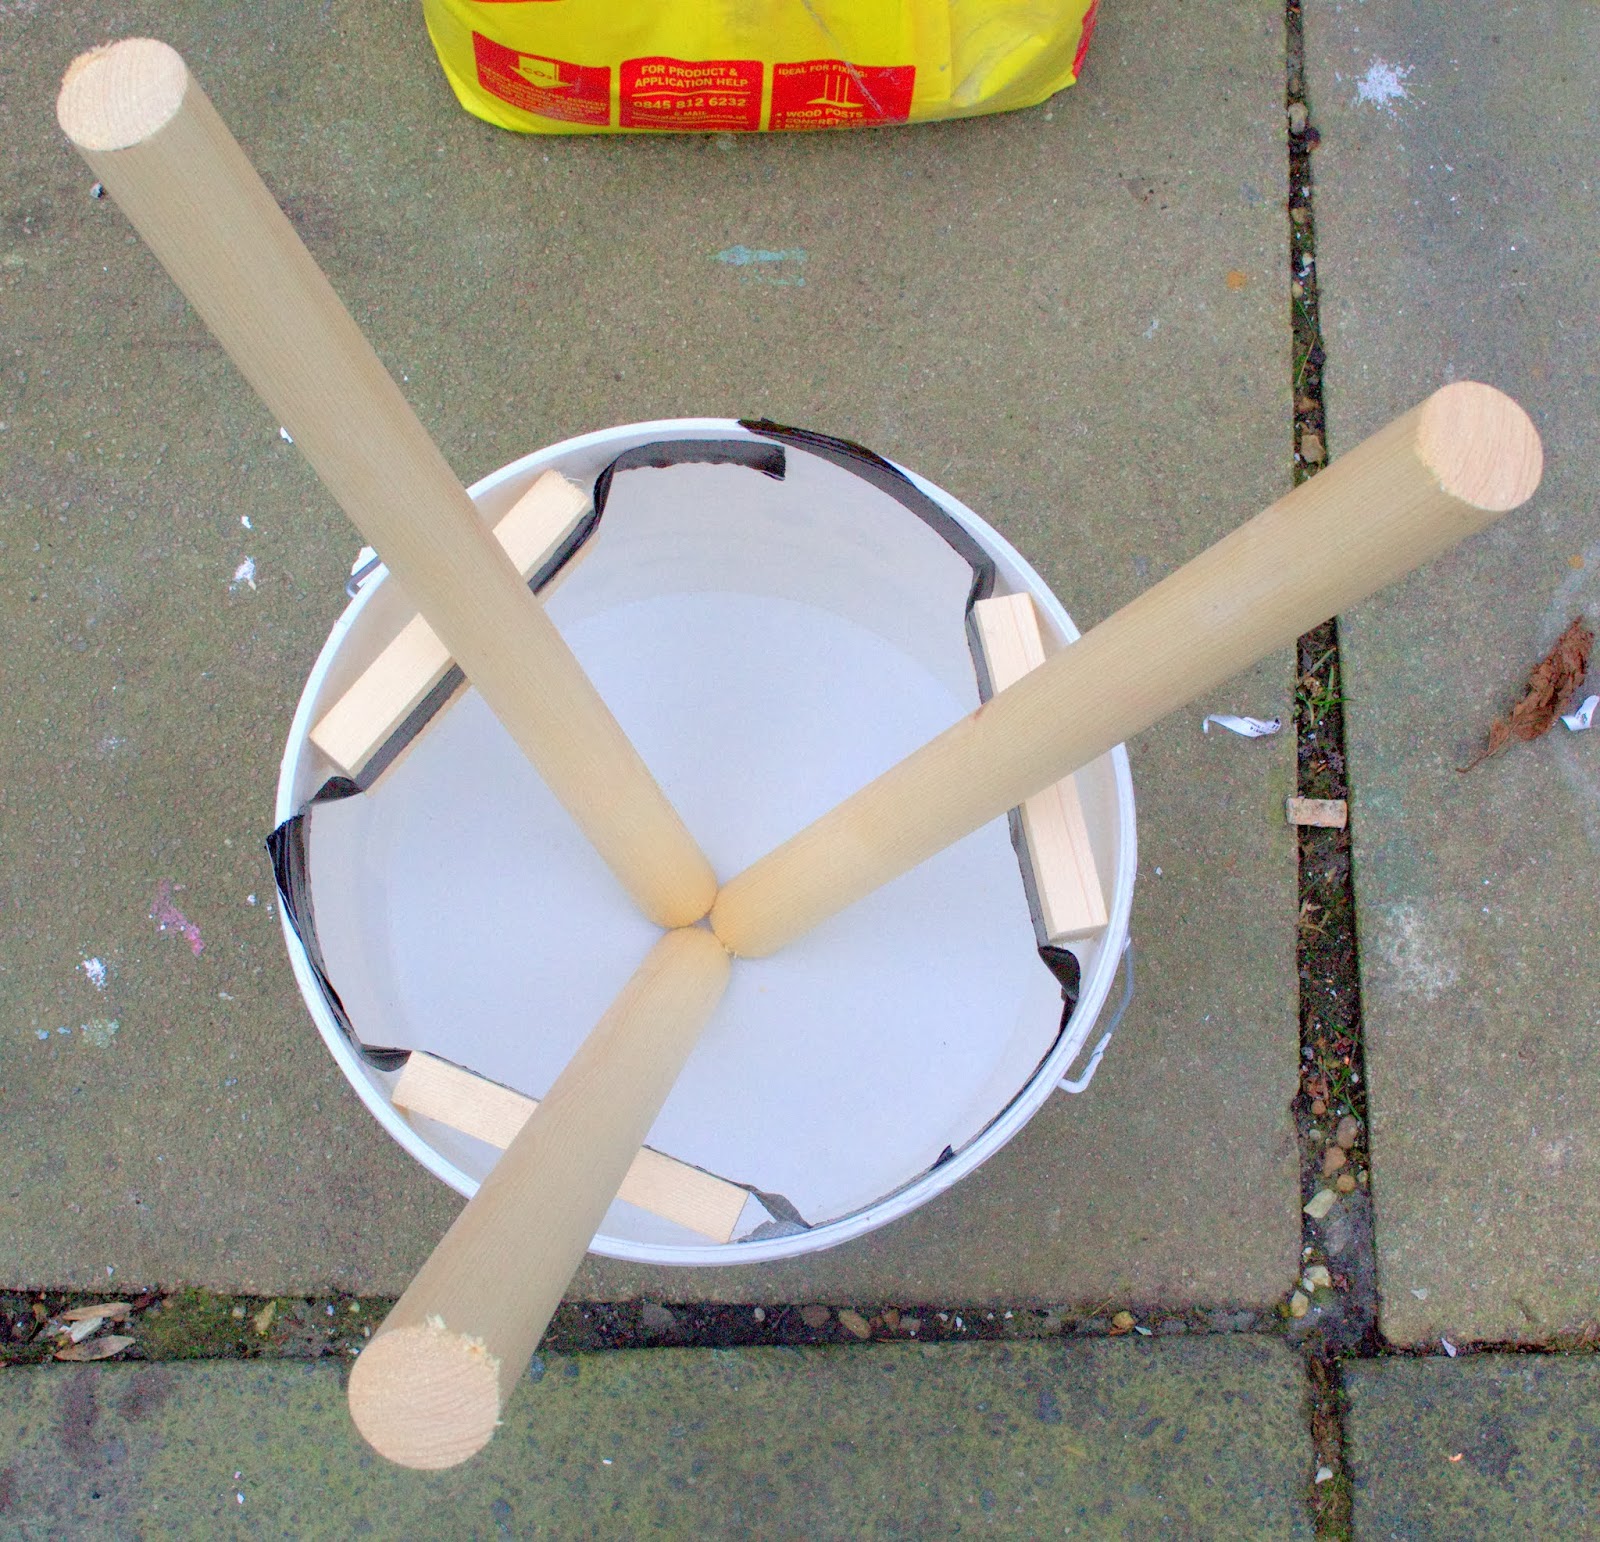
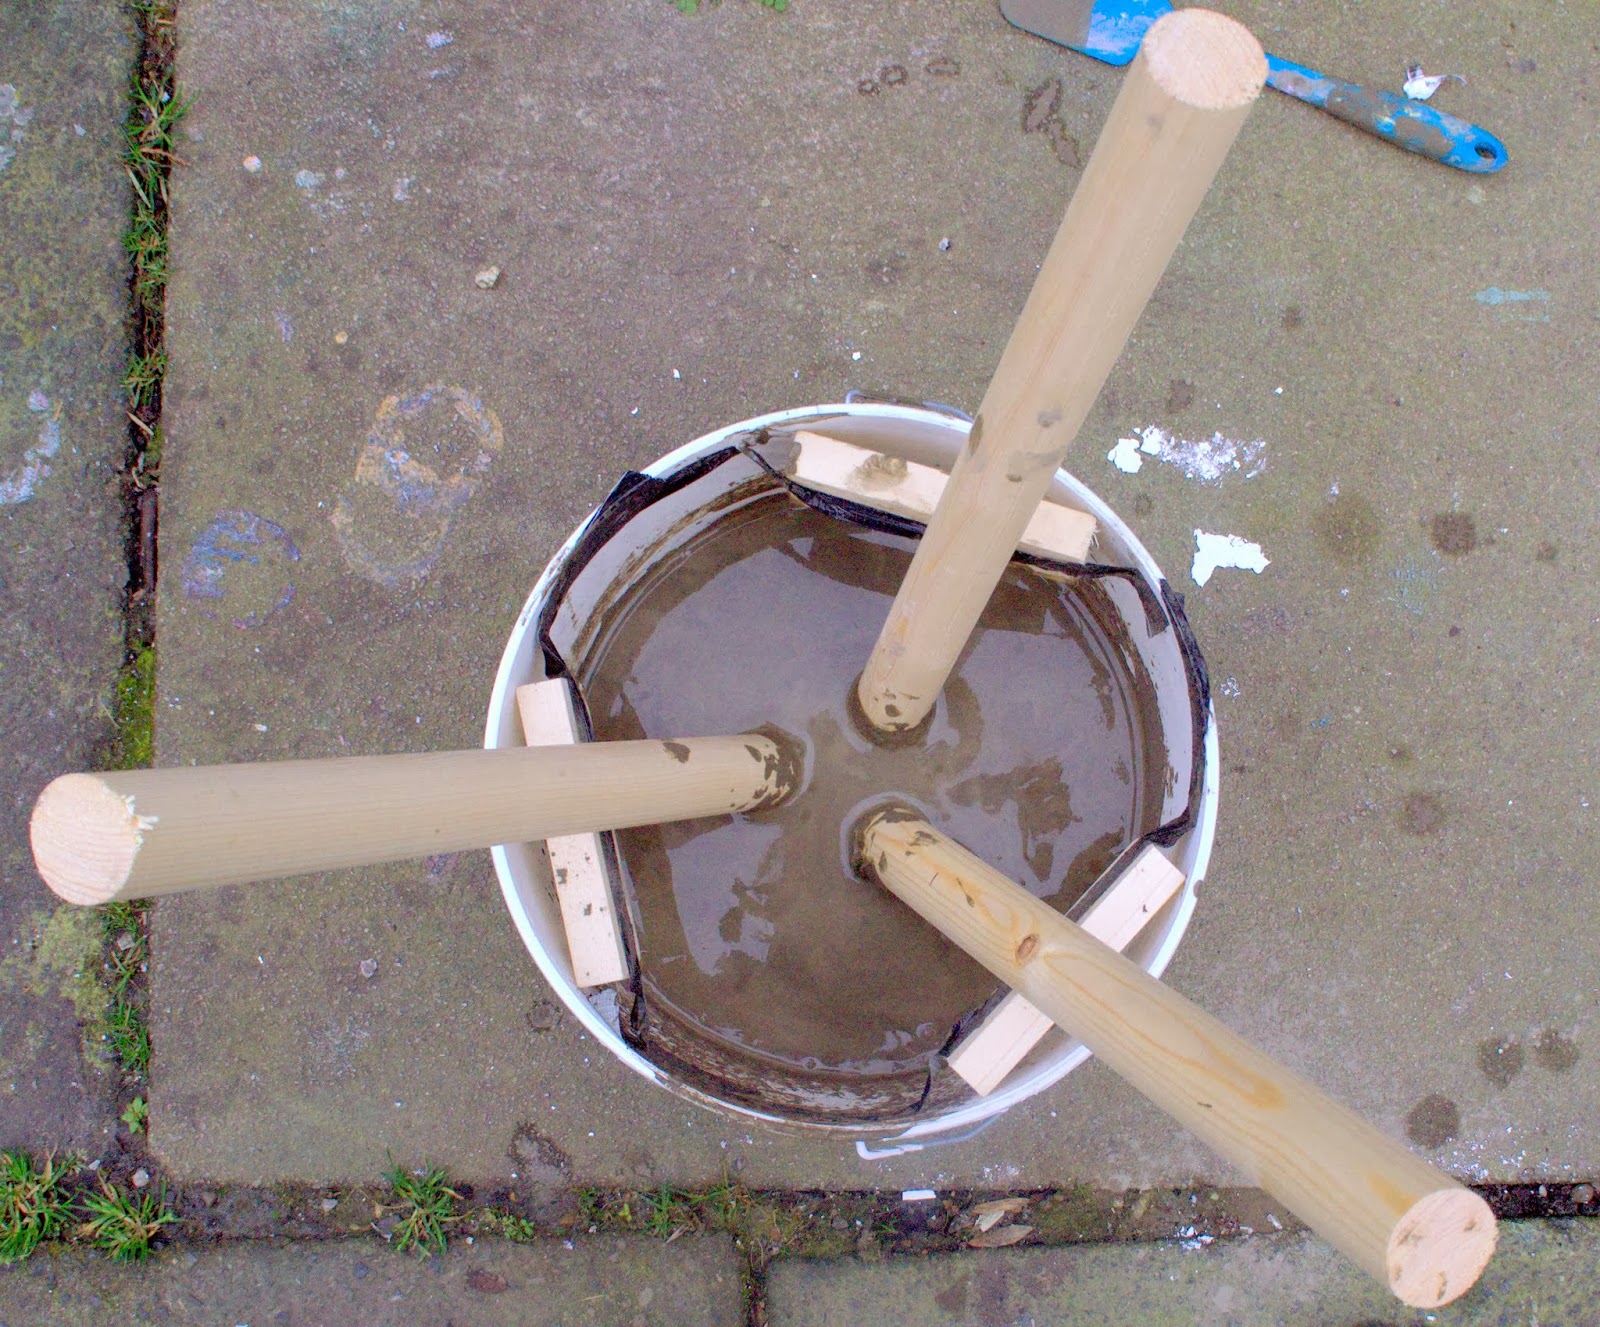
Plan the positioning of your dowel "legs" prior to mixing up the concrete:
Place them into your bucket to decide on the positioning of the legs...
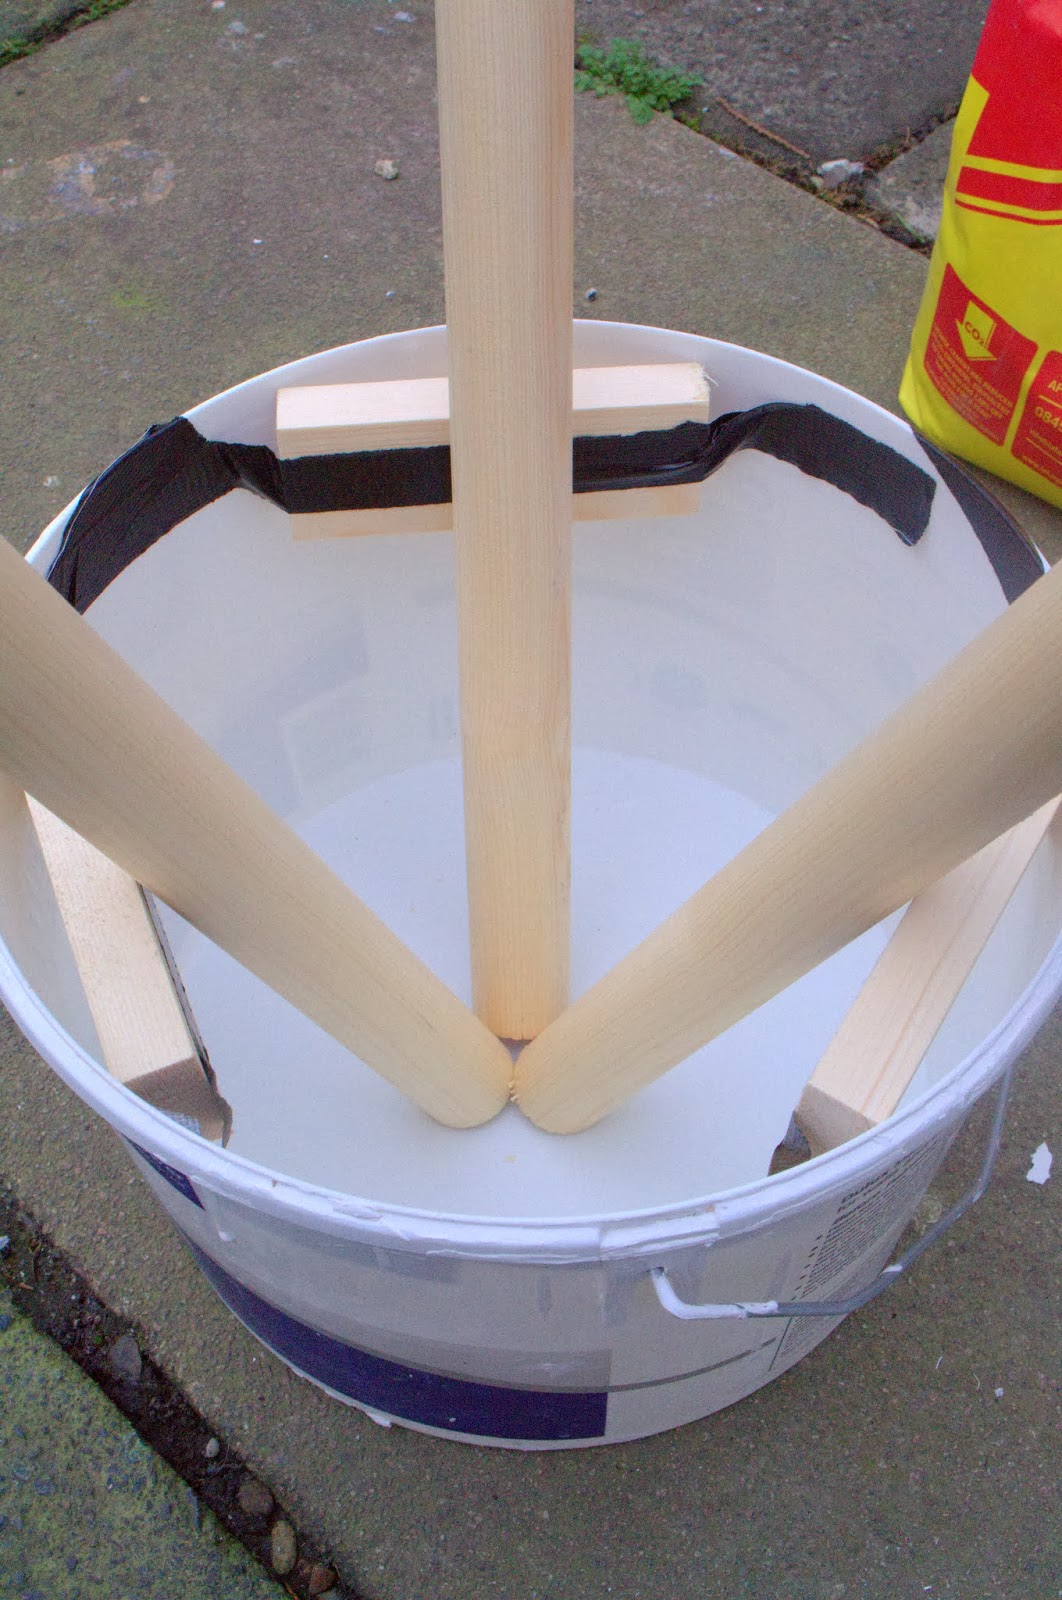
...because I used an old empty paint kettle with a low rim, I stuck 3 bits of offcut wood to the sides of the "bucket" with tape to improve the angle of mine..
Take the "legs" out again and poor about 1 inch of tap water into your bucket...
...add the concrete and mix well!
You need to aim for about 3" of concrete mix!

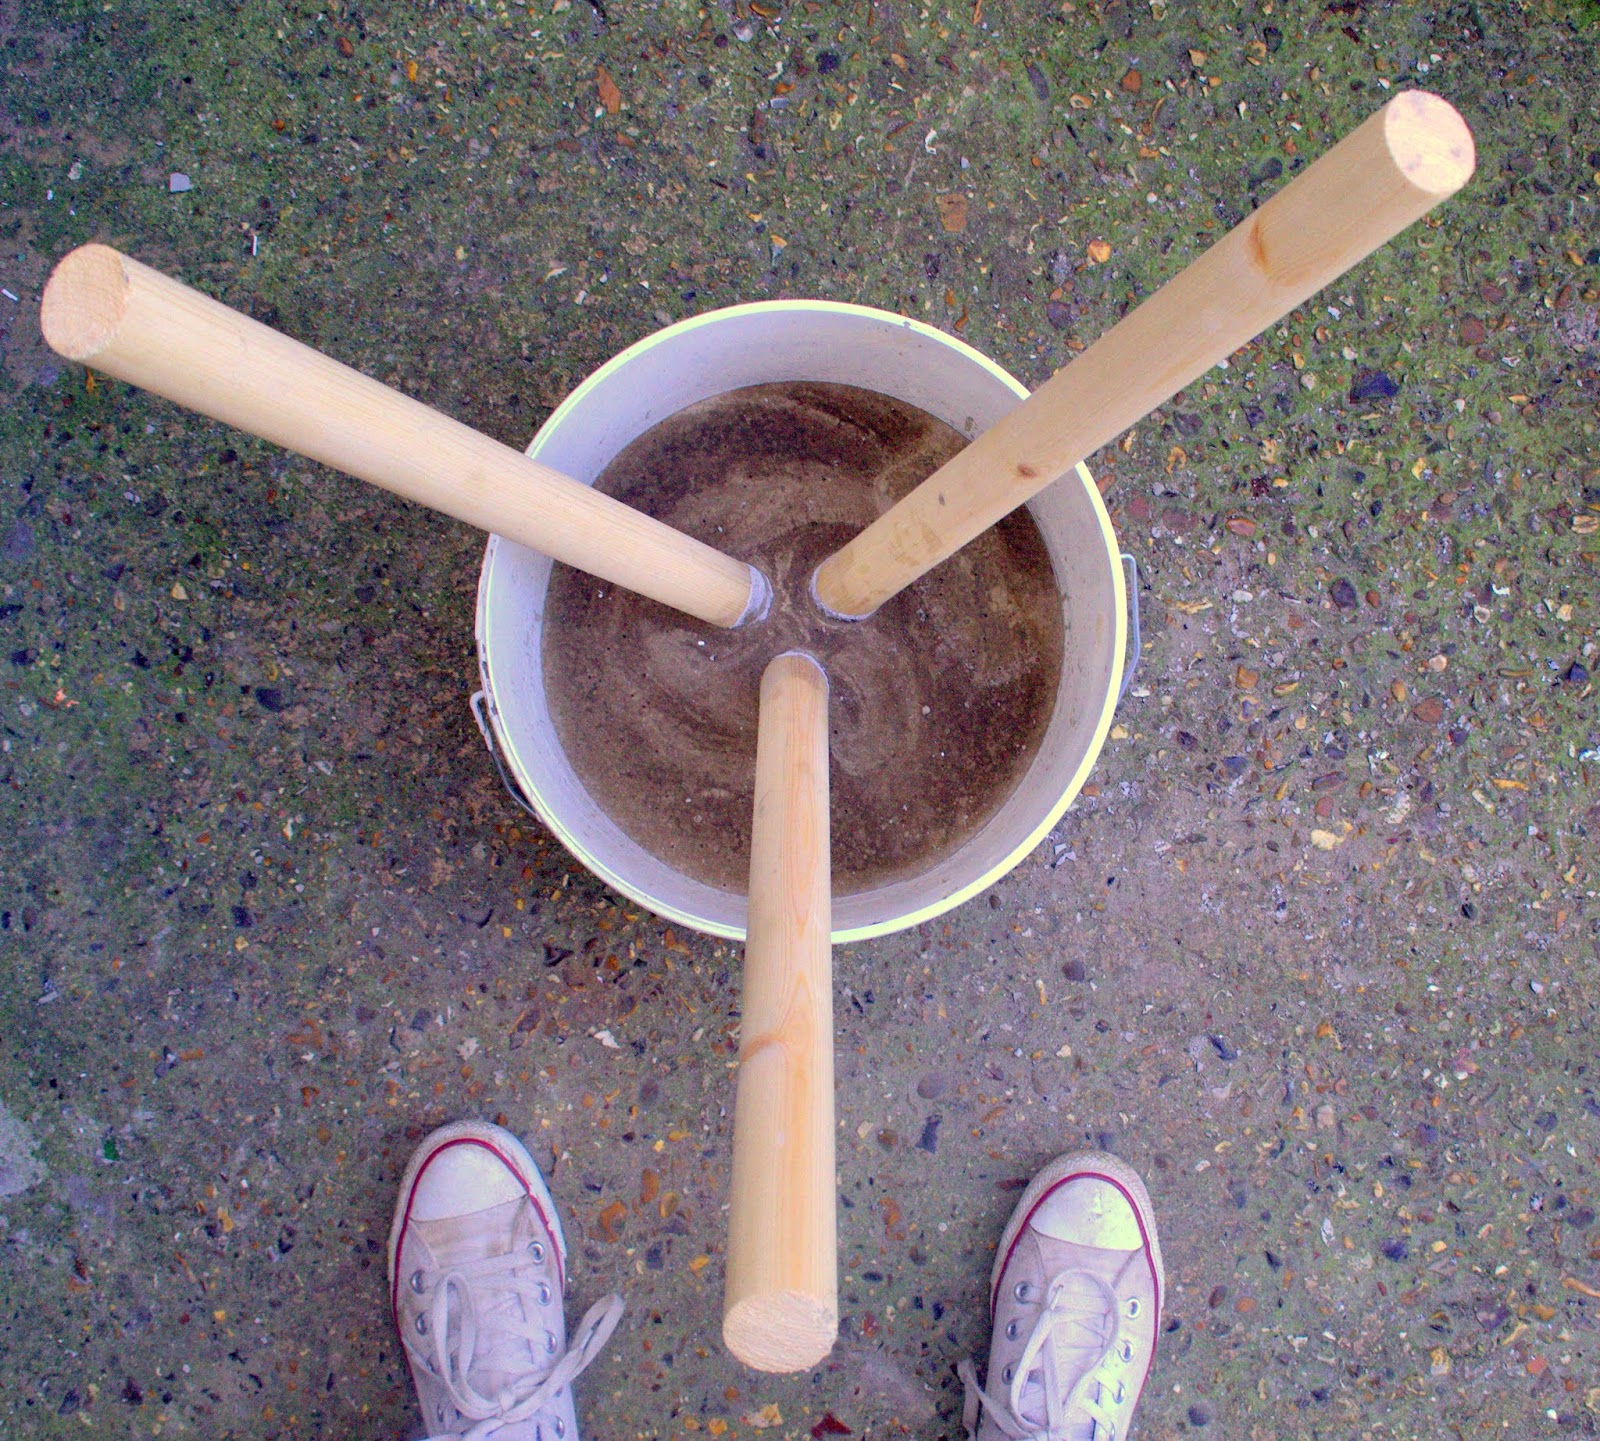
Tap and shake the bucket to knock out any air bubbles and let the mix settle, then place your dowel legs about 1/3 into the concrete...
Leave to set for at least 24 hours...
...preferably 48 hours...
If you have accidentally got any concrete on your wooden legs, use a bit of sandpaper to get rid of any unwanted lumps at this stage..
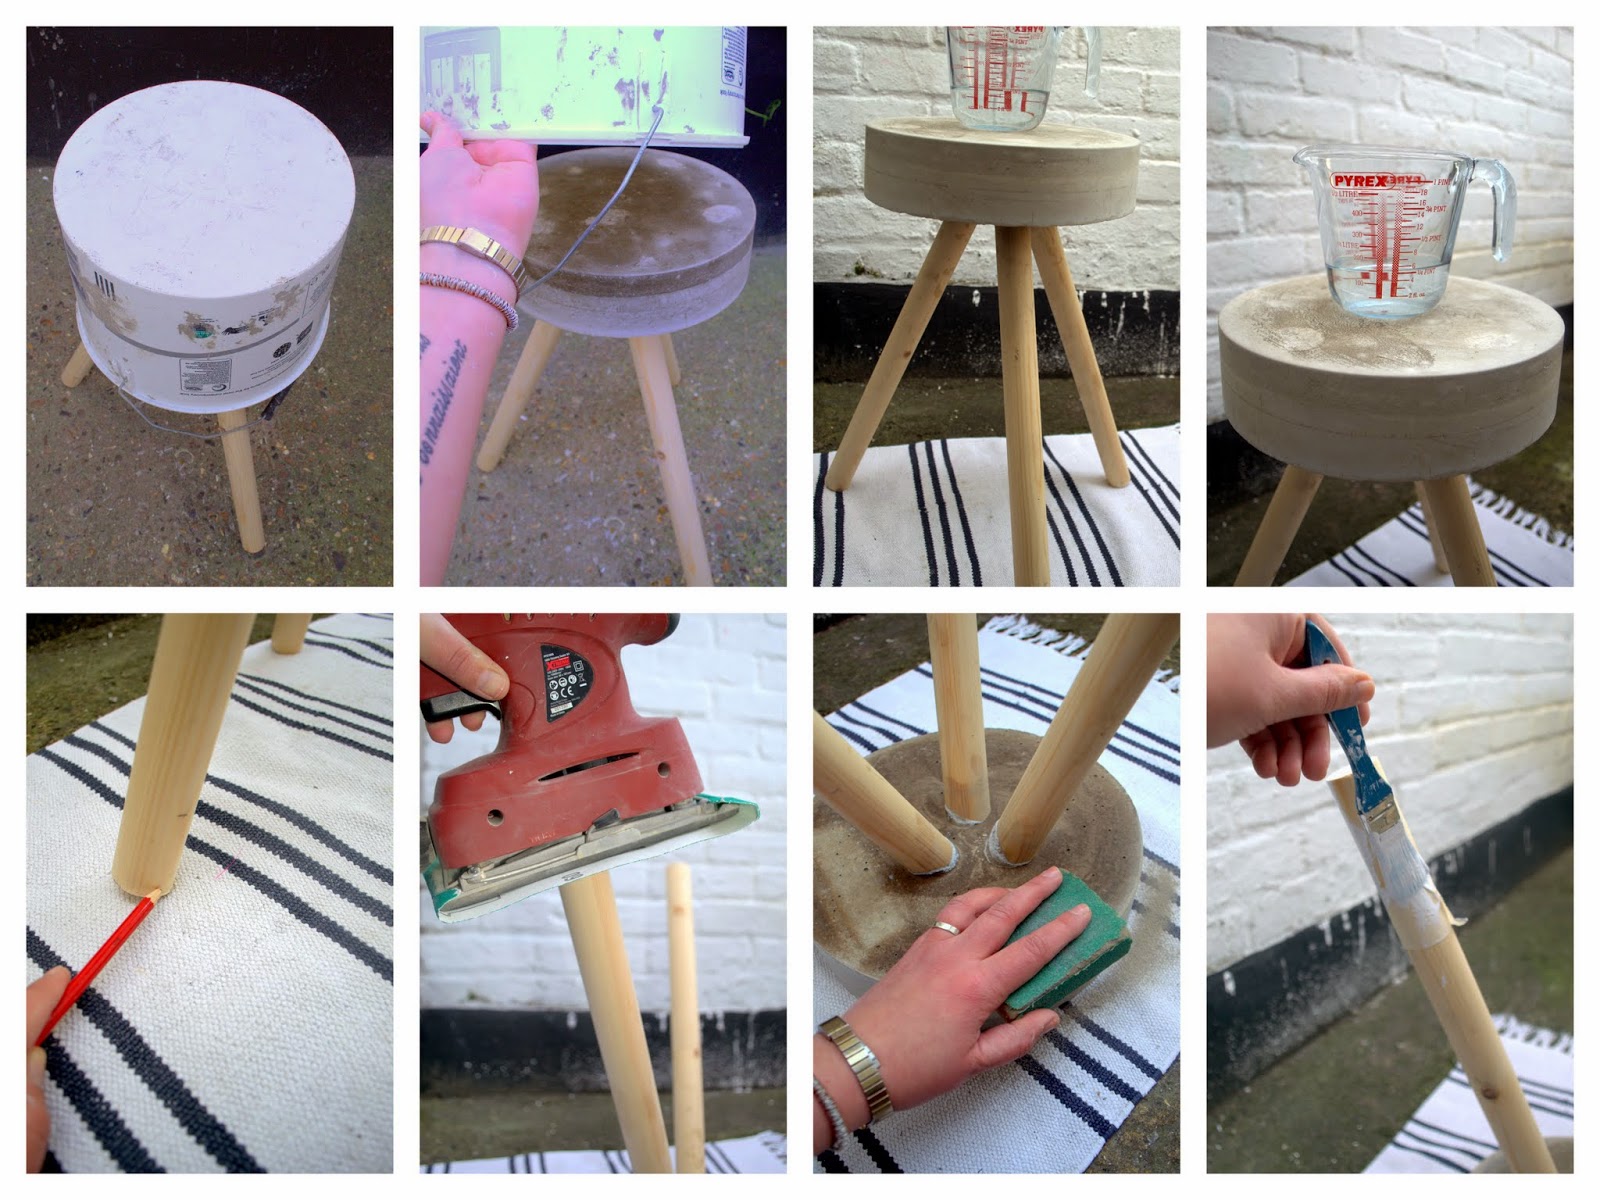
Then turn the bucket upside down and press the sides of the bucket to release the concrete...jiggle it off.
...preferably 48 hours...
If you have accidentally got any concrete on your wooden legs, use a bit of sandpaper to get rid of any unwanted lumps at this stage..
Then turn the bucket upside down and press the sides of the bucket to release the concrete...jiggle it off.
If your stool is not completely level, like mine , use a spirit level (or a measuring jug.... I couldn't find my spirit level) to determine where you will need to take some off the legs, them mark each leg that will need shortening. Use a palm-sander (or similar) to sand back the longest legs...
Run some sand-paper over the sharp edge of the concrete on the underside of the stool for safety..
I masked off 3" on each leg and painted with white gloss (Not only does this look nice, but it will also protect the wood from staining at the bottom).
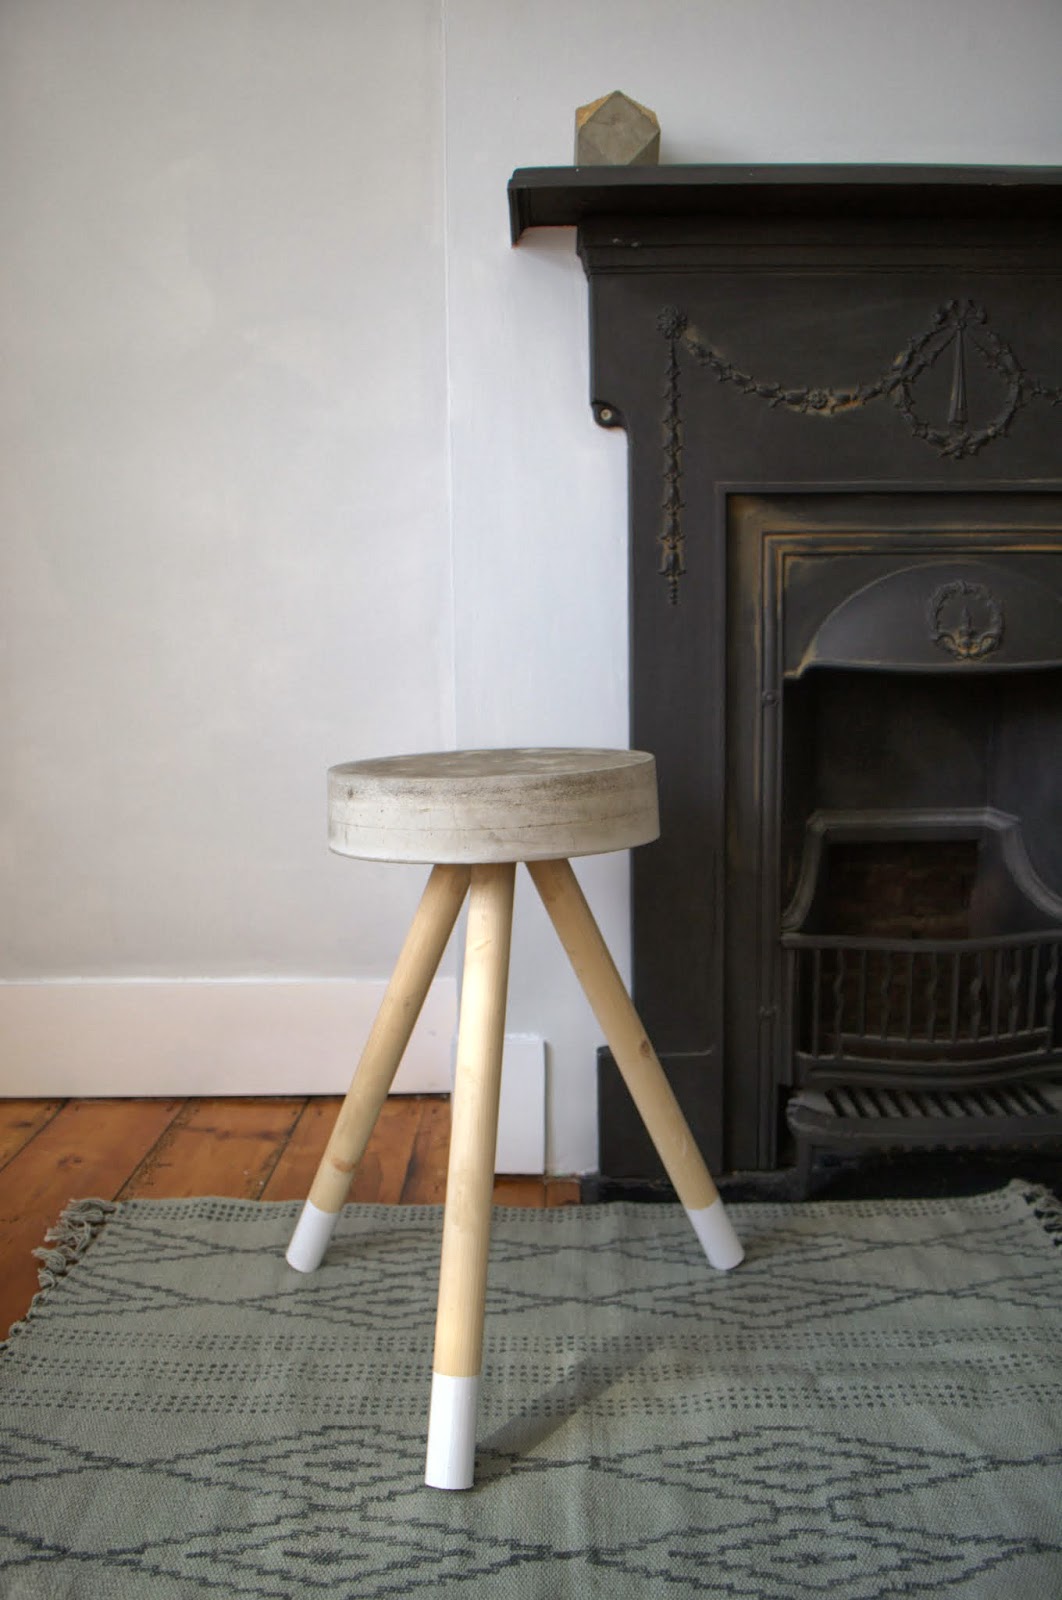
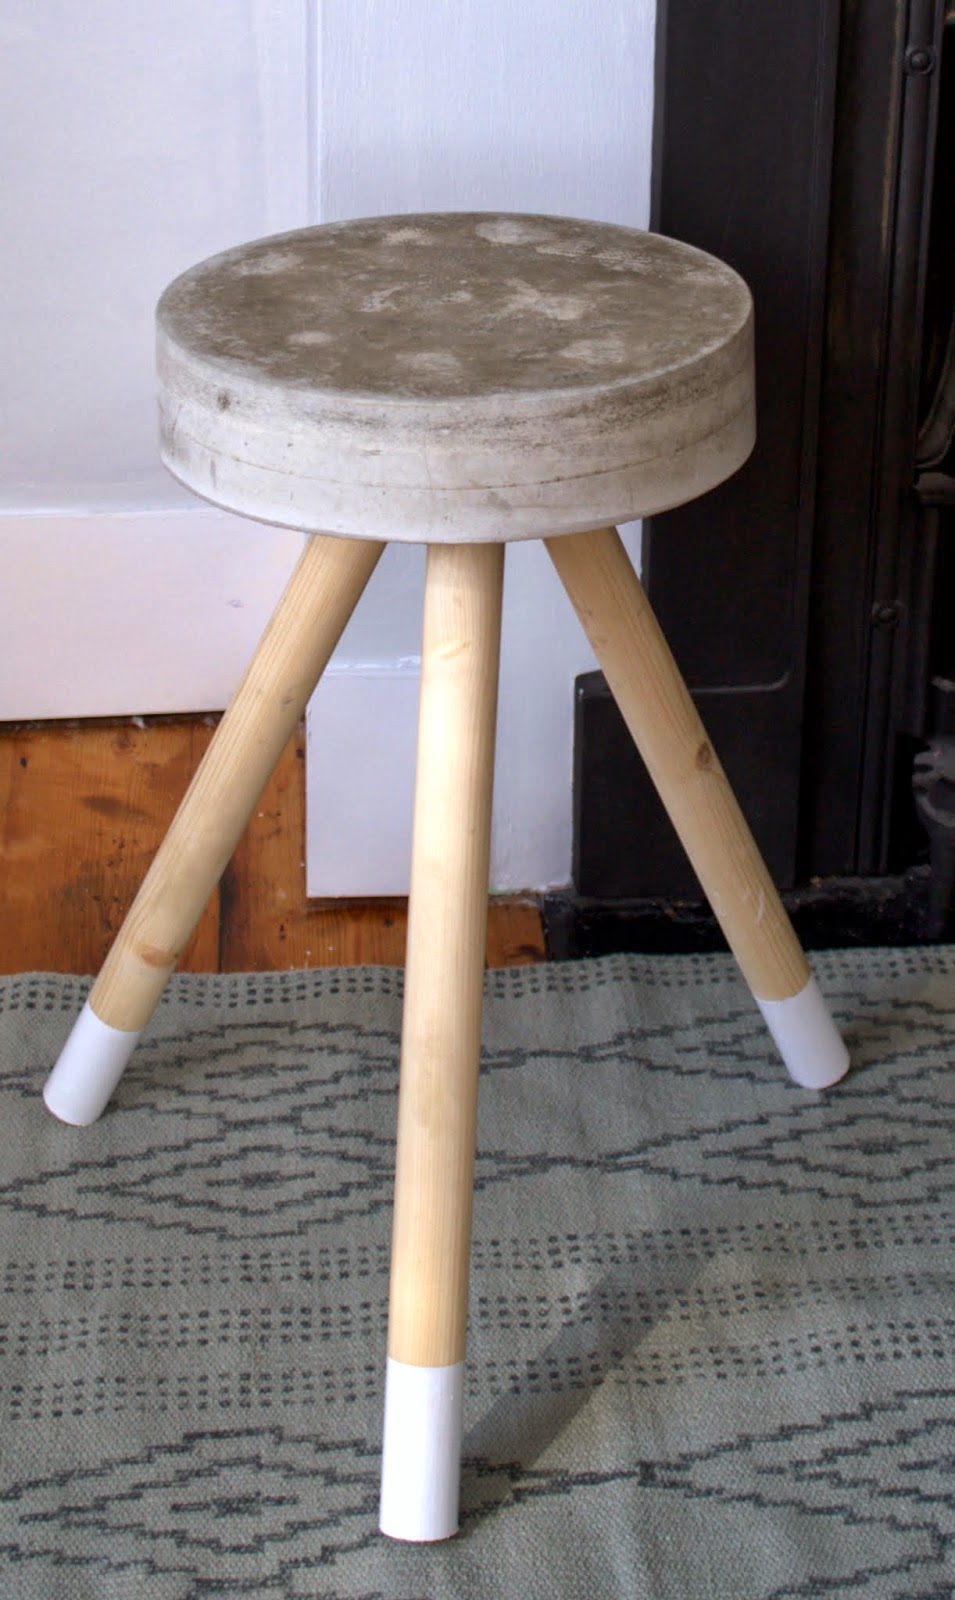
That's it!
I love that I could create this so easily for less than £25,-
It is going to look perfect in our "new-look" bedroom, which by the way is finished painted now (Sneaky peek of my new wall colour in the pic above...)
What do you think of my DIY concrete stool?
Doesn't it look easy??
It is!
Or would you have rather spent over £100 for a ready made one?
Have a great week-end folks!
I am hoping to take Mr shopping for new laminate flooring ...
so fingers crossed we find something we can agree on and commit to!
xxx
June
243 comments:
«Oldest ‹Older 401 – 243 of 243Post a Comment